Contact
Installing Builder Addons
Note: Builder Addons require the Themify Builder. You can use it with either any Themify theme or the Builder plugin.
Installing Builder Addons is exactly the same as installing WordPress plugins.
To install the addon:
- Firstly, download the addon zip file from the link provided in your Themify Member Area.
- NOTE: some browsers (eg. Safari) auto extract zip files automatically. Right-click on the download link and select "Save Linked File As" and it will allow you to download as a zip file.
- Login to your site's admin area.
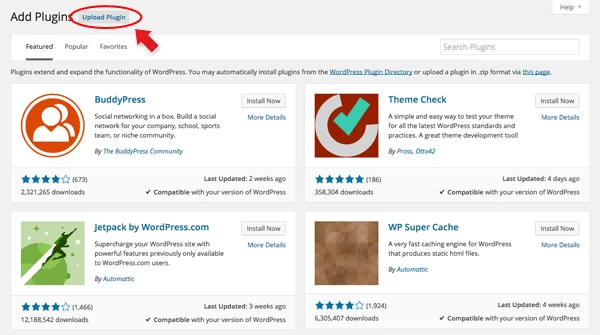
- Navigate to WP Admin > Plugins > Add New.
- Now, click the "Upload Plugin" link.
- Select "Browse" and navigate to the plugin zip file which you downloaded in the first step and then select the "Install Now" button.
- This will initiate the plugin installation process, and once finished, you can then activate the plugin.
Importing the addon demo layout
Each addon zip file contains a sample Builder data file which you can import to your site. It helps you to understand how the addon demo is created.
To import the addon demo data:
- First, extract addon zip file to your local computer
- You should have a folder of the addon. Inside there is a folder named "sample", and inside that folder there is a Builder data file in a zip format (eg. "addon_name_sample-builder-layout.zip").
- To import the Builder layout, login to admin and then go to the page frontend where you want to import the Builder layout. From the top admin bar > select Themify Builder > Import / Export > Import, upload the sample zip file.
Using the Contact Addon
Once addon is installed, you will find the Contact addon module in the Themify module panel. The module is available in both backend and frontend edit mode (just like all standard modules).
- In the backend: you can find the Contact module in the Themify Custom Panel.
- On the frontend: you can see the modules after turning on the Builder from top admin bar > Themify Builder > Turn On Builder.
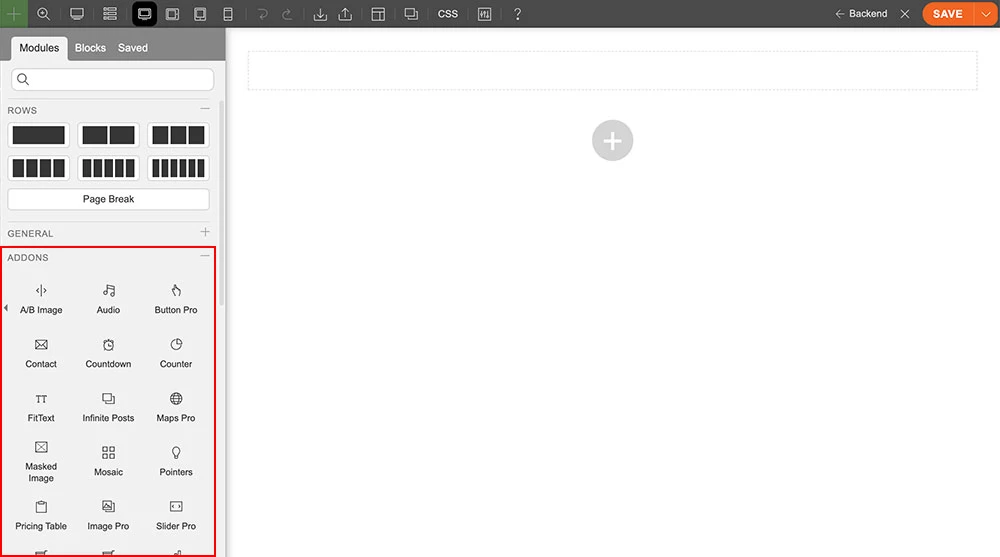
- Drag and drop a Contact module in a row.
- Contact Options
- 1) Module Title = Insert the module title that will appear at the top of the module. It will appear left aligned, upper-case, in H3 format.
- 2) Layout = Select from 4 different Contact layouts.
- 3) Sent to = Enter the email address you would like the contact form after filled by user to sent to.
- Enable Submissions as Contact posts = Creates and stores all submitted messages in the database by creating a contact post type. Note: Enabling this will showcase the following options:
- Assign "send to" email address as post author = Sets post author to where the message is being sent to.
- Show required consent checkbox to comply with GDPR = Allows you to input a consent form that user data is being store and collected. This is to comply to the GDPR regulation.
- Enable Submissions as Contact posts = Creates and stores all submitted messages in the database by creating a contact post type. Note: Enabling this will showcase the following options:
- 4) Success URL = Redirect to this URL when the form is successfully sent.
- 5) Success Message = Input text that will appear when form is successfully sent.
- 6) Default Subject = Input the default subject of each email sent.
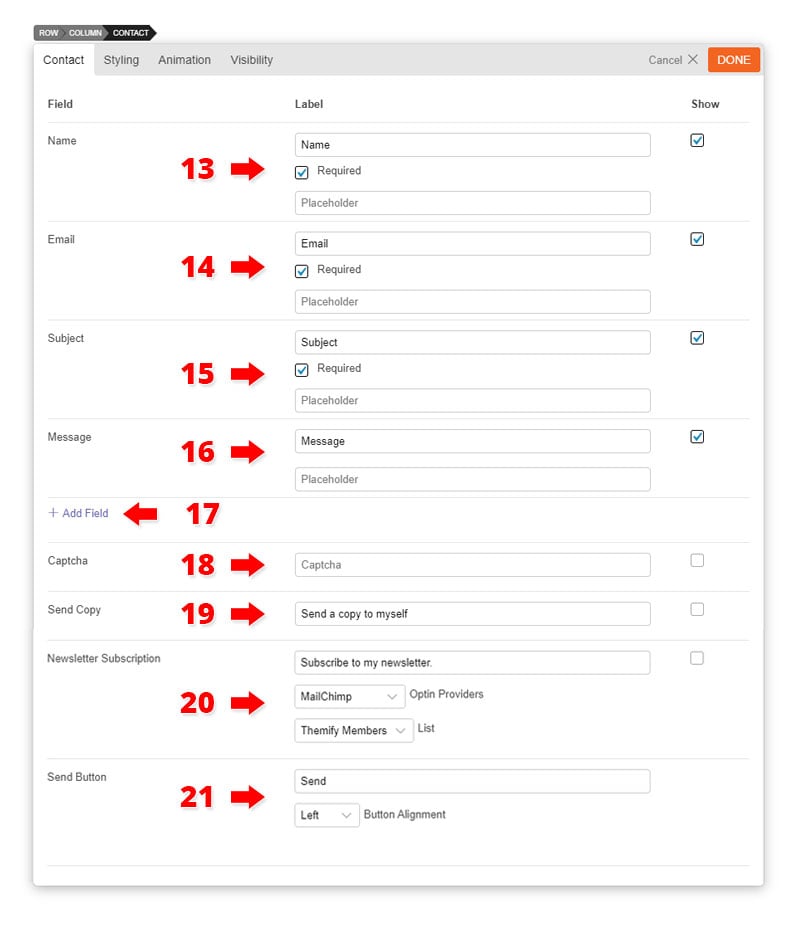
- 7) Label = Insert text on how you want your fields to appear. Defualt text are the fields.
- 8) Placeholder = Input the text that'll appear inside the input field (Note: Don't add placeholder text when selecting the "Animated Label" layout)
- 9) Add Field = Select the type of field that you'd like to add. Choose from: Text, Textarea, Upload File, Radio, Select, Checkbox, and Static Text.
- Static Text = This allows you to add text/HTML or run any shortcodes in the contact form.
- Upload File = Supports files PDF, JPEG, and .docx files.
- 10) Captcha = This is used to distinguish human from machine input which deters spam. A box will appear that will require users to answer correctly in order to send the contact form. Make sure to configure the reCAPTCHA settings first for this to work.
- To set up your Captcha:
- Go to http://www.google.com/recaptcha/intro/
- Click the "Get reCAPTCHA" button. You may need to log in to your google account in order for this to work.
- On the register a new site box:
- Enter label as you like to appear
- Enter the Domains that you would like to get the ReCaptcha Public & Private Key
- Once you've entered the Domains you'll be redirected to a new page with your Site key and Secret Key. Place the Site key on the public ReCaptcha Public Key and the Secret key on your ReCaptcha Private Key.
- Click "Save Changes"
- To set up your Captcha:
- 11) Send Copy = Check the "Show" checkbox, to allow users to receive a copy of the form they've just submitted.
- 12) Send Button = Change the text that you'd like to appear on the send button.
- Button Alignment = Set alignment to appear left, right, and center.

Additional CSS Class = This option allows you to add any custom CSS classes you wish to be the output with the module