05 Nov 2018
How to Migrate a WordPress Website From Localhost to Live Server
Today on our tutorial series, we'll be showing you how to migrate a WordPress site from a localhost to a live server. If you haven't already installed WordPress locally, read our "Installing WordPress on Local Computer (localhost) for PC" tutorial for more.
Having a WordPress server on your computer provides a great option to test out a theme or plugin in a safe environment before adding it to a live server. Many developers actually use this method to work with a new WordPress project because it allows them to manipulate and change the site safely.
It may seem more efficient to work on the live website but with a local server there is no downtime for the website, so the business can remain up and running as you implement all the changes you'd like. Also, it helps on the backend that your client would not see the changes being made and get concerned about the progression of the website's development before you're even finished.
There are 2 main methods we can use to migrate your website from the comfy local server to the live WordPress environment:
1. Using The WordPress Export Feature:
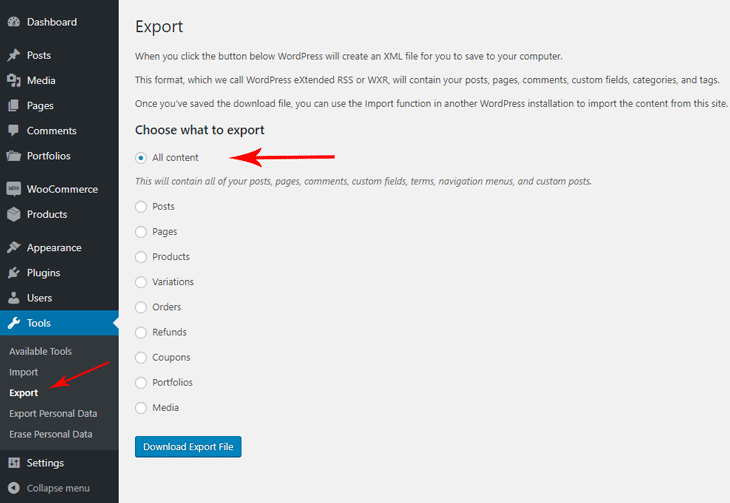
WordPress ships with a built in export feature that can be used to export the entire WordPress content or just a few select content options such as only the posts and pages. This will create an XML file and you can save it onto your computer so you can upload it to the live server later.
In order to use this feature, you need to login to your WordPress local site, then go to Tools > Export and select All Content from the list of options. This will export everything that you have setup in WordPress into an XML file. Optionally, you could use one of the other export options to export only a specific group of items.
After you have created the XML file, you can go the live WordPress environment and import the XML file that we have just exported. Do this by going to Tools > Import then select the WordPress Importer. Just be sure that you have installed the theme and plugins that you want to use on the live website before this.
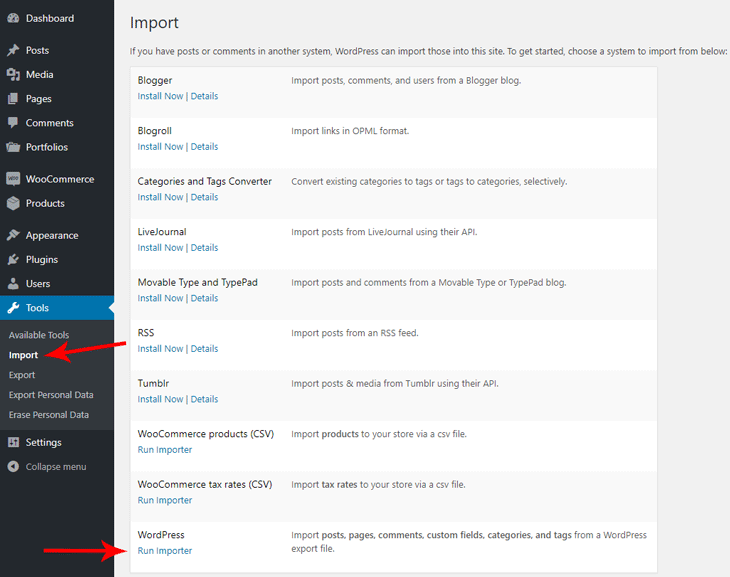
There may be a pop up that requests you to install the WordPress importer plugin. If you receive such a prompt, go ahead and install the plugin. Once you have done that, you can upload the XML file and import it.
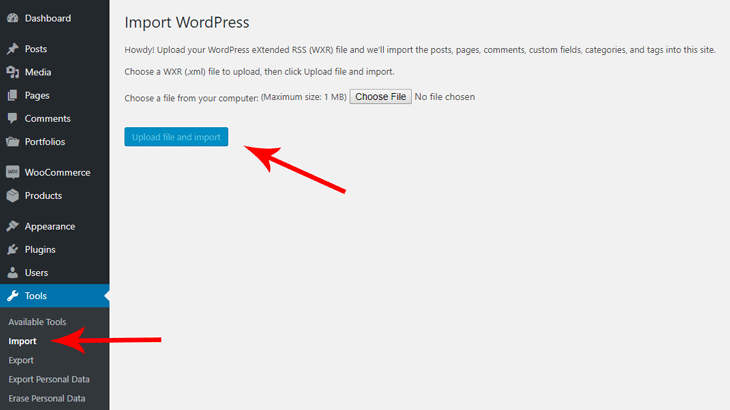
The import will transfer all of your changes from the local WordPress environment to the live environment. However you will have to manually assign your menu and widgets in the live environment, which will complete the process.
2. Using A Third Party Plugin:
We can also use a plugin to transfer the local WordPress website to the live environment. Here are a few proven plugins that can be used:
In this case, we are going to use Duplicator. We can use Duplicator to create a duplicate of our local WordPress environment then transfer it to our live website.
First, you will have to install and activate the plugin then go to Duplicator > Packages > Create New. This will allow you to make a new package to transfer onto the live site.
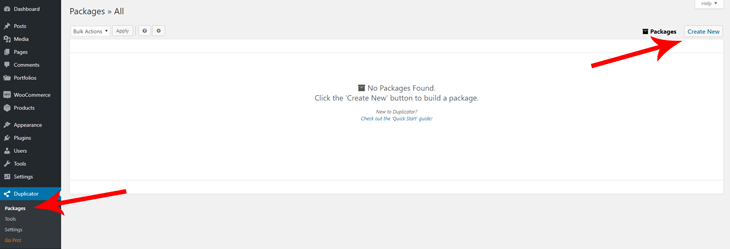
You can follow the prompts to build the package and it will carry you to the process window like the one below:

When it is completed, you will see the following window that allows you to download the package as an installer and an archive file. You will have to download them both.
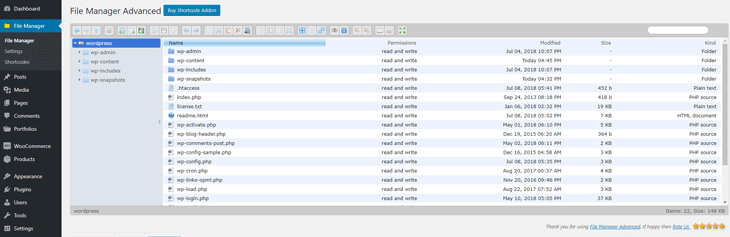
Now, we have to add the package to the live server using the File Manager Advanced plugin, so go ahead and install that plugin. Once it is installed, you can go to File Manager on the WordPress admin panel of the live site then copy the installer and archive files to the root folder. It should have the root folder open by default but you can select it as it should be the name of the site.
You can simply drag and drop the installer and archive files into this location.
Now that you have uploaded the files, we need to run the installer. Go to the address bar and add the word installer.php to your url. It should look like this: http://your-domain/installer.php or http://your-domain/your-wp-directory/installer.php .
You should see the following screen.
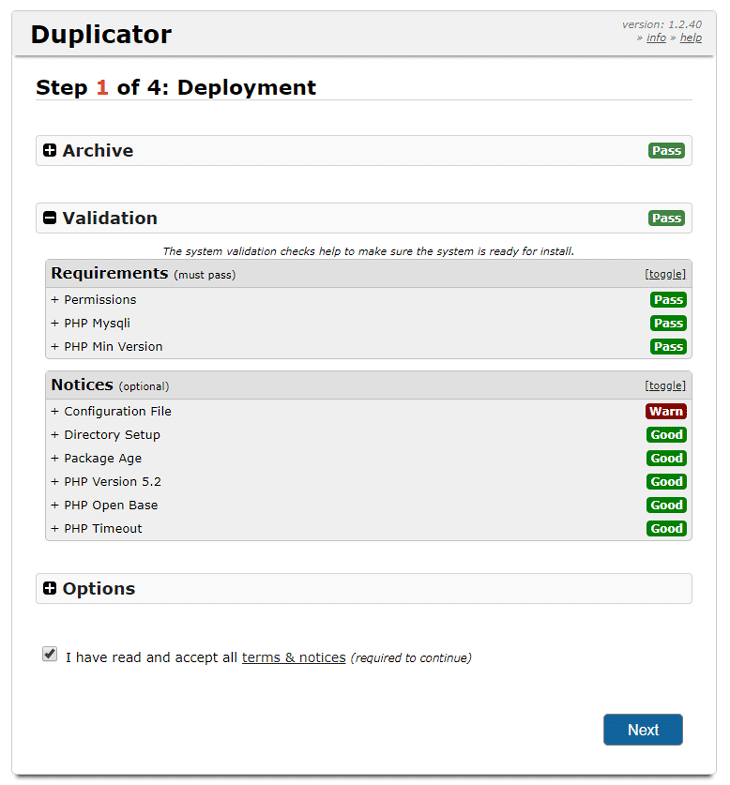
From here, you would have to agree to the terms, then click next.
After clicking next you will have the database setup screen where you can enter database setup information, then the connection. Once that is done, click next and the installer will finalize the process and transfer the data.
Last step. Go to Themify > Settings > Themify Builder and hit the Regenerate CSS Files button once. That will ensure all paths (to images and other assets) in the CSS files created by Builder are updated automatically.
And that's it!
You should have just completed the site migration. We hope we see you again at the next tutorial we'll be posting shortly. Stay tuned for more.
Nov 08, 2018 @ 01:45
I have been using All in One Migration for several years and have found it easy to use and, most importantly, extremely reliable in the migrations. If your site is under 512M, the software is free. If you use Google Drive, they have a plugin for that removes the 512M limit. Nor are you limited by the app in any other fashion – like a single domain only, etc. The multisite plugin is expensive, but worth it if you have to deal with a multisite install. It is also completely operated from the WP dashboard; no need to FTP files or that sort of thing. I don’t make a dime off Servmask, but I’ve been passing the word on this plugin since they brought it out and can not recommend it enough.
Apr 16, 2019 @ 11:43
Thanks for info Robert!
Please tell me, when you migrating from local to live server with All in One Migration plugin, after import does it need some additional setting…!?
Nov 10, 2018 @ 15:42
Thank you for this tutorial. It’s very helpful.
Feb 03, 2019 @ 03:42
It’s time for me to move servers, but I’m scared about moving SQL databases.
Apr 16, 2019 @ 11:39
Great article!