07
Feb
2011
Product Releases /
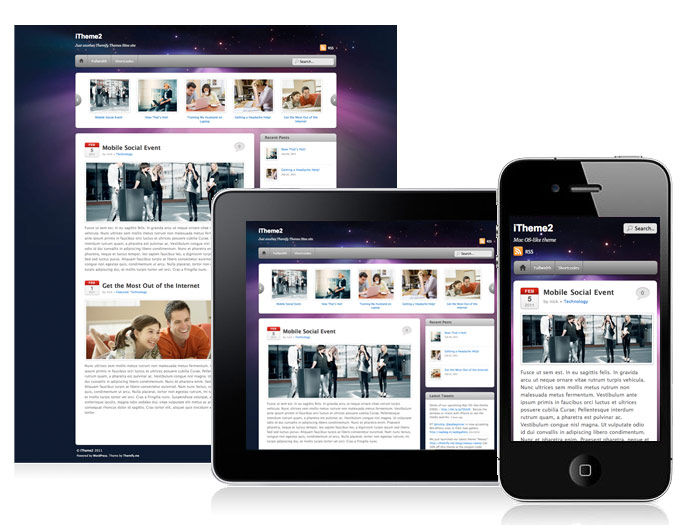
iTheme2 is a revamp of iTheme that was originally released by Nick La at N.Design Studio. Now with the Themify framework, it is even better and have more options. It is the perfect theme for technology & Mac related blogs. It uses media queries to target different displays such as desktop, notebook, iPhone, iPad, and other mobile devices (no plugin is necessary). This means the layout automatically adjusts according to the viewing area. Download this awesome free theme now!
This theme is free for download and unlimited use. However, the Photoshop .psd file and forum access is not included in the free download. If you'd like to purchase forum access along with the PSD template files you can by choosing the Developer package. This does come at a cost of $59.
Read More
04
Feb
2011
/
When an issue/bug is fixed and tested, it should be committed to Github and close the issue if there any:
- Launch GitHub desktop app, synce "themes" repository (remember to sync before adding files)
- Add new or updated file(s) to your local Github folder
- Go back to Github app and you should see changes in "Uncommitted Changes" tab
- Review the changes
- If the changes are correct, add summary and desccription text. If you are committing a change for an issue logged on Github Issues, you can close the issue automatically by writing "Use object-fit to show image dimension in preview - Close #2822" (the number should be replaced by the Issue ID number). This will close the issue automatically.
- Click "Commit to master" and then click "Sync" button again
Read More
26
Jan
2011
/
Site Logo Image
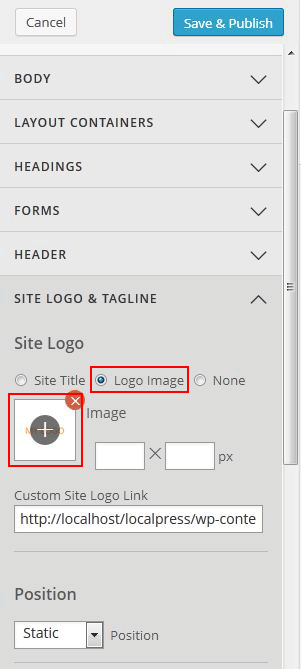
To display a logo image instead of text:
- Go to Appearance > Customize > Site Logo & Tagline
- Under "Site Logo", select "Logo Image" radio button
- Click on the (+) button to upload a logo image
- Optional: specify the image width and height
- In case if you don't want to display any logo on your site, select "None" radio button
- To reposition the logo, select "absolute" from the Position dropdown, enter the "top" and "left" position
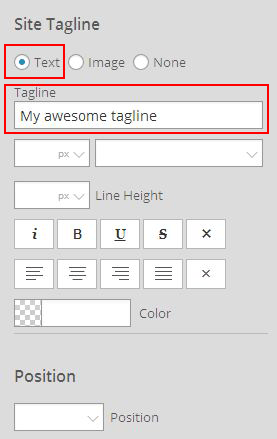
Site Description (Tagline)
To add or edit the site description:
- Go to Appearance > Customize > Site Logo & Tagline
- Under "Site Tagline," select the "Text" radio button
- In the "Tagline," field add your tagline
- You can also add an image in the tagline area, select the "Image" radio button
- Click on the (+) button to upload the image
- Optional: specify the image width and height
- To reposition the tagline or tagline image, select "absolute" from the Position dropdown, enter the "top" and "left" position
Read More
05
Jan
2011
/
Installing the Theme
To install themes with the WordPress theme uploader:
- Download the "theme.zip" file from the Member Area
- Note: some browsers (eg. Safari) auto extract zip files automatically. Right-click on the download link and select "Save Linked File As". This will allow you to download the theme as a zip file.
- Login to your site's WP Admin.
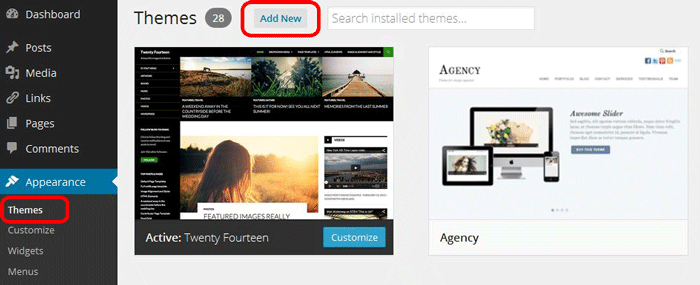
- Go to Appearance > Themes.
- Click on the "Add New" button, then click on the "Upload Theme" button
- Upload the theme.zip file (note: it is the theme.zip, not the theme-psd.zip that you just downloaded from the Member Area).
- Activate the theme
FYI: You can also install themes with FTP method. Read the Installing Themes tutorial for more info.
Demo Import
If you are starting a fresh site, importing the demo content will help you understand how the theme demo is built. The Demo Import feature will import the contents (posts, pages, comments, etc.), Themify panel settings, menus, and widgets setup from our demo to your site. You can erase the demo content afterward.
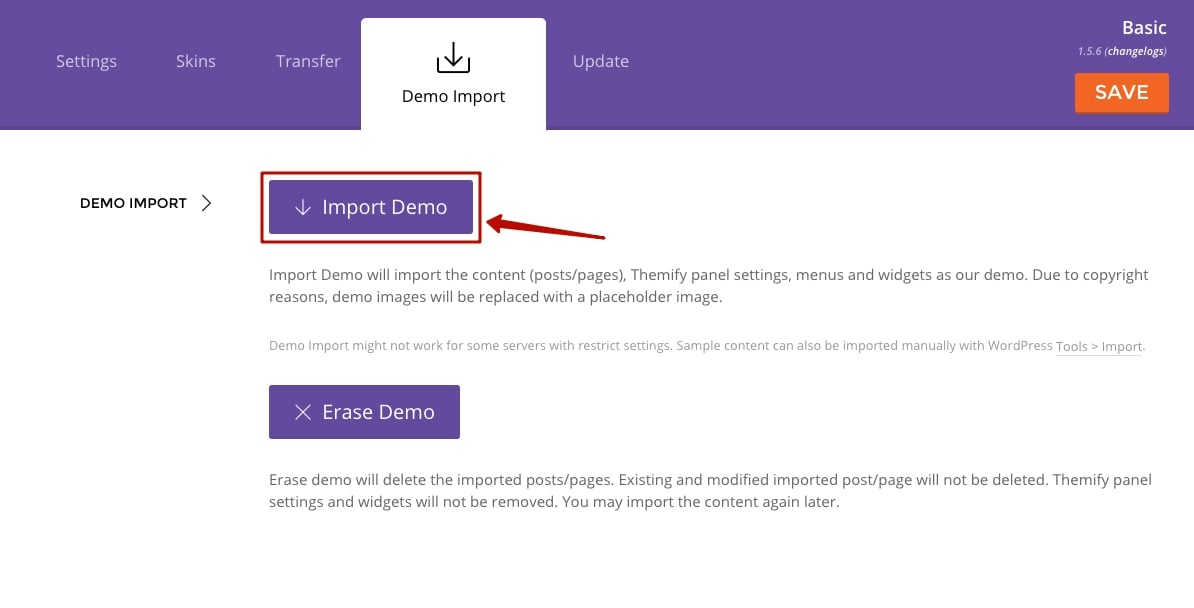
To import the demo setup:
- Go to WP Admin > Themify > Settings > Demo Import and click "Import Demo" button.
- Note that the featured images will be replaced with an image placeholder for copyright reasons.
To erase the demo setup:
- On the Demo Import tab, click on the "Erase Demo" button which will then remove the demo content.
FYI: If the Demo Import does not work on your site, you can use the WP Admin > Tools > Import tool to import the demo content manually.
Site Logo & Tagline
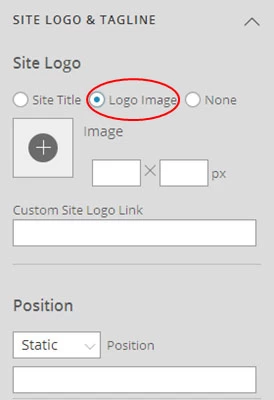
To display a logo image instead of the site name text:
- Go to WP Admin > Appearance > Customize > Site Logo and Tagline.
- Under "Site Logo", select "Logo Image" radio button.
- Upload a logo image.
- Specify the logo image width and height.
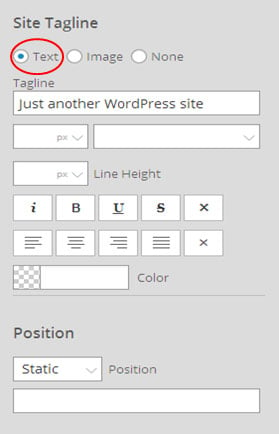
You can also change website Tagline from here:
- Go to WP Admin > Appearance > Customize > Site Logo and Tagline.
- Scroll down and under "Site Tagline" select "Text" radio button.
- Enter your site Tagline.
- Click "Save & Publish".
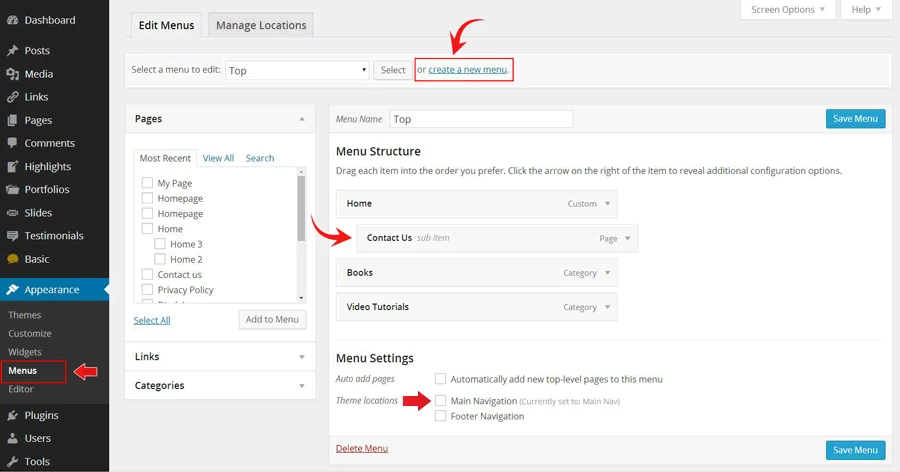
To create a custom navigation menu:
- Go to WP Admin > Appearance > Menus.
- Click on "create a new menu" to create a new menu (eg. Main Menu).
- Add the menu items from the left panels.
- To create a dropdown menu: drag the menu item towards the right (the item(s) will be indented).
- When you are done adding the menu items, click "Save Menu".
- To assign menu locations:
- Scroll down to the bottom where it says "Theme locations" and tick the menu location checkbox.
- Main Navigation = main menu on the header
- Footer Navigation = footer menu on the footer (Note: some themes might not have Footer Navigation).
TIPS: You can display menus on sidebar widgets, remove the main menu, create empty links, and lightbox links. Read Custom Menus for more detailed tutorial.
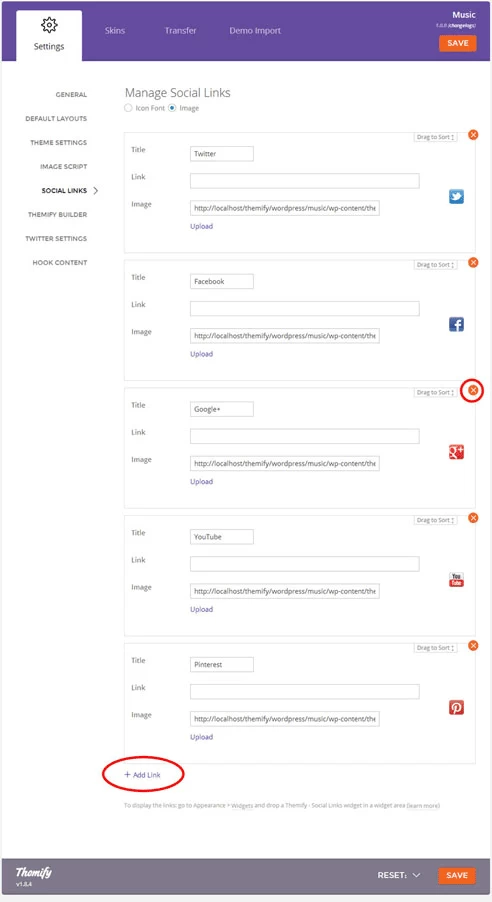
Setting Up the Social Links
Step 1) To set up the social media links:
- Go to WP Admin > Themify > Settings > Social Links tab.
- The theme comes with some pre-filled social links. Simply enter your social profile URL in the Link input field. For example, enter 'https://twitter.com/themify' for the Twitter link.
- You can choose to display either "Icon Font" or "Image".
- If "Icon Font" is selected, click on "Insert Icon" to select an icon (over 320+ icons available).
- If "Image" is selected, you can upload your own graphic icon by clicking on the Upload button.
- To add more links, click on the Add Link button at the bottom.
- To remove a link, click on the delete icon.
- To arrange the display order, drag and drop the link container.
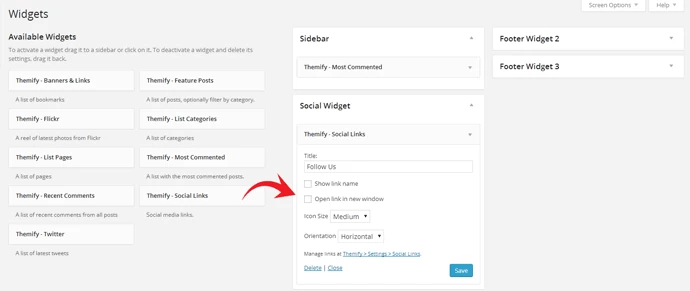
Step 2) Displaying the Social Links:
- Once you have the Social Links setup, go to WP Admin > Appearance > Widgets. Drag and drop the Themify - Social Links from the Available Widgets panel to the Social Widget panel.
- Optional: Customize Widget Title - such as "Follow Us". You can also "Show link name" and adjust icon size.
To hide the default RSS icon in the header:
- Go to WP Admin > Themify > Settings > Theme Settings.
- Under the "Exclude RSS Link", tick the checkbox that says "Check here to exclude RSS icon/button in the header".
To hide the default search form in the header:
- Go to WP Admin > Themify > Settings > Theme Settings.
- Under the "Exclude Search Form", tick the checkbox that says "Check here to exclude search form in the header".
To insert a horizontal banner ad/code in the header:
- go to Appearance > Widgets
- drop a Text Widget in the Header_Widget panel
- enter the following sample html code or your ad code:
<a href="https://themify.me"><img src="https://themify.me/banners/themify-468x60_1.jpg" alt="" /></a>
WordPress Post Formats (Tumblr-like)
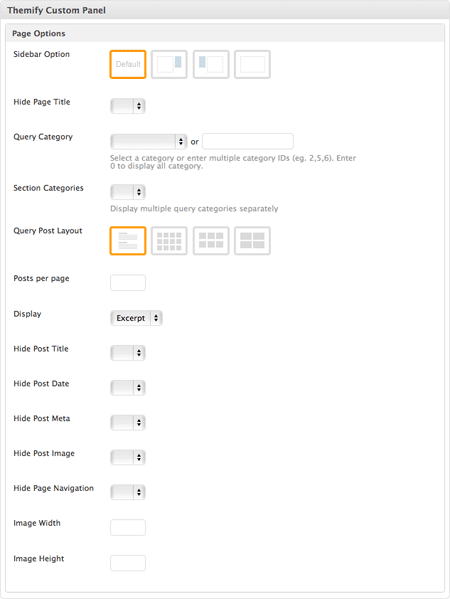
This themes comes with the following post format supports: standard (default), aside, gallery, link, image, quote, status, video, audio and chat. To assign the post format to a post, select the radio button in the "Format" panel.
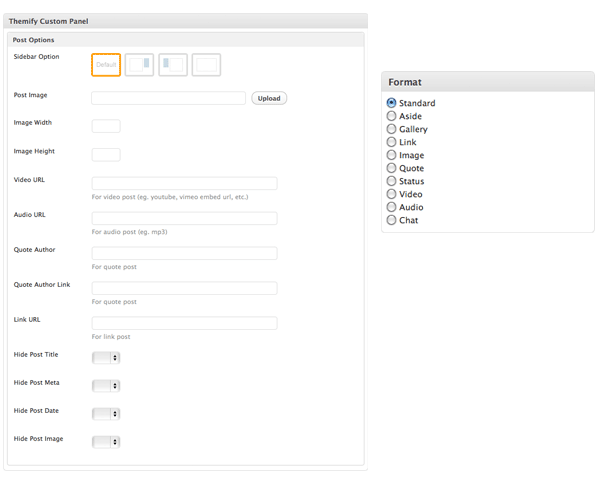
When writing or editing a post, you should see the Themify Custom Panel (see image above). The following fields are required for the different post formats:
- Video: Video URL (youtube, vimeo embed url). Examples: "http://vimeo.com/22391248" or "//www.youtube.com/watch?v=Abjx1JJO1i8"
- Image: Post Image, Content (optional)
- Gallery: gallery shortcode in Content (eg.
 )
)
- Quote: Content, Quote Author (optional), Quote Author Link (optional)
- Audio: Audio URL (eg. https://themify.me/wp-content/audio/song.mp3), Post Image (optional)
- Link: Link URL, Content (optional)
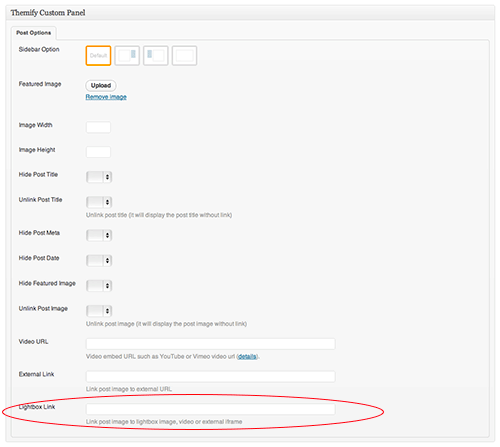
To link the featured image with a lightbox popup such as image zoom, video or an iframe window, enter the URL in the Lightbox Link field under the Themify Custom Panel. The Themify Custom Panel can be found in the post edit page.
- Sample image: https://themify.org/pinboard/files/2012/06/133618178.jpg
- Sample video: http://youtu.be/Abjx1JJO1i8
- Sample iframe: https://themify.me?iframe=true&width=100%&height=100% (you need to add
?iframe=true at the end of the URL)
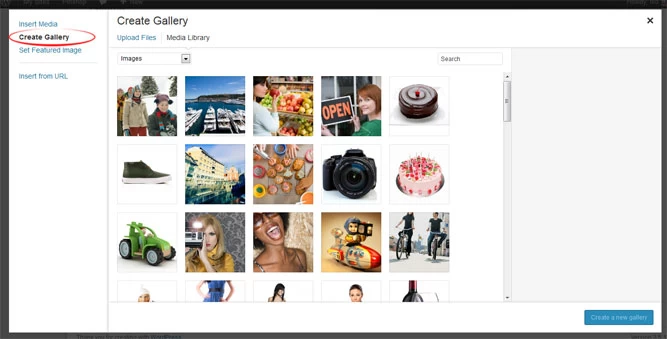
Inserting Gallery to Posts or Pages
The gallery can be inserted in any post or page. To insert a gallery, click on "Add Media" button
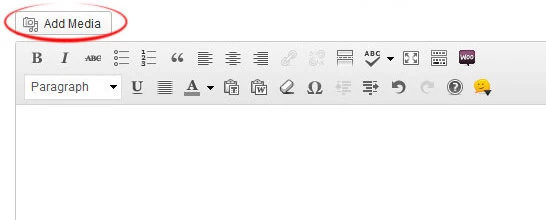
It will open a lightbox for you to create and insert gallery. Read this tutorial for more details on how to use WordPress Gallery.
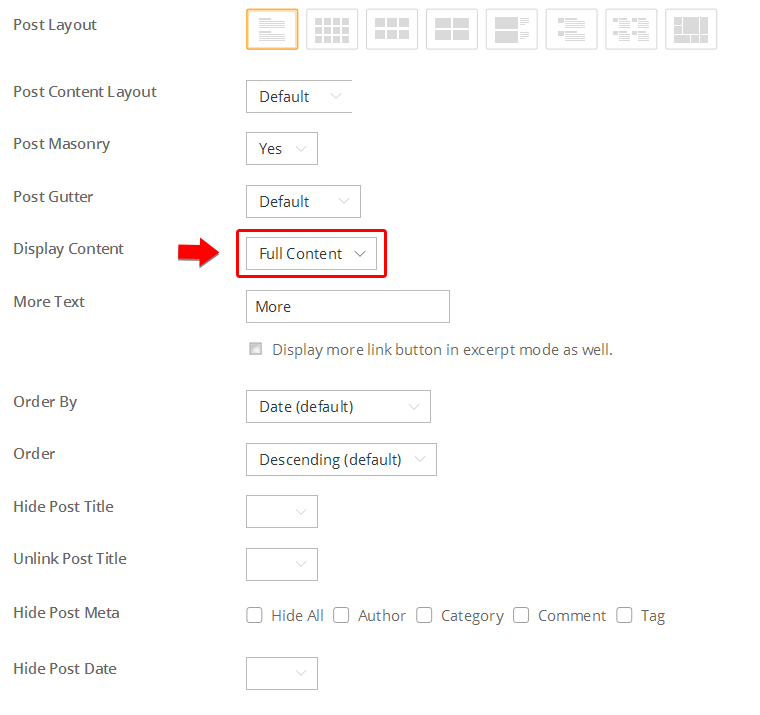
Custom Page Layout
To display posts from specific category(ies) using pre-designed layouts:
- Create a new WordPress page.
- Under the Query Category dropdown menu, select the category that you want to display or enter multiple category IDs (separated with commas) in the text field.
- Posts per page = the number of posts to be displayed per page.
- Select the layout option.
- Image width & height is optional.
Standard Page: to remove the query post options, simply clear the Query Category field or select blank in the dropdown.
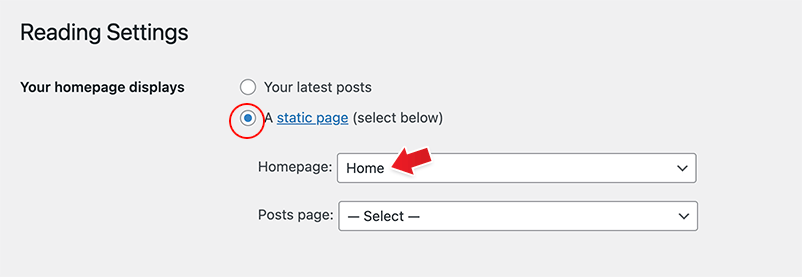
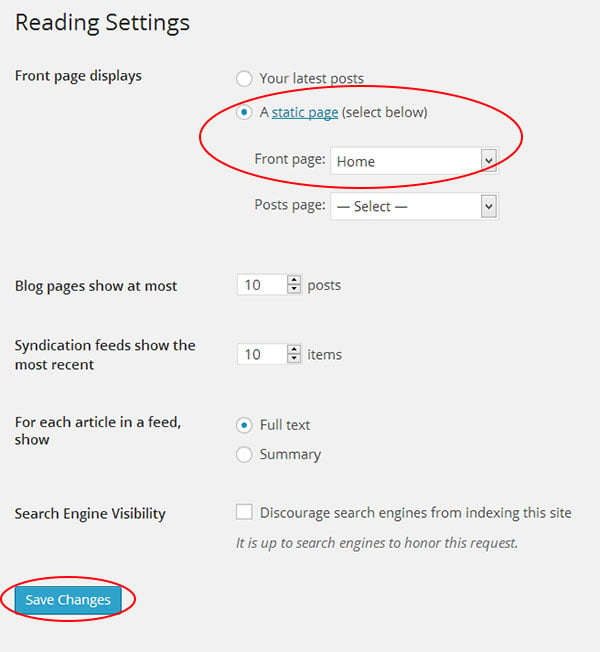
Custom Homepage
You can assign any Page as homepage:
- Create a new Page (eg. Custom Homepage) with the Query Category option as mentioned above
- Go to wp-admin > Settings > Reading
- Select a static page under the "Front page displays"
- Then select "Custom Homepage" in the dropdown
Setting Default Post and Page Layouts
Generally, the theme works out of the box. All the sidebar options and image dimensions are pre-defined in the theme. If you need to change the default sidebar options, featured image dimensions, content/except display, post meta, etc., it can be done in the WP Admin > Themify > Settings > Default Layouts.
There are three default layout options under Themify > Settings > Default Layouts:
- Archive Sidebar Option: refers to the default home page, category, search, archive, tag pages, etc.
- Default Post Layout: is the post page direct URL (also known as "Single Post").
- Note: Some themes may only have 4 layouts.
- Default Static Page Layout: is the static page.
FYI: Read Default Layouts documentation for more info.
Creating a Blog Page
To create a blog page:
- First, create a new Page (go to WP Admin > Pages > Add New), name it "Blog" or any page title as you want.
- View the page on the frontend, click "Turn On Builder".
- Drop in a Post module and configure the options as you like.
Setting a Custom Front Page
You can set any page as the front (home) page. This means you can use the Builder to design the page and assign it as the front page. To set the Front Page:
- Go to WP Admin > Settings > Reading.
- On the Front page displays, select the "A static page (select below)" option and then select a "Front page".
- Leave the "Posts page" default. If you want to create a custom Blog page, read this tutorial instead of setting the "Posts page".
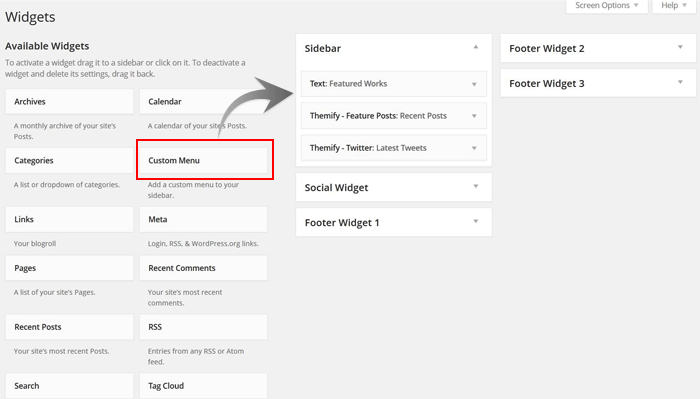
To add widgets to widgetized areas (eg. sidebar and footer widgets):
- Go to WP Admin > Appearance > Widgets.
- The big panel on the left side shows all available widgets. The small panels on the right are the widgetized areas.
- To add a widget: drag and drop the widget from the left panel to the right panel.
- To remove the widget: drag the widget back to the left panel (Available Widgets panel). If you want to keep the widget setting for future use, drag it to the Inactive Widgets instead of the Available Widgets panel. It will save your widget settings. To retrieve the widget, drag the widget from Inactive Widgets panel instead of the Available Widgets panel.
TIPS: You can also add widgets in Appearance > Customize panel.
Theme Skins
To apply pre-designed color skins:
- Go to WP Admin > Themify > Skins, select a skin by clicking on the thumbnail and click Save.
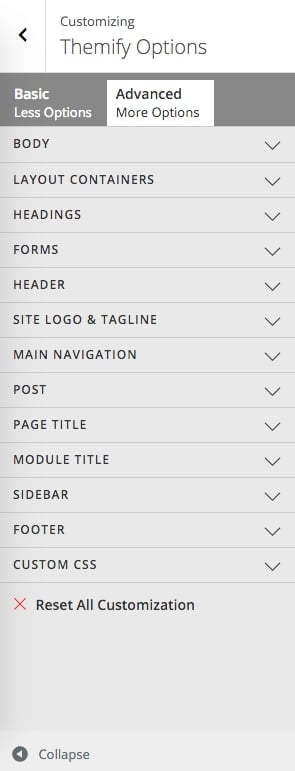
Styling The Theme
To style the theme frontend appearance:
- Go to WP Admin > Appearance > Customize.
- It will take you to the Customize panel with live preview where you can style the appearance of the theme design (ie. color, background, font, spacing, border, etc.).
FYI: Refer to Customize documentation for more info.
- To set the Footer Widget column layout, go to WP Admin > Themify > Settings > Theme Settings.

- To drop the widgets in the Footer Widgets, go to WP Admin > Appearance > Widgets.
To replace the footer credit links:
- Go to WP Admin > Themify > Settings > Theme Settings and enter the footer text.
- HTML tags are allowed in the Footer Text.
- To have empty footer text, tick the hide footer text checkbox.
Read More
09
Dec
2010
Product Releases /
Our latest theme, Rezo, release today and it includes some amazing features. You can manage you a custom post type Menu listing easily and with a number of layout options. On top of this you get a custom Homepage slider to display promotional material and photos. Rexo also includes the well known Lightbox Gallery plugin to highlight your images. The newest feature to Rezo, and our framework, is the inclusion of new shortcodes. Rezo is our first theme to get both Google Maps and custom video shortcode support. With all these features you can build any kind of site with this amazing template.
If you're interested in getting Rezo, for a limited time discount, enter the promo code "rezo" on checkout to save 30%. This coupon code can only be applied to Rezo and this discount code expires as of December 17, 2010.
Read More