How To Create a Tile-like Image Gallery with the Themify WordPress Builder
Tired of creating a plain looking image gallery where you can't adjust the gutter widths, or control the overall layout of your images? Want to display your entire image without worrying about your images being cut because it doesn't fit with the pre-built gallery containers? You like collages and want place one on your WordPress site? The Themify Builder plugin let's you do all these easily with it's image module and adjustable gutter width feature. Control the placement, size, and order of how your images will appear on your site using the Builder plugin. Check out the tutorial below and see how you can add your own tile-like image gallery on your WordPress site.
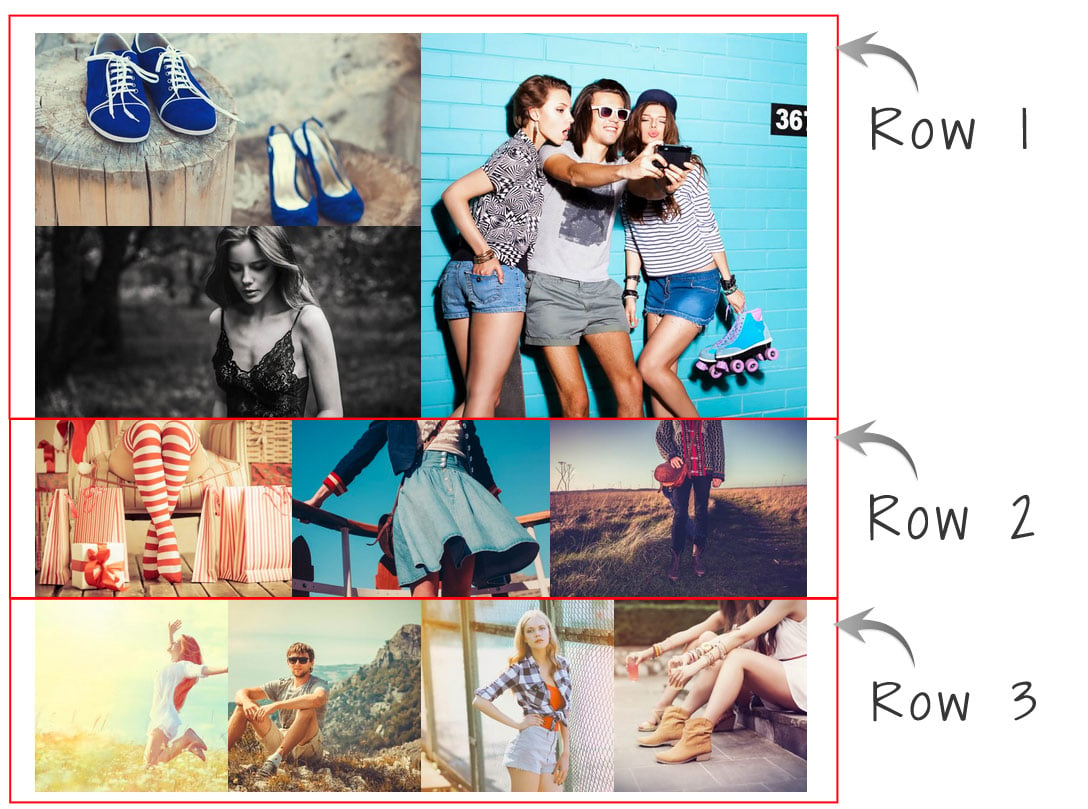
Here's a sample of a tile-like image gallery, using only the image module and Builder plugin.

This tutorial focuses on how you can recreate the above tile-like image gallery on your site. To start off, we broke down this tutorial by breaking it into 3 rows. We then did a step-by-step guide on how we made each row.
Row 1:
Let's create the first row.
- Press the Themify Icon at the top and click "Turn On Builder"
- Insert an Image module on the row that you would like to display this gallery
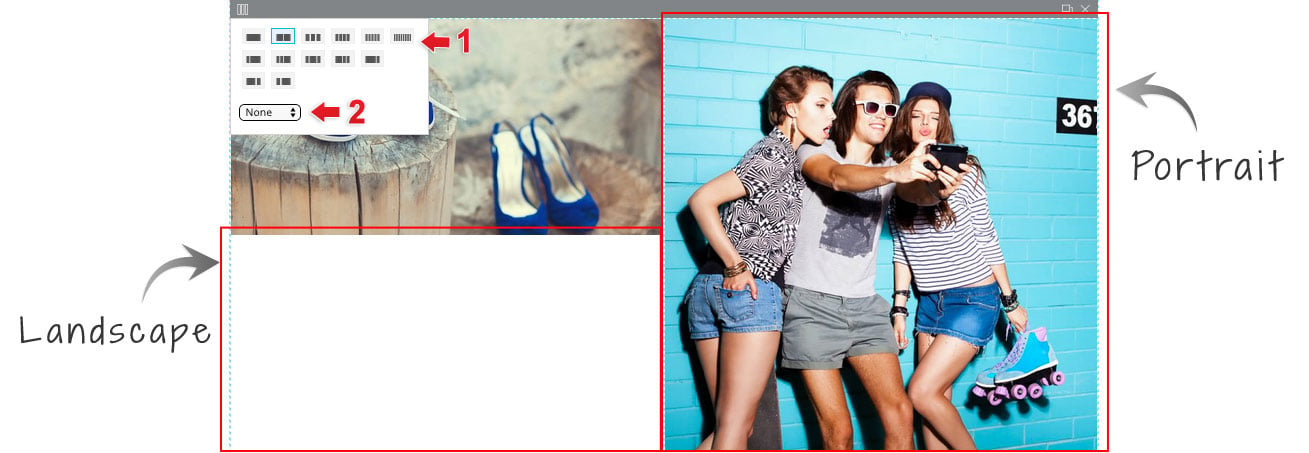
- After inserting and setting an image module. Adjust the Sub-Row Column and Gutter width. Hover your cursor on the top left corner of the module.
- 1) Sub-Row Column = Choose the 2-column layout for the first row.
- 2) Gutter Width = Click on the scroll down gutter width option and choose "none".
- To display the image like our demo image above, just make sure that the image ratios are the equal.
- You can set any parameter on your images just as long as it has an equal ratio. For the first row we set the image with the following parameter:
- Landscape:
- Width - 600px, Height = 300px
- Portrait (large):
- Width - 600px, Height = 600px
- Landscape:
Row 2:
- Duplicate row 1 to insert a new sub-row beneath the first row.
- Similar to row 1 adjust the column layout, but instead of 2-column change it a 3-column layout. Leave the gutter-width as it will have the same layout as the previous row.
- After change the image parameters of the duplicated image modules to 3-column image paramaters. Similar to row 1, you can use any parameter just as long as it has equal ratio.
- To get the same look as our demo use the following parameters for all 3 image modules
- Width - 400px, Height = 280px

Row 3:
- Duplicate row 2 to insert a new sub-row beneath the first row.
- Similar to row 1 & 2 adjust the column layout, but instead of 3-column change it a 4-column layout. Leave the gutter-width as it will have the same layout as the previous row.
- After change the image parameters of the duplicated image modules to 4-column image parameters. With this 4-column layout it has to have equal parameters because of the size of the module.
- To get the same look as our demo use the following parameters for all 4 image modules
- Width - 290px, Height = 290px

July 22, 2017 @ 11:55 pm
Can this be made to open up in a lightbox?
July 24, 2017 @ 7:39 pm
Yes, this is possible. Please allow us to help. Do you mind contacting us here – https://themify.me/contact ?
September 7, 2017 @ 11:57 am
that would be great general knowledge for all I think. Any way you could do that? I sure would like to know also. Many thanks
January 25, 2019 @ 2:17 pm
I would know the way to do it (open photo gallery up in a lightbox). It is possible to have a answer to do it please?
January 29, 2019 @ 3:10 am
Yes, you may insert an image URL as the image link and select open in lightbox option.
March 5, 2020 @ 5:23 pm
I created an image gallery with Themify and it doesn’t seem to be giving me the option to link the images to a URL. The only options I have to link to are: Attachment Page, Media File & None.
Can someone help describe how to add URL links to images if it isn’t showing as an option?
Thanks!
March 6, 2020 @ 9:47 pm
Hi Mason,
WordPress gallery doesn’t have the option to link media to external or custom URLs.