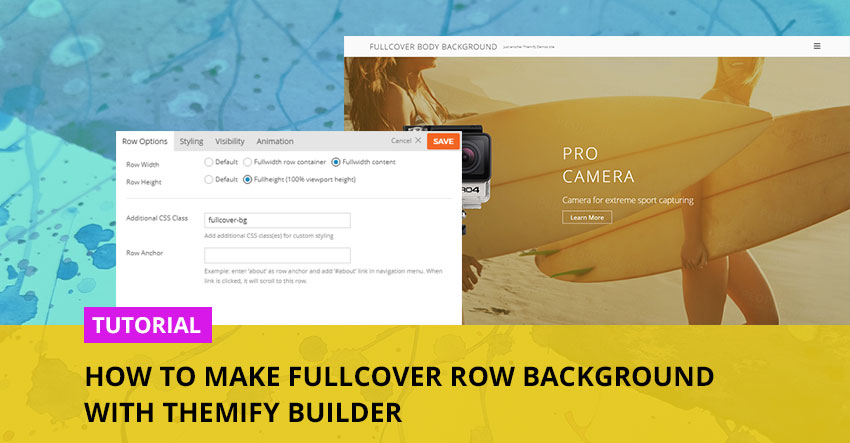
Instead of using a regular white background for your website, why not try using an image that fully covers your page? We think it could help create a minimal looking site that is both sleek and modern. To achieve this look, you'll need to insert some custom code – but fear not, for we've provided easy step-by-step instructions.
You can also go a step further than a single image and instead, opt for the image slider (a slideshow of pictures), a video, or gradient colours.
View Demos
- Single Image - single static background image.
- Image Slider - fullcover image slider in the background.
- Video Background - video background playing in the background.
Here's a sample page to see what this modification looks like with a ,, and .
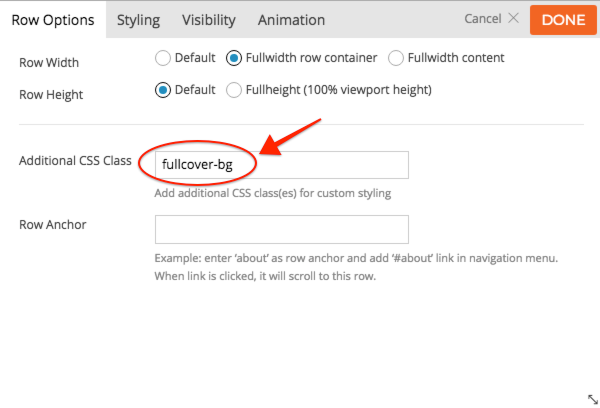
Step 1: Add "fullcover-bg" In The First Row's Additional CSS Class
- Open the page you want to customize and turn on Themify Builder in your admin bar at the top
- On your page's first row, click the Option icon in the upper right corner to open the Row Options Panel
- In the Additional CSS Class field, input "fullcover-bg"
Step 2: Choose Your Photo/Video
- Click 'Styling' beside 'Row Options'
- Click 'Background'
- Select the Background Type (Image, Gradient, Video, Slider)
- Upload the image(s) or video of your choice
- In the 'Background Mode' dropdown menu, click 'Fullcover'
- Click 'Done'
- Click 'Save' in your admin bar at the upper right corner
Step 3: Add Custom CSS
- Head to your theme's customization panel: Click 'Customize' on the admin bar at the top
- Using the menu on the left, scroll to the bottom and click on 'Custom CSS'
- Copy and paste the following into the Custom CSS field:
    .fullcover-bg {
	width: 100%;
	height: 100vh;
	position: fixed;
	top: 0;
	left: 0;
}
.themify_builder_active .fullcover-bg {
	position: static;
}Step 4: Add Content
- To add a module to your page, create a second row and start from there. Your content will automatically lay on top of the background image.
And just like that, you can easily change the look and feel of your website. Don't forget, you can opt for the slider for an automatic slideshow of images or select video to add give your website a more dynamic look. You can also choose to play with the Row Overlay in the Styling panel and give your picture a faded quality.
We hope this helps add that something extra to your site. Let us know how this tutorial was and what you'd like to see more of! Stay tuned for more.
February 7, 2018 @ 5:19 am
Wow…! Such a great details share with me. Thanks for sharing valuable information. Because I don’t have any idea about background themify builder. I was find many tutorials and any many articles, but I am not satisfy any one of them. But you provide very easily process.
February 7, 2018 @ 2:26 pm
Hello
Wow, I love this effect, I’ll apply it right now in a place I’m living.
I noticed on this page https://themify.me/demo/themes/fullcover-body-background/video/ that the images float smoothly, currently in version 1.9.1 the parallax works but not the effect of floating subtly.
On the other hand, in the contact form, the option of receiving a copy of the email sent still does not work.
Thank you.
February 7, 2018 @ 3:05 pm
Hello
This looks very good and up to the quality expected from Themify. One thing, the video option doesn’t work on Firefox though the browser does have a few security/privacy add-ons installed.
February 7, 2018 @ 6:55 pm
Hi David,
That’s odd. I just checked it on our end here and it seems to be working fine with Firefox. Do you mind trying to disable your addons? I believe this could be what’s causing the issue.
February 8, 2018 @ 1:34 pm
Hi Kurt
I restarted Firefox in Safe Mode (to disable all add-ons) and unfortunately the video still doesn’t work. I’m running Firefox 58.0.2 (64-bit). Does anything else need to be running in the background?
February 7, 2018 @ 5:40 pm
Does this apply to Themify Landing?
When I click Background, my only option is color.
February 7, 2018 @ 6:53 pm
Hi Rex,
Yes, it does apply to Landing as well :) Please allow us to help you with this. Do you mind sending us your site URL here – https://themify.me/contact. Thank you for your patience.
February 8, 2018 @ 1:45 am
Does have a tutorial video on how to do that? Tks.
February 8, 2018 @ 4:06 am
Great! I’ve been trying to work out how to do this for a while
February 8, 2018 @ 2:49 pm
Hi.
My video background does not cover 100% of the window. It seems that the video should be centered and rescaled.
I thought this would happen automatically.
How do I adjust my background?
February 9, 2018 @ 11:45 pm
hi Jorgern,
We can help you with this. Could you post this on our support forum: https://themify.me/forum.
February 9, 2018 @ 4:08 am
WOW! This is awesome.
One question, though – how did you get that motorcyclist to ‘float’ above the background on this page: https://themify.me/demo/themes/fullcover-body-background/
?
I LOVE that effect!
Is it using a .gif or .png image (with a transparent background) and a parallax effect in the styling?
Super cool!
:)
February 9, 2018 @ 11:35 pm
Hi Ruth,
That motor cyclist is a transparent PNG with parallax scrolling applied (you can apply parallax scrolling on module options > Animation > Parallax Scrolling).
February 9, 2018 @ 6:55 pm
Hi Kurt
I want to know more about the video embedded in the background.
I think that it takes time to embed the video and load the page.
It leads to lowering the convenience of visitors.
So I want to know about embedded videos.
For example, playback time, bit rate, vertical width and width of movie etc.
Please tell me the video settings you recommend.
Thank you
Ponkichi
February 9, 2018 @ 11:33 pm
Hi,
Try to keep video short and compress the video to reduce the file size (the smallest file the better). You can also try to insert YouTube video as the video background. Since the file is pinged from YouTube, it might loads faster than hosting it on your own server.
February 11, 2018 @ 1:21 pm
Is this a new feature? I guess not, since placing a picture as a background instead of just a white background is something, that existed for a while already. I am only a noob, but until now it was possible to use background pictures without any css-code.
Can someone explain please?
Chris
February 12, 2018 @ 4:56 pm
Hi Chris,
The main difference of this feature compared to adding a background image is that you now set the background image as the background for your entire site, from header to footer. Not just on one row. See our demos above and you’ll see what I mean :)
February 20, 2018 @ 5:30 pm
Hi I really love this effect and wanted to try it, however it was not working on my site as fullcover. The menu above still borders the top. Is there a way I can work around that?
February 27, 2018 @ 4:32 pm
Please allow us to help you with this. Do you mind contacting us here – https://themify.me/contact and please include your site URL so that we can provide you with better support :)
July 30, 2018 @ 10:57 pm
Hi guys, This worked great except it hides the footer. I can’t seem to make the footer re-appear.
July 31, 2018 @ 4:01 pm
Which theme are you using? Some themes have the option to exclude the footer. Check your Themify > Settings > Theme Settings -> Theme Appearance to make sure the footer is not disabled.
March 8, 2019 @ 4:02 pm
Hi,
I have the same exact problem. Footer is enable, i can see the return up arrow, but no social links and no copyright
March 8, 2019 @ 6:08 pm
Hi Filipe,
Our support expert advised me to let you know that, yes, the code may hide the footer on some themes. But that they would need your website link and admin access so we can check your user settings. Please post your issue on our Support Forum (for the fastest response times) or contact us via email: themify.me/contact
December 26, 2018 @ 1:23 pm
Hello, i have a problem with making a video background full width. I can make it fine for desktops but the same doesnt apply on mobile phones, even when i check it on pc it seems good but on actual phone it doesnt go full width. Tried the solution with fullcover-bg and the css but my problem is the “height:100vh”. If i reduce the 100vh to 30-35 it is ok but the number for the hight is different on every mobile device i try it on. I guess it has to do with different aspect ratios of screens etc. Is there a better way of doin this?
January 3, 2019 @ 12:55 am
Hi Apostolis,
Please post this issue to our support forum, so we can help you there: https://themify.me/forum
January 19, 2019 @ 6:25 pm
How do I get a full width slider background?
January 19, 2019 @ 11:41 pm
Hi Rebecca,
You can create a full-width Slider Background in Themify Builder Edit Row > Styling > Background – set Slider and Insert Gallery: https://cl.ly/fc49ab8580f9
June 5, 2019 @ 4:33 pm
In your corporate theme demo, you have a video background that plays ‘behind’ the logo and main navigation. This in searching is how I found this tutorial. However, with a recent version of corporate, ‘mode’ is no longer a setting for background videos. Do you have other advice for recent versions of themify corporate theme to be able to do this?
June 5, 2019 @ 7:20 pm
Hi,
If you mean this demo: https://themify.me/demo/themes/corporate/home/company-landing/ the background-video is added to the Row in Row Styling > Background => Video: https://cl.ly/e765f40512b8 if you are referring to a different demo, please send us a link to it, so we can help you to replicate the same what you can see on any of our demos.
June 6, 2019 @ 3:59 pm
Yes thank you! that is what I mean. In your screenshot, notice the video doesn’t stretch up behind the header logo and navigation. However if you view the demo directly, it does go behind (i screenshot what I mean with a red arrow). The arrow i have in there is pointing to the video sky that does move behind the header and the navigation. How did you get it to do that? The row video background only stops at the top of the row.
Screenshot here
https://drive.google.com/file/d/1wpb8RFIHrljOjh3oSN5e9P0I1PURiD-X/view?usp=sharing
June 6, 2019 @ 8:37 pm
Hi @J Brown,
The Header is set to “Transparent Background” in Themify Custom Panel: https://cl.ly/a41efed13103 so if the transparent header is set it will cover the first Row from the top.
July 22, 2019 @ 9:37 am
Is it work on Shoppe theme ? I tried but nothing happen
July 22, 2019 @ 4:35 pm
Hi Johnny,
It should work with any Themify theme if all 4 steps are applied correctly, please double-check and if everything is correct, but it is not working, please send us a link to your website, to the page where the Fullcover Row is applied, so we can check why it isn’t working for you.