
Sorry for the lengthy title. But if you've clicked this post, you know exactly which issue you'll be fixing in this quick edition of our tutorial series.
For a brief explanation, during a plugin or theme installation process, there can be an error which states that you have exceeded the max upload file size allowed on WordPress. However, the good news is that this is not an end-of-the-road issue as we can use a few methods to increase the max file upload size alloted.
For this guide, we will be using the following plugins:
There are a few methods that can be used to fix this issue. If you are using a shared hosting service, you would have to contact your hosting provider to increase your file upload limit. However we can also do it ourselves using 1 of the 3 following options:
Option 1: Edit the PHP.ini file
We can edit the PHP.ini file by using FTP or a file manager plugin. For this guide we will use the WP File Manager to edit the files. In most cases, the PHP.ini file would be located in the root folder but if you don't see it, you can create it there and continue to edit it.
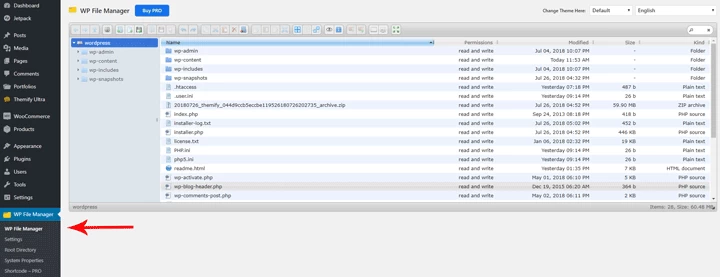
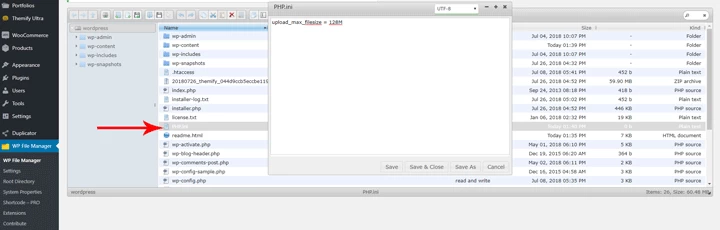
You will have to go to the WordPress admin panel > WP File Manager and open the PHP.ini file or create the PHP.ini file, if it is not already there. Once you have opened/created the file, you can edit this file by right clicking it, then click the edit file option and add this max upload filesize value to it:
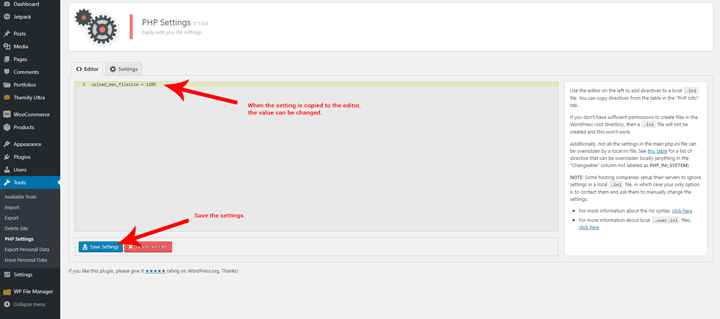
upload_max_filesize = 128M
Optionally, you can add more PHP setting options in this file such as the following:
post_max_size 128M
max_execution_time 300
memory_limit = 3000M
Once you have completed the changes, simply save the file and close it. Then try to install the theme or plugin once more.
Option 2: Edit the .htaccess file
Another option, is to edit the .htaccess file in the root folder of your hosting server so this can be accessed through FTP or by using a third party plugin such as File Manager, which we will using again in this guide.
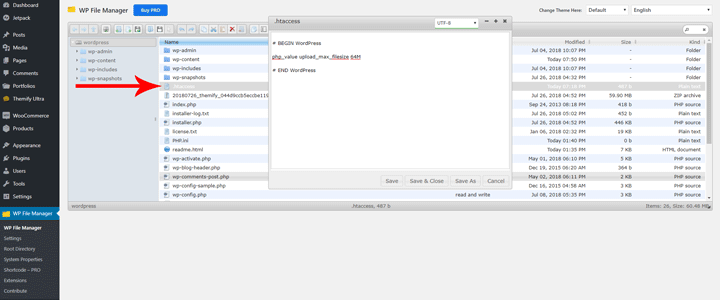
Just like we did in the PHP.ini file, you can right click the .htaccess file and edit it. You can edit the file by adding the following code:
php_value upload_max_filesize 1000M
The file should look like this:
When you have added this code, you can now save the file and the process is complete!
Again, you can go ahead and reinstall the theme or plugin in question once more.
Option 3: Use a third party plugin to edit the PHP settings
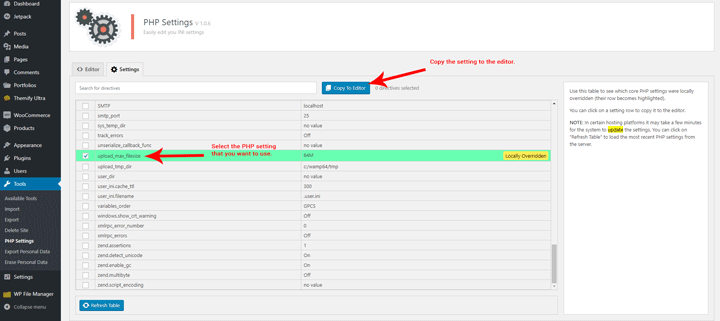
Finally, with this option we will be using the PHP Settings plugin to edit the settings. Once you have installed the plugin, go to the Admin Panel > Tools > PHP Settings > Settings tab.
In the Settings tab, you can select the PHP setting that you want to change and copy it to the Editor tab. Once, the setting is in the editor tab then you can change the value of that setting and save the changes.
And with that, we have increased the max upload file size limit that is used in WordPress.
You can now go ahead and reupload that theme or plugin that started you down this rabbit hole. Mission complete!
We're looking to add more basic tutorials for our Themify and larger WordPress community, so please enjoy and check out the next one!
November 2, 2018 @ 4:08 pm
Thank you so much!! I’m a beginner and I had a very hard time trying to install a plugin. The only thing it worked for me was to editing the .htaccess file in wordpress. Thanks for your very usefull explanations!
November 4, 2018 @ 5:26 am
Thank you very much for this tutorial! I am just a beginner in WordPress development
I love to read WordPress tutorial and It’s very comforting when I can find answers to at least some of my many questions!
January 10, 2019 @ 8:52 pm
Great post written here. Keep it up!
May 23, 2019 @ 8:24 am
I got this error multiple times on my blog and I was searching for the solution. Luckily, I found your post and finally I have increased the file size for my blog. Thanks
January 28, 2020 @ 6:46 pm
this file cant be copy “delete-img-btn.png” i dont know what to do
January 29, 2020 @ 9:22 pm
Hi,
You shouldn’t need to copy that image file. If you reinstall the theme, the file will be installed.