Custom Fonts
This tutorial will show you how to add custom fonts in Themify themes. The custom font feature is added in Themify framework 4.6.9, so make sure you are using a newer verison before following this tutorial.
Why Use a Custom Font?
Themify themes include a complete library of all Google Fonts (940+ fonts). But if you can't find the Google Font that you like, then you would need to upload your custom fonts. Or if you can't use Google Fonts due to privacy laws, then you can upload the custom fonts on your own server.
To add your own custom fonts:
- Download a free font of your choice (take a look at our list of free font sites below). If your font is downloaded as a zip file, extract it, and keep in mind where the .ttf file is – we will use this later.
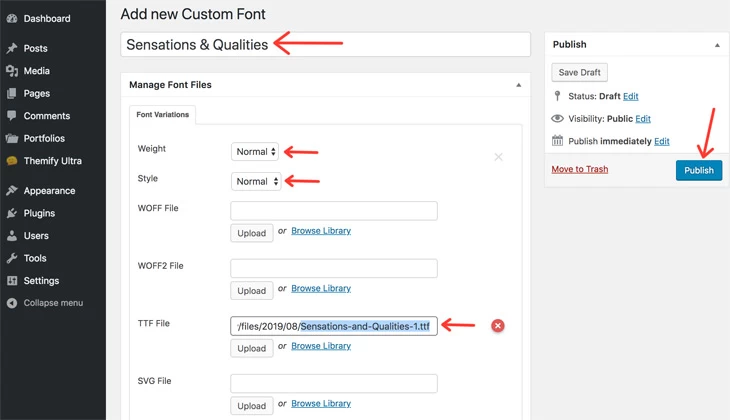
- Go to WP Admin >Themify > Custom Fonts > Add New:
- Enter the font name (it’s best to use the actual name of the font to keep things organized)
- Weight: select normal (you can always change this later)
- Style: select normal (you can always change this later)
- TTF File: upload your font’s .ttf file
- NOTE: When you are uploading the .ttf font file and see an "X" icon, it means your WordPress site doesn't allow the file extension upload. Install the File Upload Types plugin and then add the .ttf file extension upload support.
- Click ‘Publish’
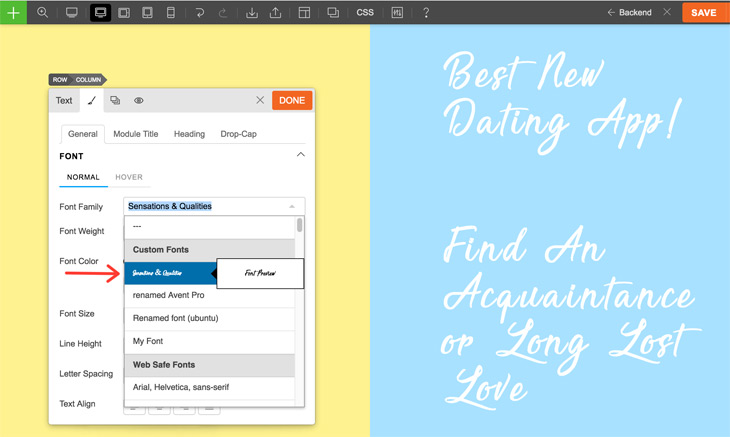
- Now when you go to the Customize panel, or turn on the Builder and go to any text element’s styling menu, you’ll see your new custom font from the selection of Fonts.
Where to Download Fonts?
You can download free fonts from the list of sites below. Please double check the font license before uploading it to your site.