Custom Menus
To create a custom navigation menu:
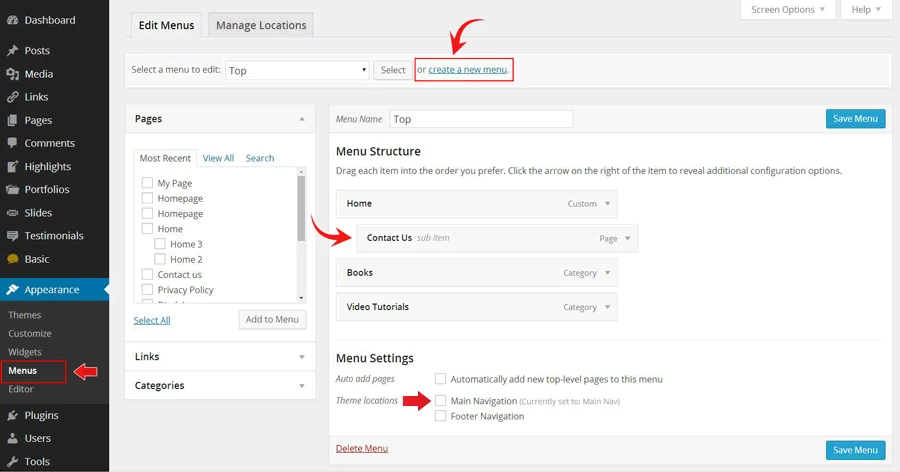
- Go to Appearance > Menu
- Click on "create a new menu" to create a new menu (eg. Main Menu).
- Add the menu items from the left panels
- To create dropdown menu: drag the menu item toward the right (the item(s) will be indented)
- When you are done adding the menu items, click "Save Menu"
- To assign menu locations:
- Scroll down to the bottom where it says "Theme locations" and tick the menu location checkbox
- Main Navigation = main menu in the header
- Footer Navigation = footer menu in the footer (note: some themes might not have Footer Navigation)
Tips: the custom menu can also be used with the widget (go to Appearance > Widgets and drop in the Custom Menu widget). You may create additional menus by clicking the "create a new menu" link.

Custom Link Buttons
The "Custom Links" panel allows you to add menu link to external URL. For example you can create a link to Themify by entering:
- URL = https://themify.me
- Label = Themify
Empty/Fake Link
- URL = #
- Label = Link Text
Removing the Default Main Navigation
To remove the default main navigation:
- Create a new menu (eg. Blank Menu)
- Do not add any link in the Blank Menu (ie. leave it empty)
- Save the menu and assign it as the Main Navigation in the Theme Locations panel
Menu Item Icon
With the Themify framework you have the option to show any desired icon along with a menu item. For that, while editing a menu item click the Insert Icon button and choose the icon you want to show on frontend.

Open Link in Lightbox
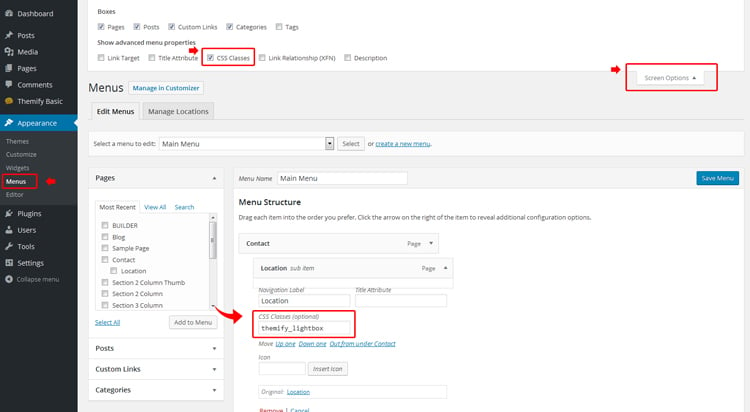
To open the menu links in lightbox, add 'themify_lightbox' in the CSS Classes field as shown in the screenshot below. If the CSS Classes field is not visible: click "Screen Options" and then check "CSS Classes.

Custom Menu Widget
To display custom menus in sidebar widgets:
- First create the menu
- Then go to Appearance > Widgets, drop in a Custom Menu widget to the widget panel
- Select the menu and save the widget panel