WooCommerce Shopdock Plugin
Installing the Plugin
To install the plugin, you can use the standard plugin upload function provided by WordPress by following these steps:
- First, you will need to download the plugin files from the member area on the Themify site.
- Note: Some browsers (e.g. Safari) may auto-extract ZIP files. Right-clicking on the download link and selecting "Save Linked File As" will allow you to download the ZIP version.
- Once you have the ZIP file correctly saved, login to your site's admin dashboard and go to Plugins.
- On this screen, you will want to select the "Add New" button, which will then take you to the plugin installation page.
- On this page, you will need to select the "Upload" tab.
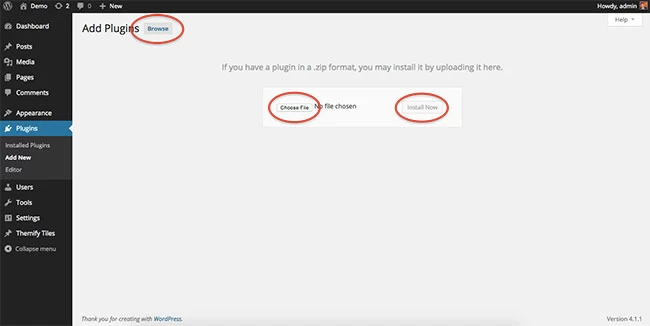
- Now, select the "Browse" button and use the file window to navigate to where you saved the plugin ZIP file and select it.
- Following this, select the "Install Now" button.
Activating the Plugin
Once the plugin is installed, you will then need to activate it before you have access to the features of the plugin.
To do this, please follow these steps:
- First, go back to the main Plugins page.
- Here you should see the Themify plugin in the list of installed plugins.
- Select "Activate" underneath the plugin's name.
- The plugin will now activate and you should see a message stating the successful activation, along with the new menu options for the Themify plugin on your dashboard.
Using the WooCommerce Shopdock Plugin
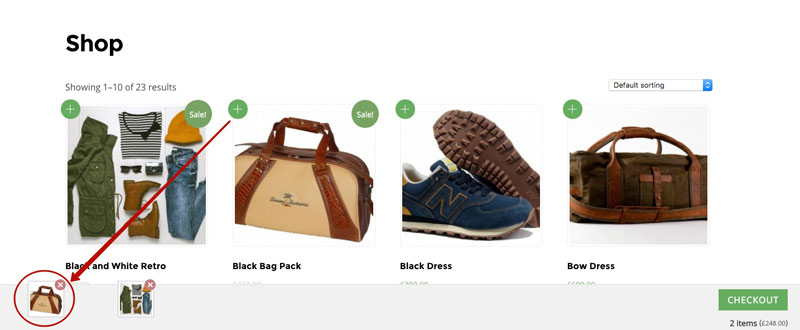
The WooCommerce ShopDock plugin is functional as soon as you activate the plugin. A (+) button will appear on one of the top corners of your products, and clicking these buttons will instantly add 1 of that product to the cart. The cart will appear from the bottom of the page, showing what is currently in your cart as well as a button to go to the checkout.
Change Skins
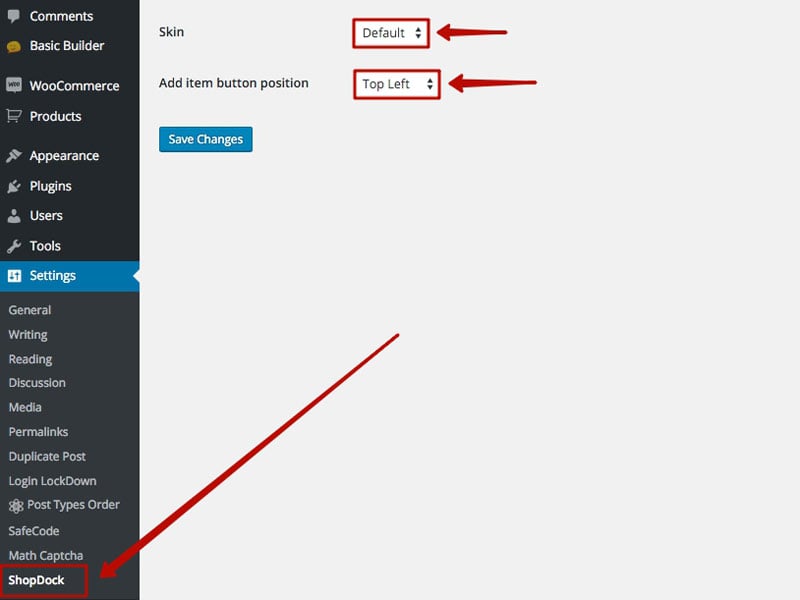
By default, the ShopDock plugin uses the default WooCommerce theme skin, and places the (+) button on the top left of products.
You can change this default behaviour by going to your WP Admin > Settings > Shopdock. Once inside the settings, you can choose change the skin color and (+) button position.
Update Plugin
You will receive notifications of updates to the plugin whenever you are on admin dashboard page for the plugin, these notifications will provide a link that will redirect you to the Update plugin page for the WooCommerce Shopdock plugin on your dashboard.
You can find a list of updates and the changes made in each in the Builder changelogs which are also linked in the notification.
You can also manually update by downloading the latest ZIP file from your Themify member area and either deleting the plugin on your site and following the installation instructions above again, or by uploading the contents of the new ZIP via FTP and overwriting the existing plugin folder.
Reinstall Plugin
If the auto plugin update does not work, you may reinstall the Themify plugin by following the steps below. Reinstalling the plugin shouldn't affect the content/data because they are saved separately in the database. To be safe: you should backup your WordPress content (posts, pages, menus, etc.) before reinstalling it. To backup your WordPress content, go to wp-admin > Tools > Export and export all content to a zip file. You may use wp-admin > Tools > Import to import these content in the future if necessary.
- Login to Member Area to download the latest themify-builder.zip (keep it as .zip file, do not extract it)
- Login to your site wp-admin
- Go to Plugins (where WordPress lists all the plugins on your site)
- Deactivate the Themify plugin (plugin can not be deleted if it is active)
- Now click on the "Delete" button to remove the Themify plugin (the "Delete" link is located under the Themify plugin name)
- Remain on the Plugins page, click on the "Add new" button (located at the top of the page), click on the "Upload Plugin" link, upload the latest themify-[plugin-name].zip and activate it (basically the same procedure as you would install a new plugin)