How to Redirect Old URLs on Your WordPress Site – Create a 301 Redirect
When you rename, change, or delete a post’s URL slug, people might still be directed to and visiting the old URL or receiving an error message. Having 404 errors on your site not only leaves a visitor with a bad experience, but is also a bit unprofessional and could cause you to lose future customers and business leads. Further, search engines might also penalize your site SEO rank due to these 404 errors.
You can avoid this and further secure your site's success by redirecting the old URLs on your WordPress site. There are many types of redirects, from a 302, 307, to a 301 redirect. The 301 redirect is the one we’ll be using to permanently redirect an old URL to a new one of your choice. The 301 redirect essentially sends search engines and site visitors to a different URL than the original one selected from a link or search engine page.
So let’s get started with this foundational tutorial, to redirect old URLs on your WordPress site with these simple steps.
Download and Install Free Redirecting Plugin
We’ll be using this free redirecting plugin called Simple 301 Redirects.
- Download the plugin here
- Login to your WordPress site >WP-Admin Dashboard > Plugins > Add New > Upload Plugin > choose the plugin zip file > Install Now > Activate Plugin
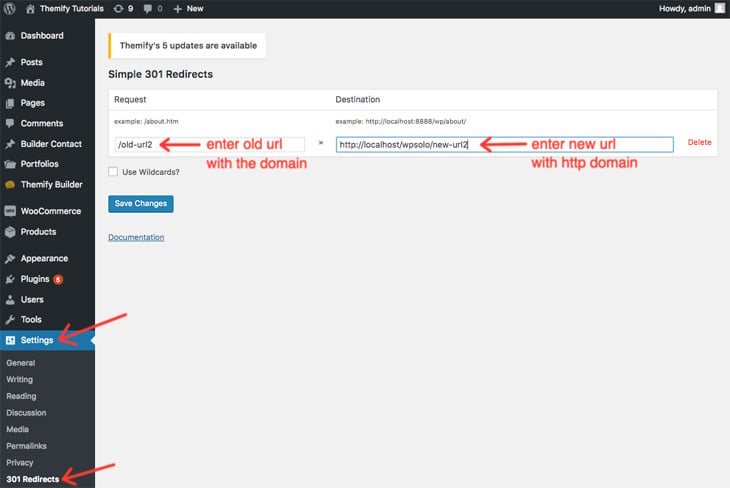
After you activate the plugin, just enter the old and new URL using the steps below:
- Go to WP-Admin Dashboard > Settings > 301 Redirects > Enter the old URL under ‘Requests’ and the new URL under ‘Destination’ > Save Changes
And there you have it! You have just successfully redirected one or more of your old URLs to the new and more accurate URL. We highly recommend you do this prior to changing any site links or URL slugs. Further polish up your site and increase your search ranking using our latest tutorial on how to increase your website’s page loading speed.
May 2, 2019 @ 5:21 pm
thanks for sharing this information with us… very helpful