Audio Dock Plugin Documentation
Installing the Plugin
To install the plugin:
- Download the free plugin zip from our Plugins page.
- Note: Some browsers (e.g. Safari) may auto-extract ZIP files. Right-clicking on the download link and selecting "Save Linked File As" will allow you to download the ZIP version.
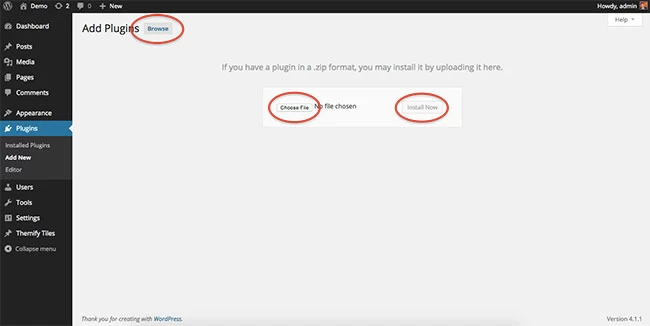
- Then go to your WP Admin > Plugins > Add New > Upload Plugin
- Now upload the plugin zip file and click "Install Now".
- After the plugin is installed, click "Activate Plugin" to activate the plugin.

FYI: If you can't install the plugin using WordPress plugin installer, you may also use a FTP software to install the plugin. To install plugins with an FTP method: extract the plugin zip on your local computer then upload the plugin folder to your FTP server where you installed WordPress > wp-content > plugins folder. After, login to your WP Admin > Plugins to activate the plugin.
Using the Audio Dock Plugin
For the Audio Dock to appear on your site you'll first need to insert a track on the Themify Audio Dock settings area. On the Themify Audio Dock settings area you'll find all the options available for the plugin, such as adding tracks, changing the track and bar color, and setting to auto play.
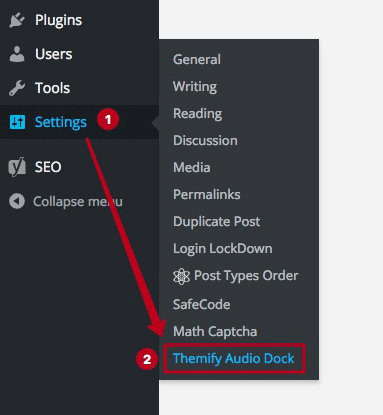
To access the settings area, please go to the WP Admin > Settings > Themify Audio Dock

Adding an Audio Track
You can add an unlimited number of audio tracks to your playlist. Just note that only one track will play at a time, but users will be to toggle with the player and choose which track they'd like to listen to. Below are the options:
- 1) Name: Input custom title
- 2) Song File: Browse your media library and input any audio file you'd like
- 3) Delete Icon: Click to remove any audio track you don't want to add on your playlist
- 4) Add New Track: Click to add more tracks on your playlist
- 5) Autoplay: Set the audio player to play automatically as soon as users visits your page (Note: The track will refresh each time the page is refreshed)

Styling the Audio Dock
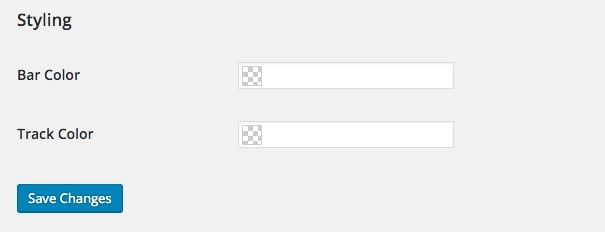
You can style the Audio Dock to match your site color by changing both the bar and track colors. The color picker will allow you to add any color you'd like and even adjust the opacity of the dock, allowing it to blend on your site as users browse.

Update Plugin
If an update is available, you will see a notification at the top of the admin dashboard. Click on the update link will take you to the update page where you can auto update the plugin and view changelogs. You can also find updates manually by going to the wp-admin > Shopify Buy Button > Update.
Reinstall Plugin
In the event there are issues/bugs with the plugin or you can't auto update the plugin, try to reinstall it with the latest version. Since WP 5.9, you can reinstall plugins by re-uploading the plugin zip. Reinstalling the plugin shouldn't affect the content/data because they are saved separately in the database. To be safe, you should backup your WordPress site before reinstalling it.
To reinstall a plugin:
- Download the latest plugin zip
- Go your site WP Admin > Plugins > Add new
- Then upload the new plugin zip and WordPress will ask if you want to replace the current version, click "Replace current with uploaded"