Event Post Documentation
Installing the Plugin
To install the plugin:
- Download the free plugin zip from our Plugins page.
- Note: Some browsers (e.g. Safari) may auto-extract ZIP files. Right-clicking on the download link and selecting "Save Linked File As" will allow you to download the ZIP version.
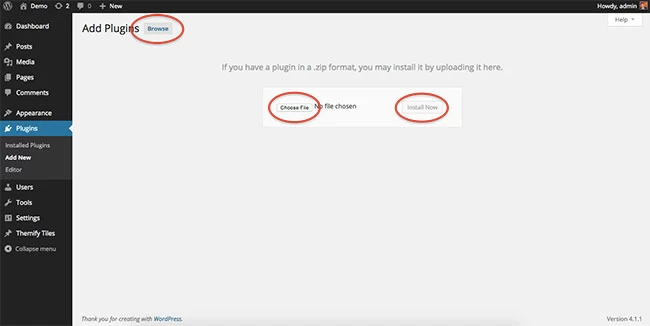
- Then go to your WP Admin > Plugins > Add New > Upload Plugin
- Now upload the plugin zip file and click "Install Now".
- After the plugin is installed, click "Activate Plugin" to activate the plugin.
FYI: If you can't install the plugin using WordPress plugin installer, you may also use a FTP software to install the plugin. To install plugins with an FTP method: extract the plugin zip on your local computer then upload the plugin folder to your FTP server where you installed WordPress > wp-content > plugins folder. After, login to your WP Admin > Plugins to activate the plugin.
Developed by Themify, Event Post is a plugin allows users to create an event specific post type.
Using the Event Post
Once you activate the plugin, you will see, a "Events" on the WP-admin sidebar. Follow the steps below to add an event post
Step 1: Add New Event Post
- To add an Event post, go to your WP Admin > Events > Click on "Add New"
- Enter the following options:
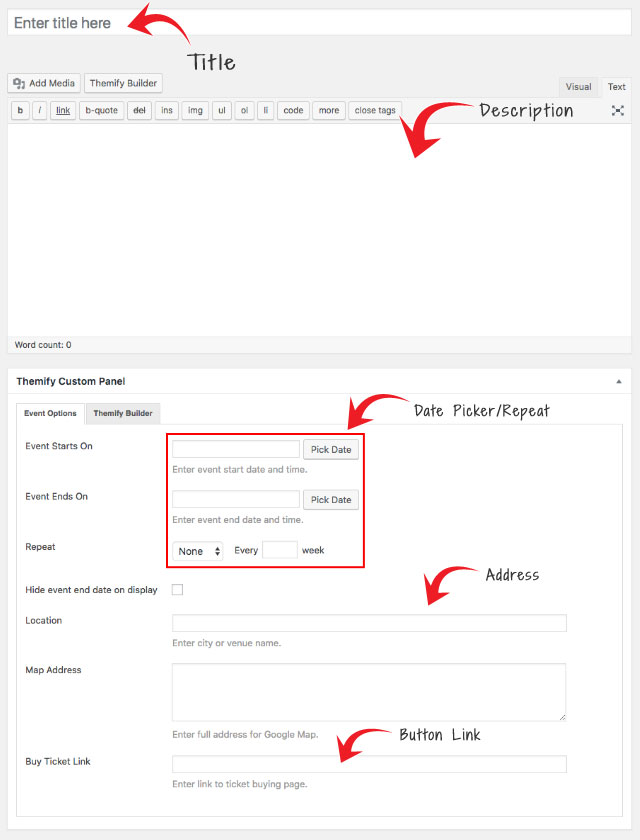
- Post Title - Event title
- Description - Will be used as the event description
- On the Themify Custom Panel (scroll down to view), enter the following:
- Event Starts/Ends On/Repeat - Use the calendar picker to select a start and end date. You can also set when you'd like the event to repeat daily, weekly, or monthly.
- Location - Input the map label that'll appear on the event post. This will appear beside the calendar icon as plain text.
- Map Address - Input the address that'll be inputed on the Google map that'll appear on the Event post. This map will appear below the featured image.
- Button Ticket Link - Input the link that the user will be redirected to (ie. link to ticket master).
Step 2: To Display Event Posts
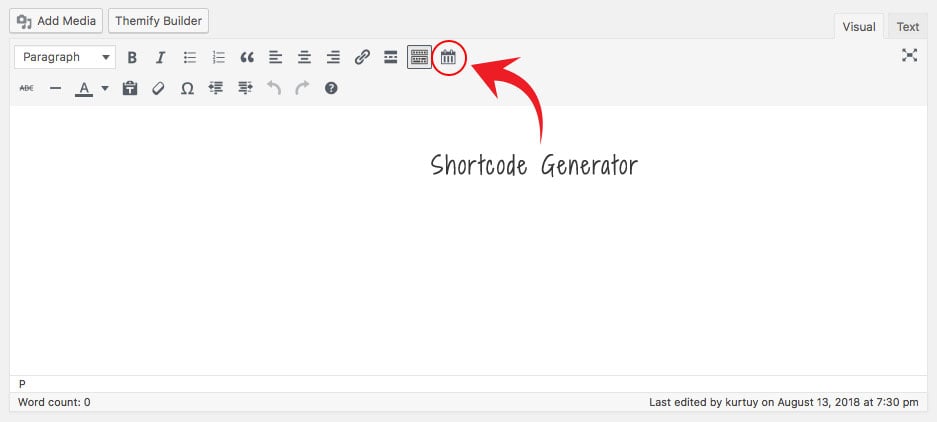
- Add or edit an existing page
- On the text editor, click on the Event Post shortcode generator (the calendar icon in the image above)
- Input the parameters (read shortcode parameters for mode detail) on the popup lightbox to generate the shortcode. Once you click OK, it will generate a shortcode in the editor (TIPS: You can copy & paste the shortcode to display elsewhere like a sidebar Text widget).
Shortcode Parameters
- Layout Style (style): Post list, Grid4, Grid3, Grid2, Grid2 thumb
- Show (show): Upcoming Events (upcoming), Past Events (past), Mix of both (mix)
- Number of Posts to Query (limit): Set the limit of number of posts that'll appear (Default is 5).
- Categories to include (category): Enter the category ID numbers.
- Post Order (order): Set either the ascending or descending order.
- Sort Post By (orderby): Set the order by Event Date, Date, Title, Random, Author, or Comment number.
- Show Featured Image (image): Show or hide the featured image.
- Display (display): Select to show content, excerpt, or none.
- Image Width (image_w): Input custom image width in pixel.
- Image Height (image_h): Input custom image height in pixel.
- Hide Event Date (hide_event_date): Select to show or hide the event date.
- Hide Event Location (hide_event_location): Select to show or hide the event location.
- Hide Pagination Links (hide_event_pagination): Select to show or hide the pagination links.
Sample Shortcode:
[themify_event_post show="mix" style="grid3" limit="12" category="2,5,6" image_w="400" image_h="300"]Reinstall Plugin
In the event there are issues/bugs with the plugin or you can't auto update the plugin, try to reinstall it with the latest version. Since WP 5.9, you can reinstall plugins by re-uploading the plugin zip. Reinstalling the plugin shouldn't affect the content/data because they are saved separately in the database. To be safe, you should backup your WordPress site before reinstalling it.
To reinstall a plugin:
- Download the latest plugin zip
- Go your site WP Admin > Plugins > Add new
- Then upload the new plugin zip and WordPress will ask if you want to replace the current version, click "Replace current with uploaded"