Portfolio Post Documentation
Installing the Plugin
To install the plugin:
- Download the free plugin zip from our Plugins page.
- Note: Some browsers (e.g. Safari) may auto-extract ZIP files. Right-clicking on the download link and selecting "Save Linked File As" will allow you to download the ZIP version.
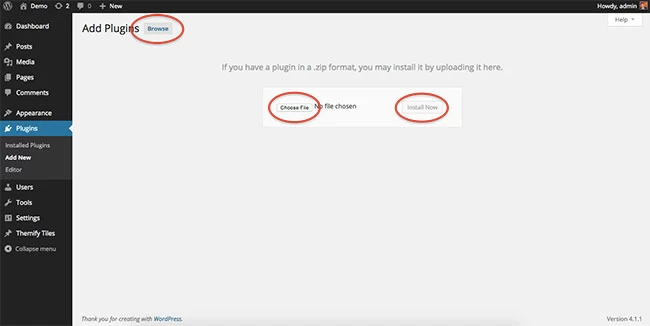
- Then go to your WP Admin > Plugins > Add New > Upload Plugin
- Now upload the plugin zip file and click "Install Now".
- After the plugin is installed, click "Activate Plugin" to activate the plugin.

FYI: If you can't install the plugin using WordPress plugin installer, you may also use a FTP software to install the plugin. To install plugins with an FTP method: extract the plugin zip on your local computer then upload the plugin folder to your FTP server where you installed WordPress > wp-content > plugins folder. After, login to your WP Admin > Plugins to activate the plugin.
Developed by Themify, Portfolio Post is a simple plugin that allows you to showcase your projects in a clean gallery-like style.
Using the Portfolio Post
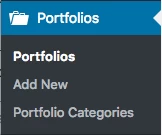
Once you activate the plugin, you will see a "Portfolios" post type on the WP-admin sidebar.

Adding Portfolio Posts:
- To create a Portfolio post, select "Add New" under the "Portfolios" admin menu
- Enter the Portfolio title and content
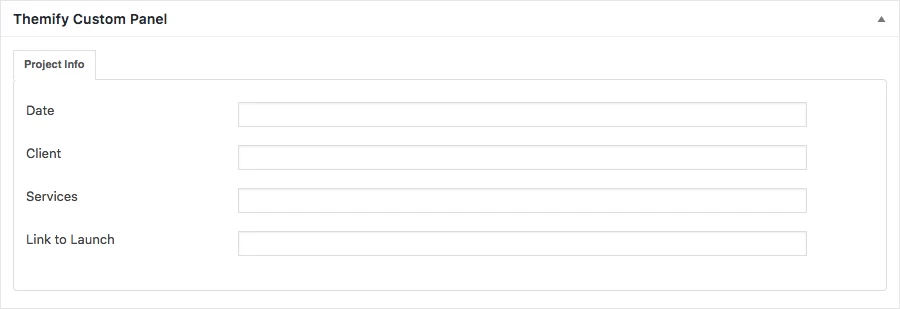
- Scroll down to the Themify Custom panel and input additional project info

Displaying Portfolio Posts using shortcodes
You can use the shortcode to display the Portfolio posts anywhere in the content editor, Text widget, and the Builder Text module. Below are some sample portfolio shortcodes using different parameters:
-
- = display Portfolio posts with default settings
-
- = display latest 3 Portfolio posts in grid3 layout, set image dimensions and show postdate
-
- = display latest 8 Portfolio posts from Portfolio Category ID 13 in grid2 layout
-
- = display latest Portfolio posts from portfolio categories Web Design and Illustration, given that their text slugs are "web-design" and "illustration"
Available parameters:
- limit = number of post to query/show
- category = category ID number or category name (default = all categories)
- image = show post image or not (yes or no)
- image_w = featured image width
- image_h = featured image height
- title = show post title (yes or no)
- display = display whether full content, excerpt or none (content, excerpt, or none)
- post_meta = display post meta (yes or no)
- post_date = display postdate (yes or no)
- style = layout style (grid4, grid3, grid2). You may also add custom css class in here (eg. style="grid4 custom-class"). Custom CSS class is only required for developers to apply styling.
- order = specifies ascendant or descendant order (ASC or DESC)
- orderby = criteria used to order posts (author, comment_count, date, menu_order, and title)
- unlink_image = remove the link on featured image (yes or no)
- unlink_title = remove the link on the post title (yes or no)
- more_link = display a custom more link after the posts
- more_text = text that will appear in more_link
- pagination = display the portfolio pagination (yes or no)
Reinstall Plugin
In the event there are issues/bugs with the plugin or you can't auto update the plugin, try to reinstall it with the latest version. Since WP 5.9, you can reinstall plugins by re-uploading the plugin zip. Reinstalling the plugin shouldn't affect the content/data because they are saved separately in the database. To be safe, you should backup your WordPress site before reinstalling it.
To reinstall a plugin:
- Download the latest plugin zip
- Go your site WP Admin > Plugins > Add new
- Then upload the new plugin zip and WordPress will ask if you want to replace the current version, click "Replace current with uploaded"