Slideshow
Installing Builder Addons
Note: Builder Addons require the Themify Builder. You can use it with either any Themify theme or the Builder plugin.
Installing Builder Addons is exactly the same as installing WordPress plugins.
To install the addon:
- Firstly, download the addon zip file from the link provided in your Themify Member Area.
- NOTE: some browsers (eg. Safari) auto extract zip files automatically. Right-click on the download link and select "Save Linked File As" and it will allow you to download as a zip file.
- Login to your site's admin area.
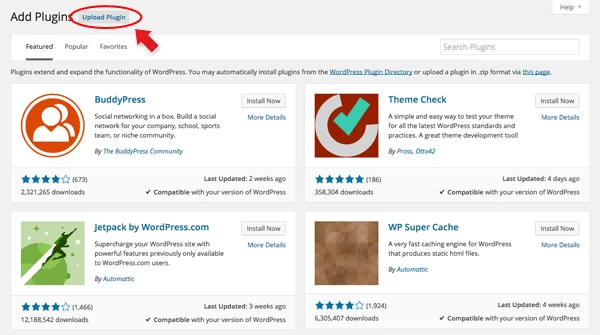
- Navigate to WP Admin > Plugins > Add New.
- Now, click the "Upload Plugin" link.
- Select "Browse" and navigate to the plugin zip file which you downloaded in the first step and then select the "Install Now" button.
- This will initiate the plugin installation process, and once finished, you can then activate the plugin.
Using the Slideshow Addon
Unlike many of the other Builder addons the Slideshow doesn't have it's own module. Instead, once this addon is activated, it'll be automatically appear on each page/post on your site on the Themify Custom panel > Builder Slideshow tab. Enabling this option will set your page to no sidebar, fullwidth, and hide page title. Check out the screenshot image below to see how it'll look like.
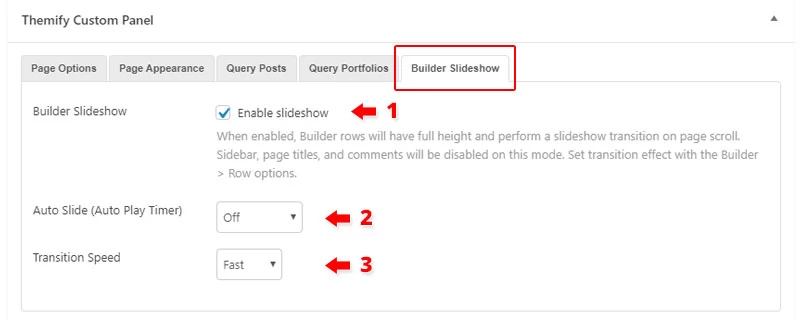
- 1) Builder Slideshow - Enable this option to set page to no sidebar, fullwidth, and hide page title.
- 2) Auto Slide (Auto Play Timer) - Set the number of seconds that you would like to set each slide to transition. Default is set to off.
- 3) Transition Speed - Set transition speed to slow, normal, or fast.
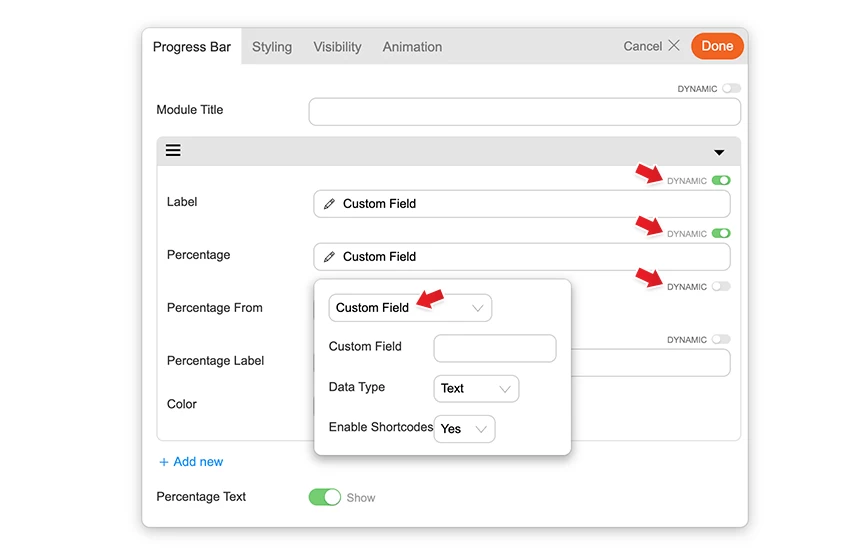
Builder Pro Dynamic
You can use Builder Pro to display addon fields dynamically. Once you have Builder Pro activated, you will see a "Dynamic" toggle button on each field. NOTE: Some fields might not have the "Dynamic" feature if it is unavailable or incompatible. With the dynamic feature, you can display field data from post metadata, shortcodes, custom fields, and other fields created with plugins such as Post Type Builder and Advanced Custom Fields. Refer to Builder Pro Documentation for more information.