WooCommerce
Installing Builder Addons
Required: Builder Addons require the Themify Builder. You can use it with either any Themify theme or the Builder plugin.
Installing Builder Addons is exactly the same as installing WordPress plugins.
To install the addon:
- Firstly, download the addon zip file from the link provided in your Themify Member Area.
- NOTE: some browsers (eg. Safari) auto extract zip files automatically. Right-click on the download link and select "Save Linked File As" and it will allow you to download as a zip file.
- Login to your site's admin area.
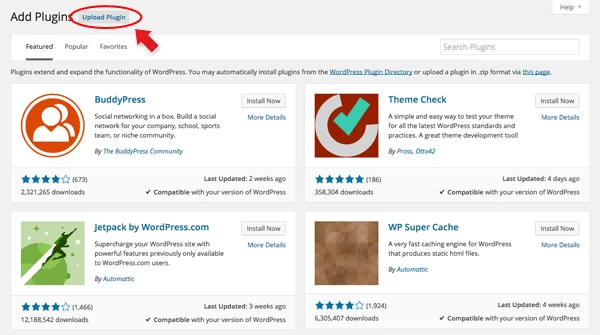
- Navigate to WP Admin > Plugins > Add New.
- Now, click the "Upload Plugin" link.
- Select "Browse" and navigate to the plugin zip file which you downloaded in the first step and then select the "Install Now" button.
- This will initiate the plugin installation process, and once finished, you can then activate the plugin.
Importing the addon demo layout
Each addon zip file contains a sample Builder data file which you can import to your site. It helps you to understand how the addon demo is created.
To import the addon demo data:
- First, extract addon zip file to your local computer
- You should have a folder of the addon. Inside there is a folder named "sample", and inside that folder there is a Builder data file in a zip format (eg. "addon_name_sample-builder-layout.zip").
- To import the Builder layout, login to admin and then go to the page frontend where you want to import the Builder layout. From the top admin bar > select Themify Builder > Import / Export > Import, upload the sample zip file.
Using the Woo Products Addon
Note: You need to have the WooCommerce Plugin activated on your site and published products and product categories to use Builder WooCommerce addon. This addon includes 2 modules: Woo Products and Product Categories.
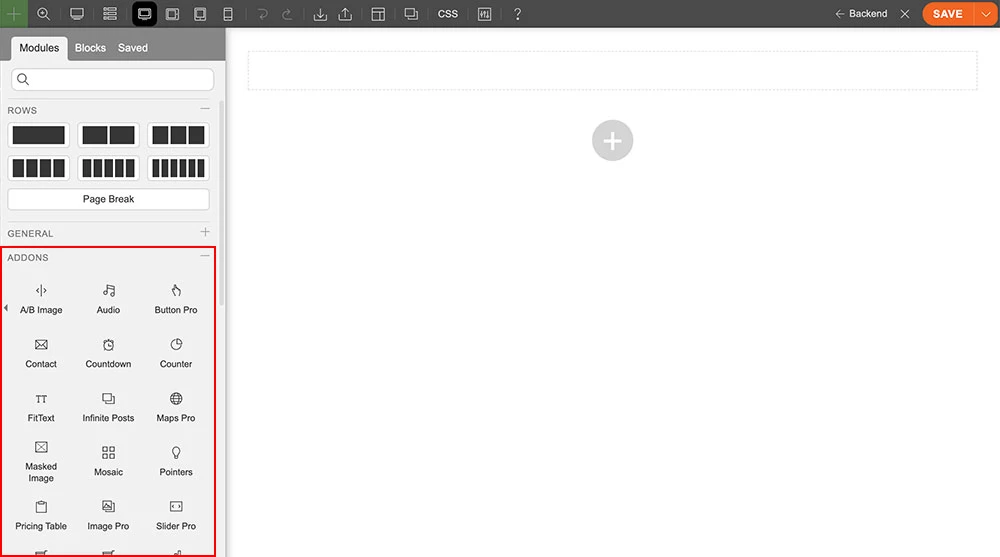
- Create or edit any page and turn on the Builder.
- You will see the Woo Products and Product Categories module in the module panel, under the "Addons" section.
- Drag and drop a Woo Products module in a row
- 1) Module Title = Insert the module title that will appear at the top of the module. It will appear aligned to the left, upper-case, in H3 format.
- 2) Type = Choose which type of product you would like to showcase.
- 3) Category = Choose which category you would like to showcase.
- 4) Parent Category Product Only = Choose to display parent category only.
- 5) Hide Free Products = You can choose whether to hide free products offered or not. If you don't have any free products, disregard this.
- 6) Out of Stock Products = You can choose whether to hide out-of-stock products or not.
- 7) Limit = Input the number of products you would like to show.
- 8) Offset = Input the number of products to displace or skip. The main purpose of this is to avoid showing the same products on multiple rows.
- 9) Order By = Choose the order of your products, either by date, price, sales, ID, title, or random. The title will arrange it alphabetically.
- 10) Order = Choose either ascending or descending. Descending will show newer posts first.
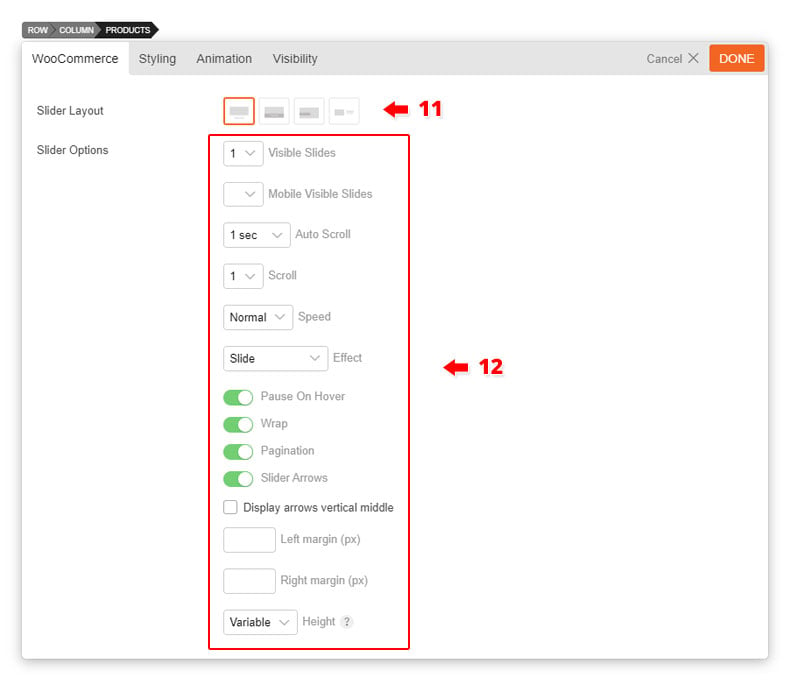
- 11) Display as = Choose to show your products using a slider or list view.

- Slider Layout = Choose 4 different layouts for how you want your products to appear
- 12) Slider Options:
- Visible = Input how many products you want to appear at the same time.
- Auto Scroll = Input the amount of seconds you want the slider to auto-scroll your products, or choose "off" if you don't want auto-scroll.
- Scroll = Choose the number of products that will scroll at a time.
- Speed = Choose how fast you would like the slider to scroll.
- Effect = Choose the effect you would like the slider to use when transitioning products. Options include continuous sliding, fade, or regular slide.
- Pause On Hover = Choose how you want the slider to react when the cursor hovers over an image.
- Wrap = Choose whether you want the slider to continuously loop or stop at the last product posted.
- Show slider pagination = Choose to show the indicator of how many images are in the slider.
- Show slider arrow buttons = This allows users to navigate the slider using arrow buttons that appear on the left and right corners of the image.
- Left & Right margin space between slides = Choose the left and right margin you would like to place on each image. Note: The arrow will remain in the slider container and will not follow the image.
- 13) List Layout = Choose from 6 different layouts for how you want your products to appear.

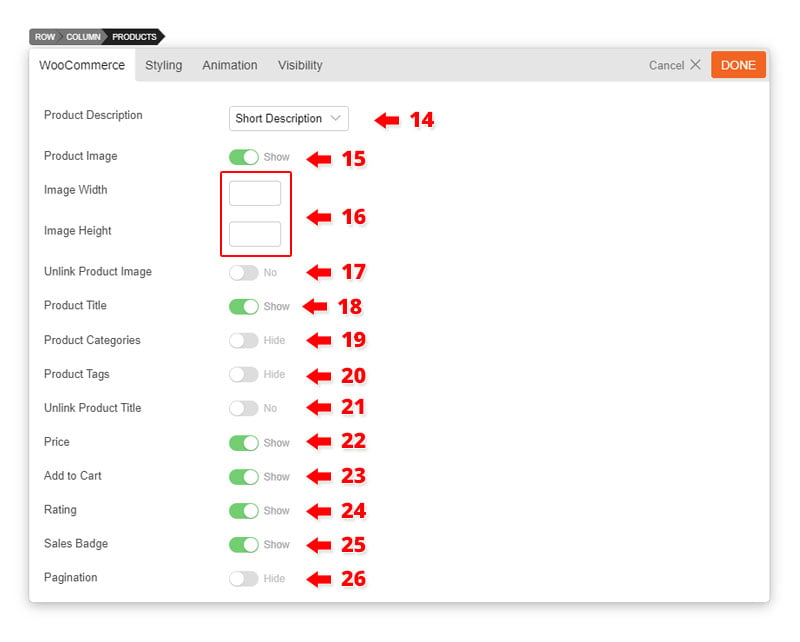
- 14) Product Description = Choose how you want the description of your products to appear.
- 15) Hide Product Image = Choose to either hide or show your product image.
- 16) Image Width & Height = Choose the pixel size of the height and width of your image.
- 17) Unlink Product Image = This allows your product images, when clicked, to automatically redirect users to the product page.
- 18) Product Title = Choose to show or hide the product title. By default, the product title appears at the top of the rating in all caps.
- 19) Product Categories = Choose to show or hide product categories.
- 20) Product Tags = Choose to show or hide product tags.
- 21) Unlink Product Title = Choose to link or unlink the product title. This allows the product title, when clicked, to redirect users to the product page.
- 22) Hide Price = Choose to either hide or show the prices for your products.
- 23) Hide Add To Cart Button = This is the button that appears at the bottom of the price. Choose to show or hide the "Add To Cart" button.
- 24) Hide Rating = The rating consists of stars that are shown at the bottom of the title of the product. Choose to show or hide the rating of the product.
- 25) Hide Sales Badge = Choose to show or hide the sales badge. The sales badge only appears if you've set the product on sale in the admin panel. The placement varies depending on the layout chosen and will appear either on the left or right top corner of the image.
- 26) Pagination = Choose to show or hide the pagination.
Using the Product Categories Module
Note: You can select only one category if you have subcategories for it. If it doesn't have any subcategories, do not select one category as it won't show anything.
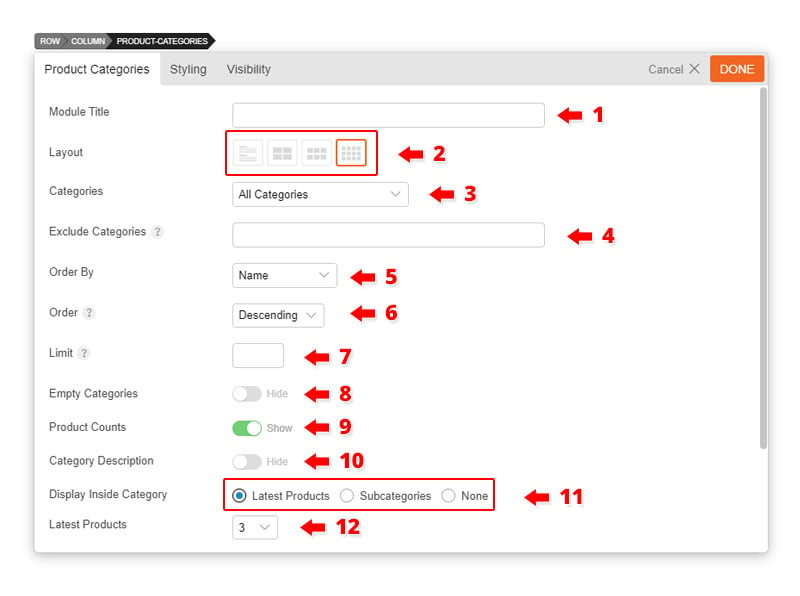
- 1) Module Title = Insert the module title that will appear at the top of the module. It will appear aligned to the left, upper-case, in H3 format.
- 2) Layout = Choose 4 layouts that your categories will appear on your site.
- 3) Categories = Choose "All Categories". Choosing one category will only work if you have subcategories for that particular category.
- 5) Order By = Choose the order of your products, either by date, price, sales, ID, title, or random. The title will arrange it based on the alphebetical order.
- 6) Order = Choose either ascending or descending. Descending will show newer posts first.
- 7) Limit = Enter limit of product you want to display
- 8) Hide Empty Category = Choose if you would like to hide the category or not.
- 9) Show Product Count = Choose if you would like to show or hide the amount of products you have in stock.
- 10) Category Description = Choose if you would like to show or hide the category description
- 11) Display Inside Category = Choose what you want to display on the category (latest product or subcategories)
- 12) Latest Products = Show how many products you would like to appear at the bottom of each category display.
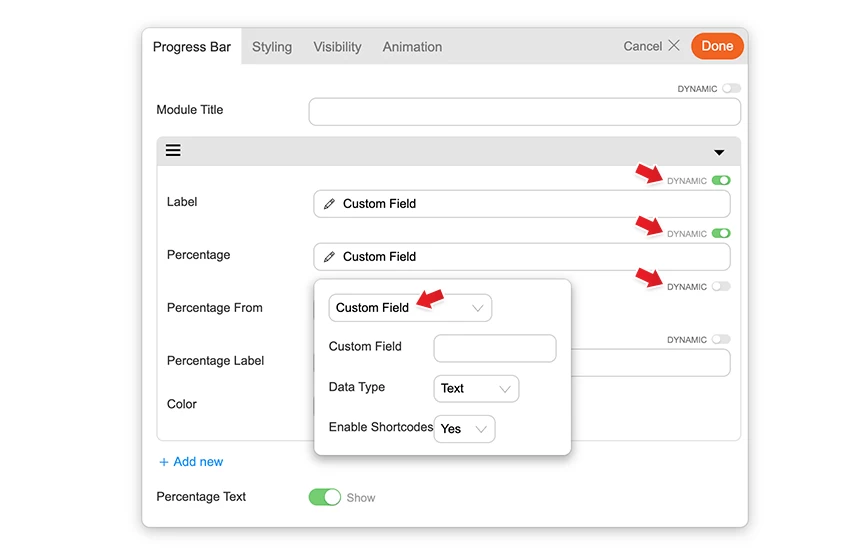
Builder Pro Dynamic
You can use Builder Pro to display addon fields dynamically. Once you have Builder Pro activated, you will see a "Dynamic" toggle button on each field. NOTE: Some fields might not have the "Dynamic" feature if it is unavailable or incompatible. With the dynamic feature, you can display field data from post metadata, shortcodes, custom fields, and other fields created with plugins such as Post Type Builder and Advanced Custom Fields. Refer to Builder Pro Documentation for more information.