
Security in the online world is an important issue today, especially for WordPress as it's the most popular Content Management System (CMS) in the world! Learning how to protect your WordPress site from malicious attackers is important yet easily done with helpful plugins to take care of just that.
WordFence Security is a great and popular option when it comes to security plugins. It helps keep your website protected from malware, DDoS (Distributed Denial of Service) attacks, and hacking attempts. The plugin has a premium version but we will focus on the free version for this guide.
You can download WordFence here, or install it within the WordPress plugins area.
How to Install WordFence
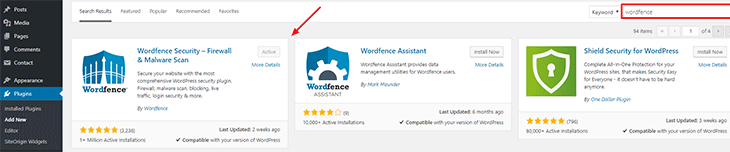
You can install the plugin by going to the WordPress Admin panel > Plugins > Add New, then in the search field input 'wordfence' then install and activate the plugin.
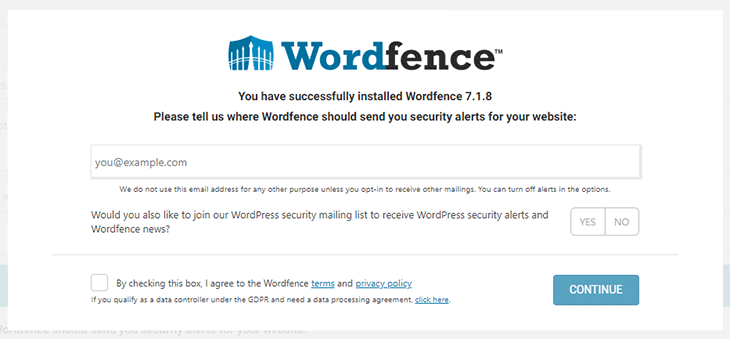
After WordFence has been activated, there will be a new menu item added to the WordPress admin panel called WordFence and there will be a popup requesting you to add your email address. This will be used to notify you about any possible threats and changes that may need your attention. This cannot be skipped as it is important to be updated on what happens on your website.
It may also ask you for a premium key, which you can add if you have one available but you can skip that and use the plugin for free.
That is all there is to installing WordFence.
Firewall Setup
Now, we can setup the WordFence firewall via the WordPress admin panel > WordFence > FireWall > Manage FireWall.
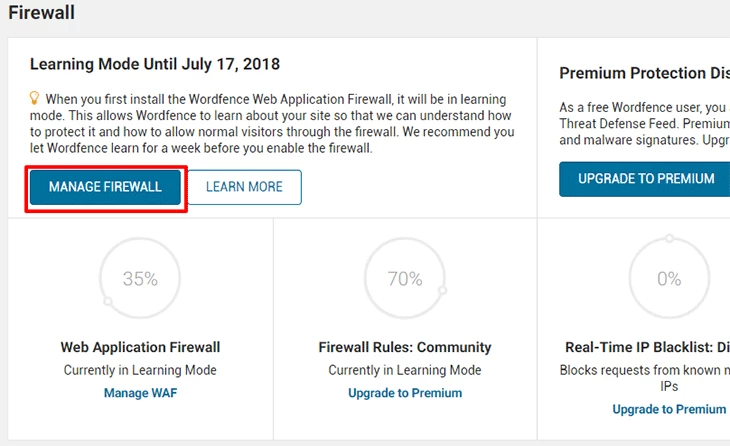
Once you have clicked Manage Firewall, you will then be able to optimize your firewall using the 'OPTIMIZE THE WORDFENCE FIREWALL ' button.
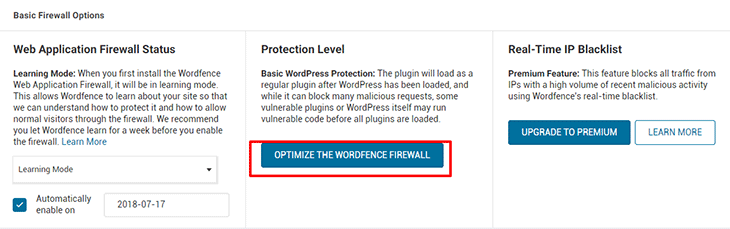
Now, a new popup should appear asking you to download a copy of your .htaccess file. Go ahead and download the file as it is a great precaution in case something goes wrong.
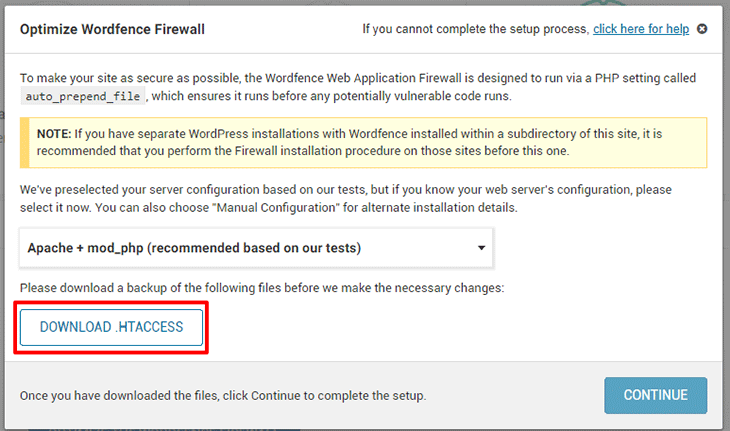
After downloading the file click Continue, and the firewall will be ready to go.
Run a Scan
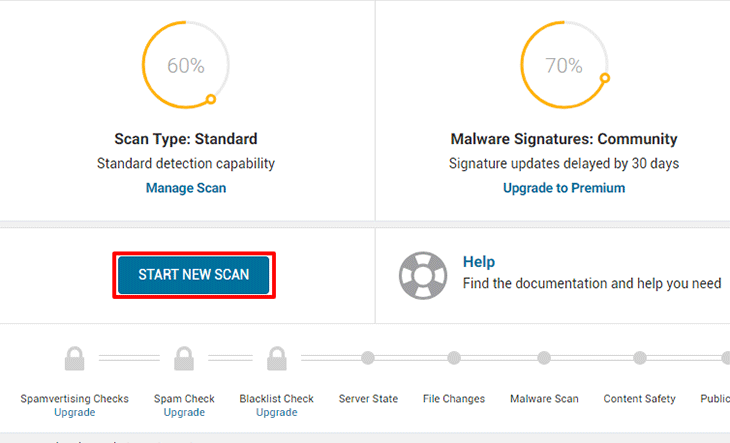
For the final step, we can run a simple scan to ensure that the plugin works. So simply go to Wordfence > Scan and click 'START NEW SCAN' . The scan should be complete in a few minutes.
That is all there is to it! WordFence is now up and running and your WordPress site is now protected.
We hope you are all enjoying our tutorial series as there are still many more to come. Look out for our next one on setting up automatic backups. Now go on out there and get protected!
August 10, 2018 @ 3:33 pm
Hi personally I would rather recommend Shield, but I often use them both. Wordfence lets you scan your files and delete them if they are marked as ‘suspended’.
By default in Wordfence an option called ‘liver traffic’ is turned on. You better turn this off because you don’t need it and it slows down your website performance dramatically.
August 20, 2018 @ 8:07 am
Sorry for the typo. The Wordfence option is called ‘Live traffic’.
August 21, 2018 @ 5:06 pm
Hey Eric,
thanks for your input. Installed Wordfence fot the first time. If it causes no harm I will uncheck Live Traffic.
Regards
Bert-Jan