
If you want full control over your Google Map appearance, custom styling is the best approach. In this tutorial, you will learn how to adjust map element colours in Google Maps Platform and link the style to the Themify Builder Maps or Maps Pro module. The process includes creating a map style, generating a Map ID, and applying it within the Builder. Once connected, your customized map design will display consistently across your website.
-
Login to your Google console account where you have the Map API key entered on Themify panel
-
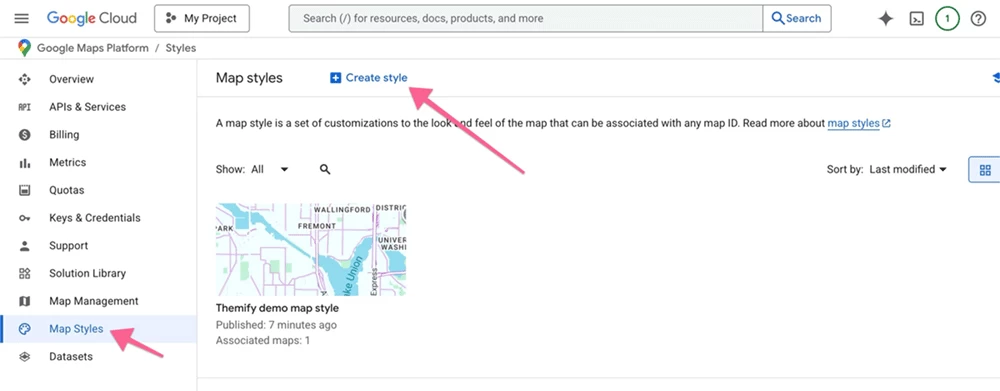
Go to "Google Maps Platform > Map Style", add a new map style if you haven't created one yet.
-
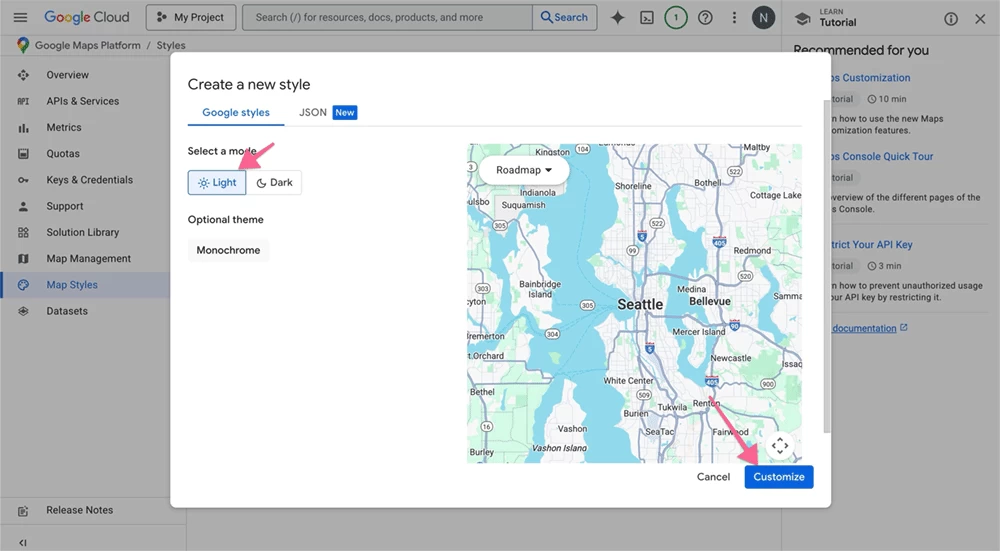
Select light mode and click "Customize"
-
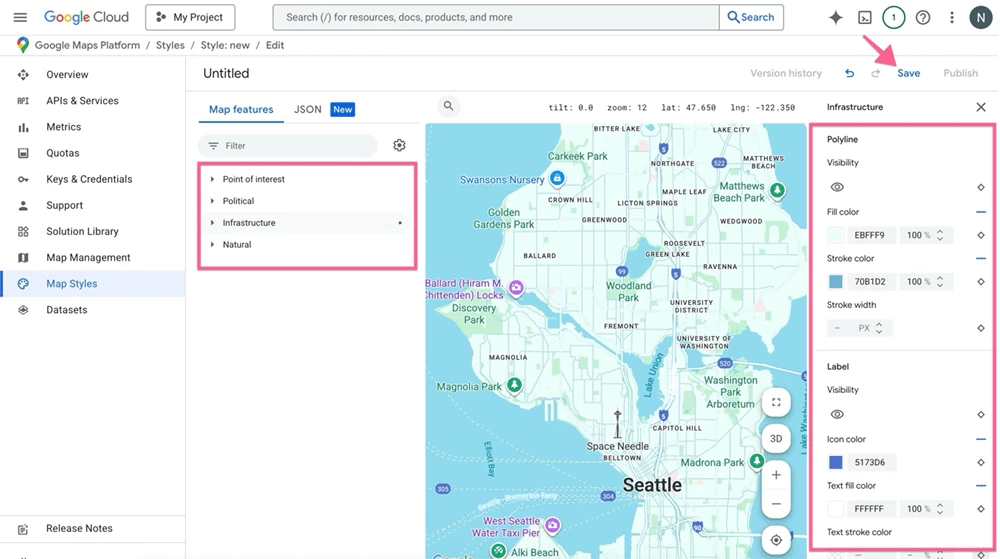
Select the map elements on the left panel and then pick the colours as desired. Save the map style when you are done.
-
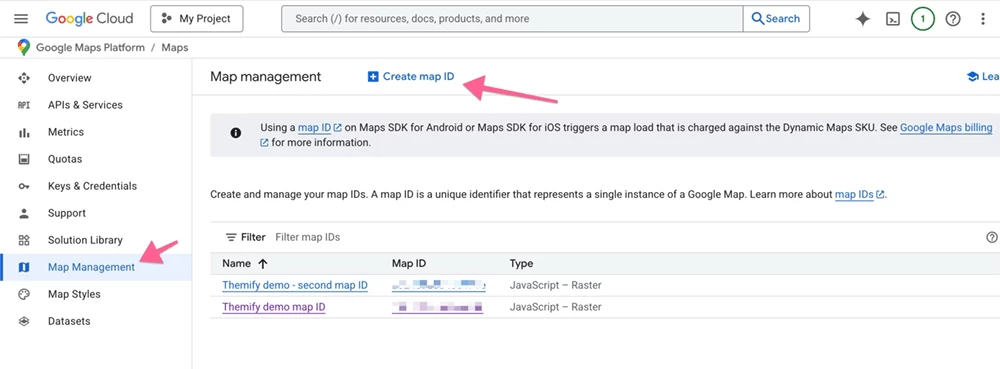
Then go to "Map Management", click "Create map ID" if you don't have a map ID yet.
-
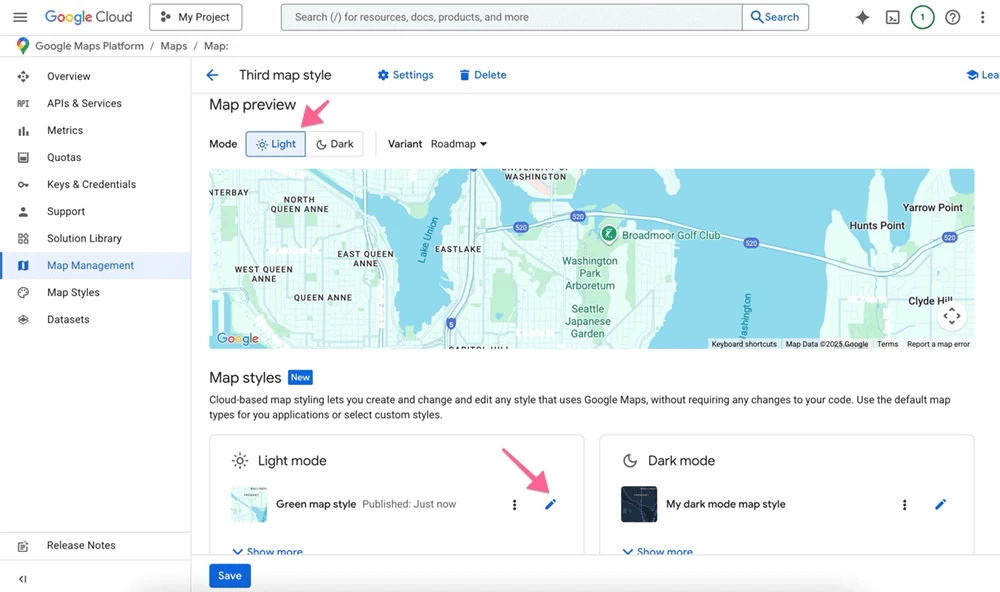
Select light mode and then click the "pencil" icon.
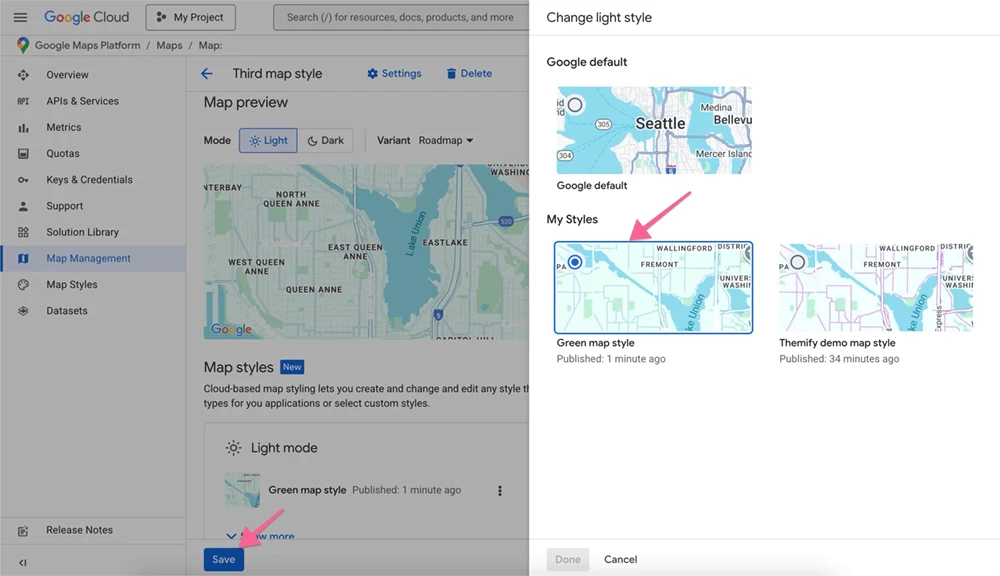
Then select the map style you created previously and click "Save".
-
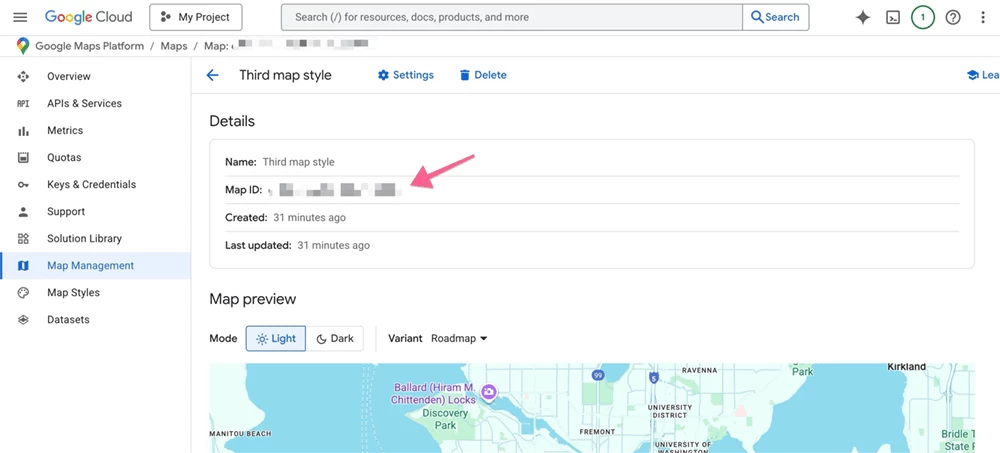
Copy the map ID code (which you will be pasting to Themify Builder > Maps module).
-
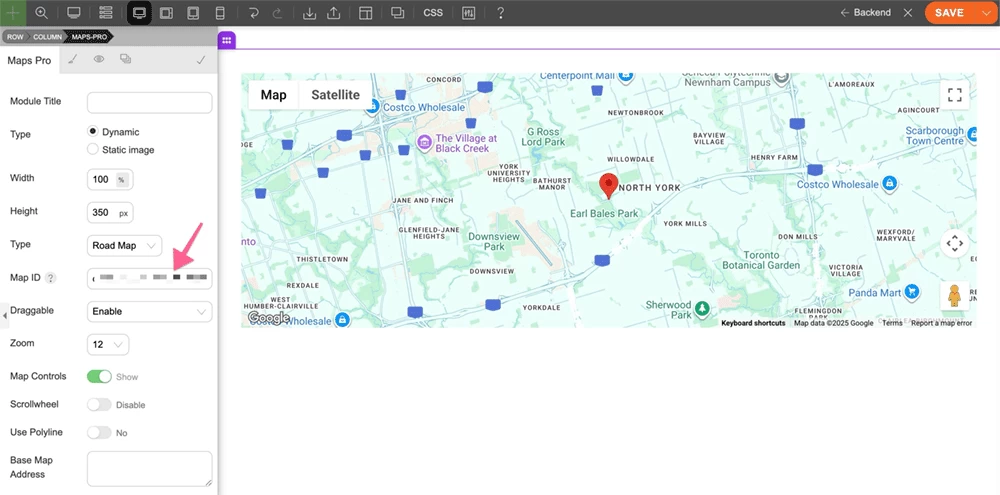
Go to the Builder page where you are using Maps or Maps Pro module, paste in the "Map ID". Your map styling will apply on the map. If you need to change the map element colours, go back to Map Style and edit the style.
March 2, 2026 @ 7:57 pm
Good info, thank you for sharing!