Translating Themes
Themify enables you to translate each theme into different languages without the need to edit the template files directly. This can be achieved using the free Poedit software or translation plugins like Loco Translate. Alternatively, you can opt for the premium WPML plugin if you require more advanced features such as translating custom types, taxonomies, and menus.
Option A) Translating with Loco Translate (Free Plugin)
Loco Translate is a free plugin that allows you to translate the text strings from themes and plugins. You can use it to translate the text strings into another language or simply use it to re-word a text.
- Install and activate the Loco Translate plugin
- To translate a theme, go to "Loco Translate > Themes", select the theme that you want to translate. In the following example, we are going to translate "Themify Ultra" theme. Click on "+ New Language"
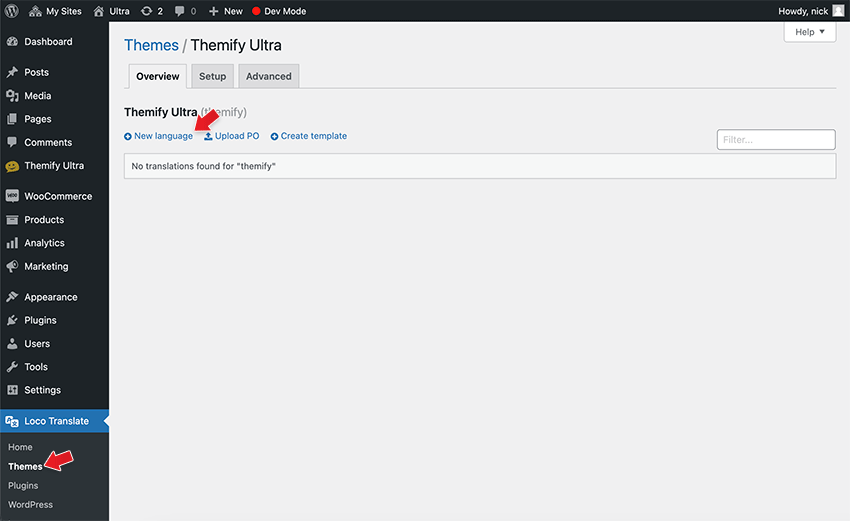
- You'll then see an option where you can "Create a template" or "Skip a template", click "Create a template"
- After creating a template, choose a language that you want to translate to, and click "Start Translating"
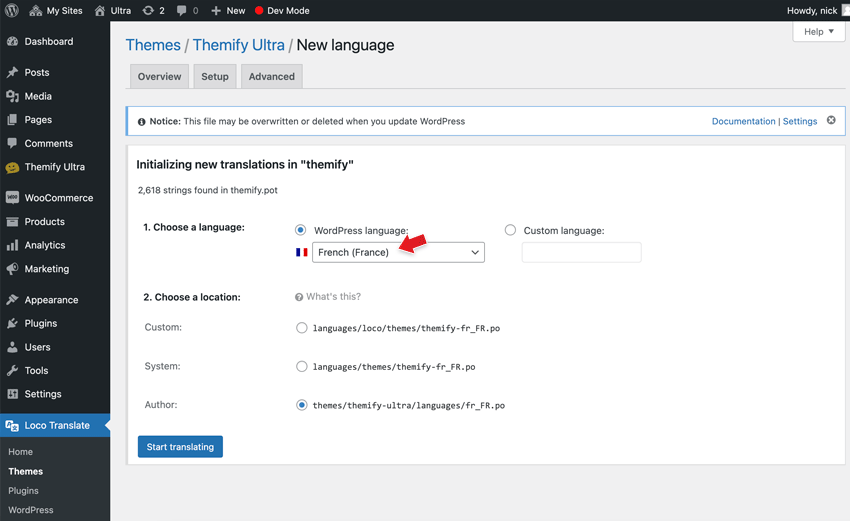
Under "Choose a location" section, you have three options:
- Custom: Do not use, your translation files do not load.
- Author: This puts the translation files inside the theme or plugin you're translating. This works, however there's a risk that these files may be lost after you upgrade said theme/plugin.
- System: This puts the translation files under global translations directory (under wp-content/languages in your WordPress installation) which is the best choice. Make sure to select this one.
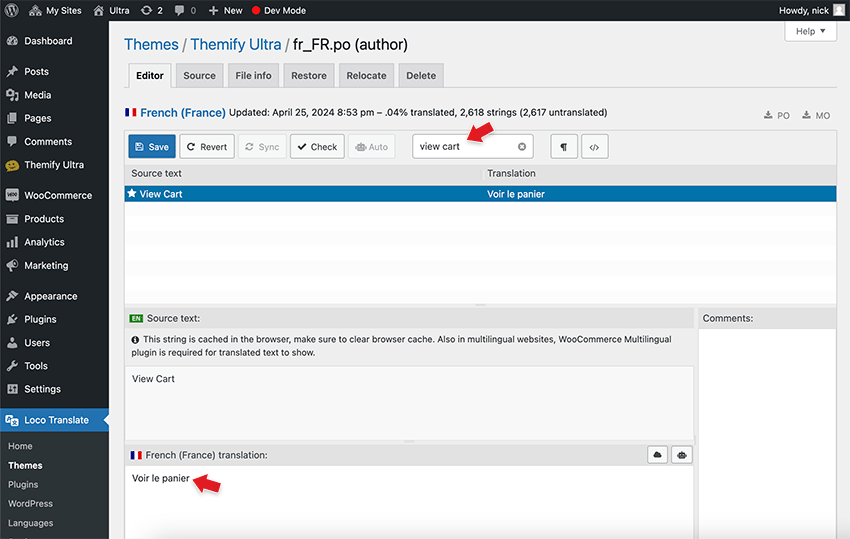
- Now you will see a list of words available to translate in the theme. Search for the word that you want to translate (eg. search "view cart" text string) and then enter the translated text in the translation textarea. Remember to click "Save" after you are done with the translation.
Missing translation strings
Sometimes you may find yourself unable to locate a particular string that is present in the theme to be in your language files. Commonly this could be due to updating from older versions which would miss the new strings.
To add the missing strings to your translation:
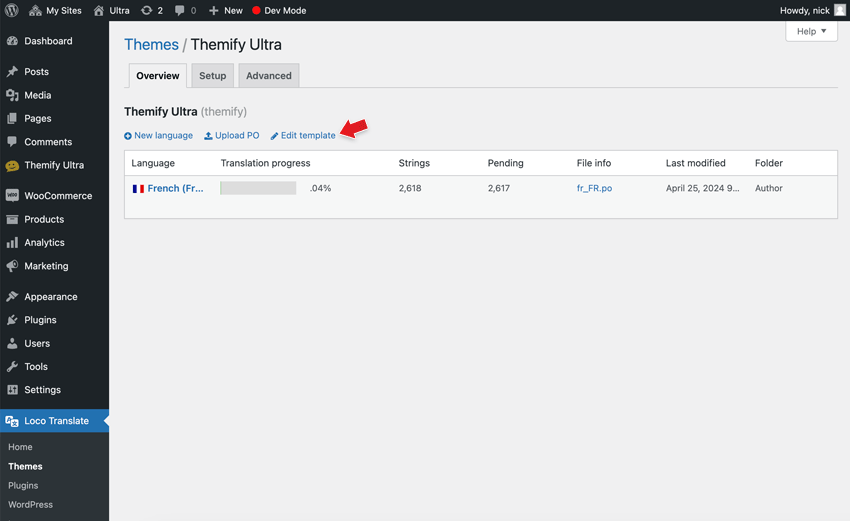
- Go to "LocoTranslate > Theme" and select your theme
- Click "Edit Template". This will refresh the text strings.
Translating Plugins with Loco Translate Plugin
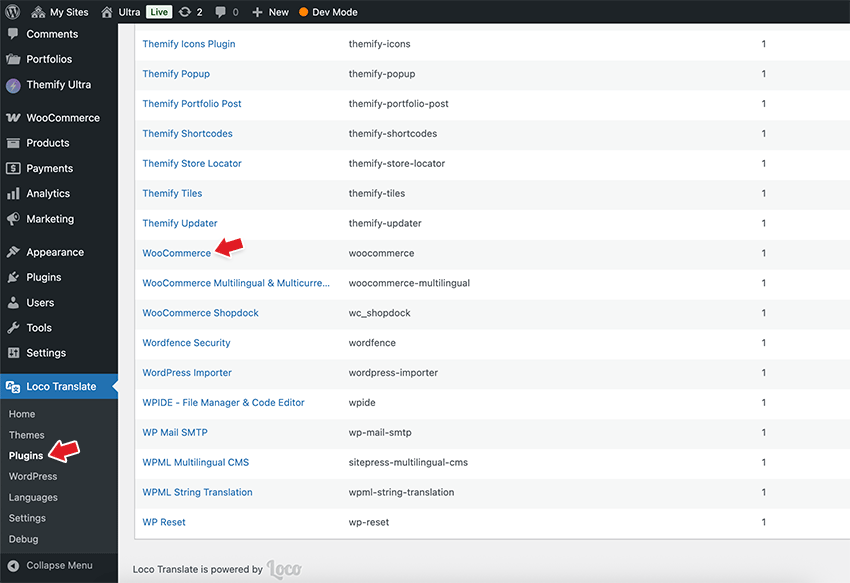
The process of translating plugins is similar to translating themes, as described above. Simply go to "Loco Translate > Plugins", find the plugin, and follow the same steps to translate the plugin’s text strings. For example, if you want to translate the text strings output by the WooCommerce plugin, go to "WooCommerce" and follow the same steps to translate its text strings.
Option B) Translating with the WPML plugin
The WPML plugin is a popular WordPress translator that enables your site visitors to choose the language they prefer to view on your site.
- Install WPML Multilingual CMS plugin. WPML is a premium plugin, so it might ask you for the license key in order to install it.
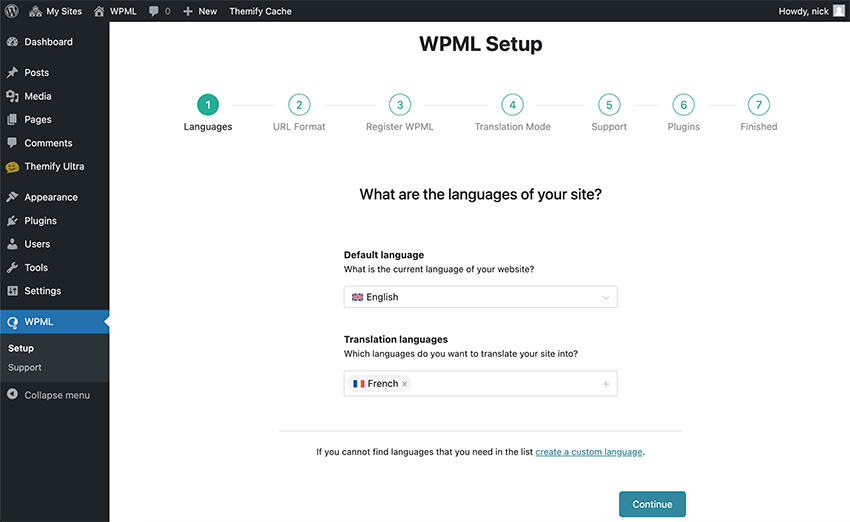
- If you haven't set up the languages yet, navigate to "WPML > Setup", add the language(s) for your site, and follow the WPML setup wizard to complete the process. If prompted to install the "String Translation" component, proceed with the installation.
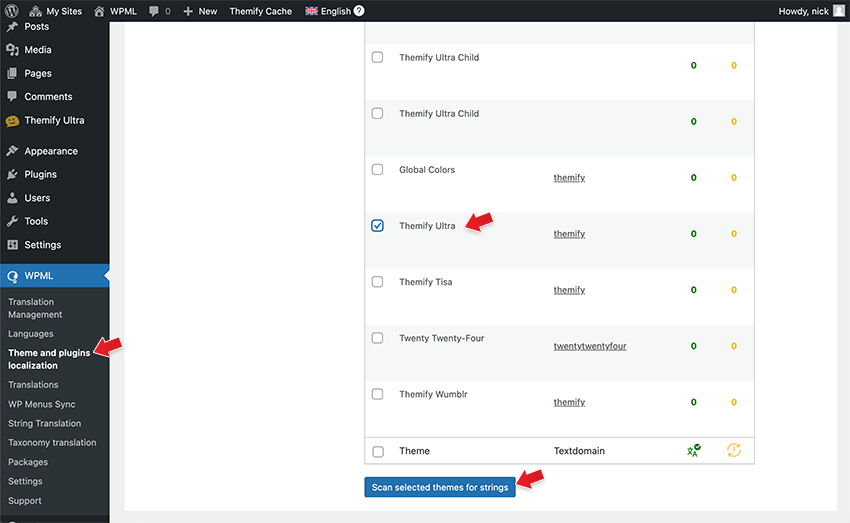
- To translate a theme or plugin, navigate to "WPML > Theme and plugins localization", choose the theme you wish to translate, and then click the "Scan selected themes for strings" button. If you're translating a plugin, scroll down, select the plugin, and click "Scan selected plugins for strings". This process scans all text strings within the chosen themes/plugins, so allow it to run until completion.
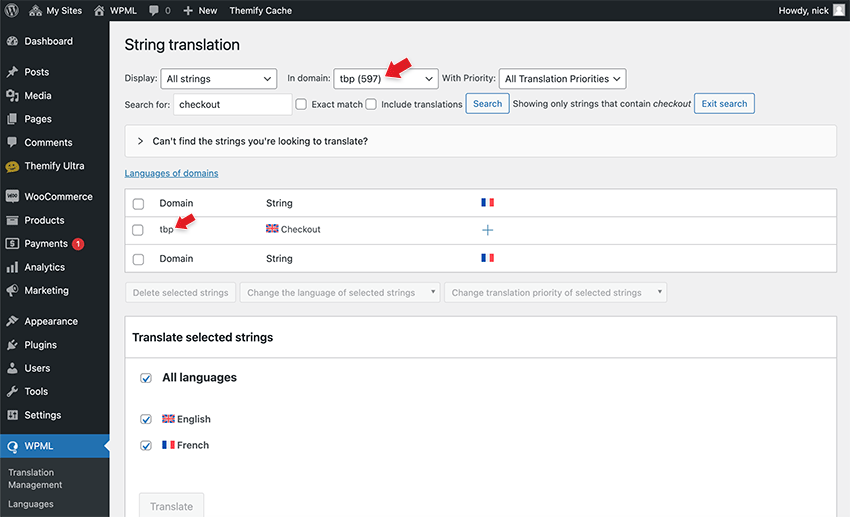
- After WPML scanned the text strings, go to "WPML > String Translation", search for the word that you want to translate in the theme/plugin. For example, if you want to translate the word "Checkout" in Ultra theme, you would search for "checkout", click the "+" icon and enter the translated text.
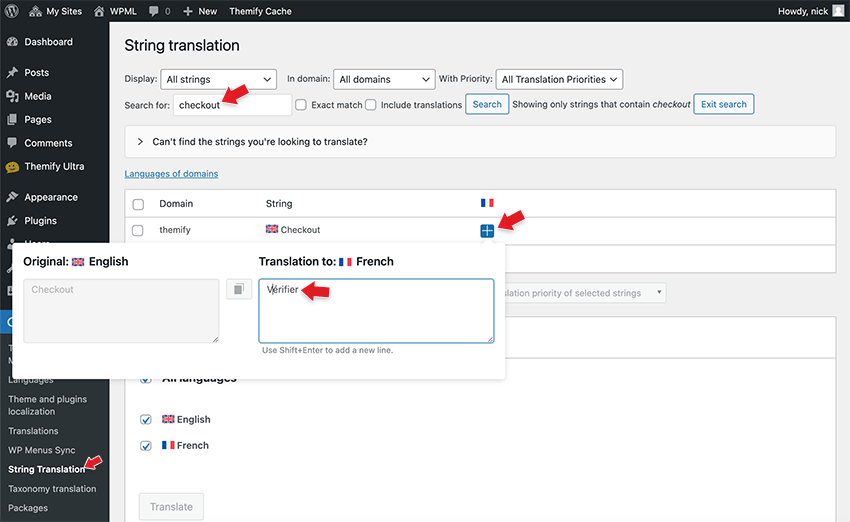
- NOTE:When translating text strings, it is important to know their origin to ensure accurate translation. For instance, the term "checkout" may appear in various themes or plugins, such as the Ultra theme, Builder WooCommerce addon, Themify Builder Pro plugin, and WooCommerce plugin. Each theme and plugin typically has its own unique text domain. For example, all Themify themes utilize the "themify" text domain, while Themify Builder Pro's domain is "tbp". In WPML's "String Translation" section, you can refine your search by selecting the relevant domain. Incorrectly translating the text domain will result in the translation not appearing in the correct location on the live site.
Option C) Translating with Poedit
If you don't have the Poedit software, download and install it first.
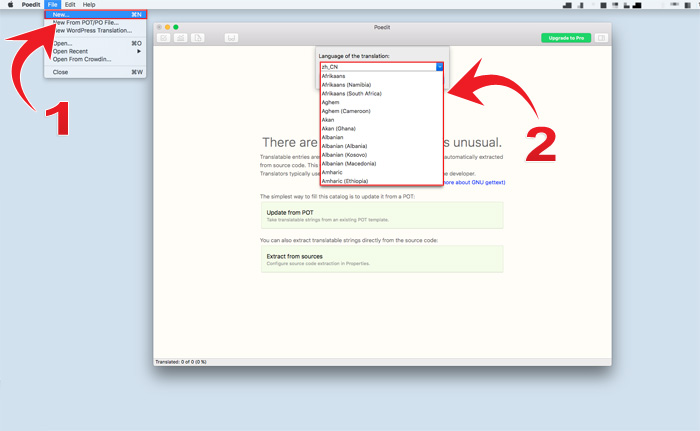
Step 1: Create a new catalog: Start Poedit and go to File > New. You'll then be prompted with the option "Language of the translation". Select the language from the dropdown option panel and select "Ok".
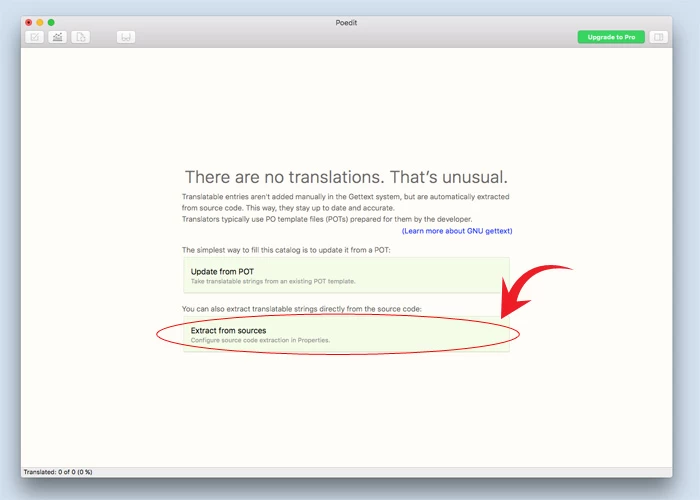
Then save the file on the theme > languages folder. After saving the file click on the "Extract from Sources" option:
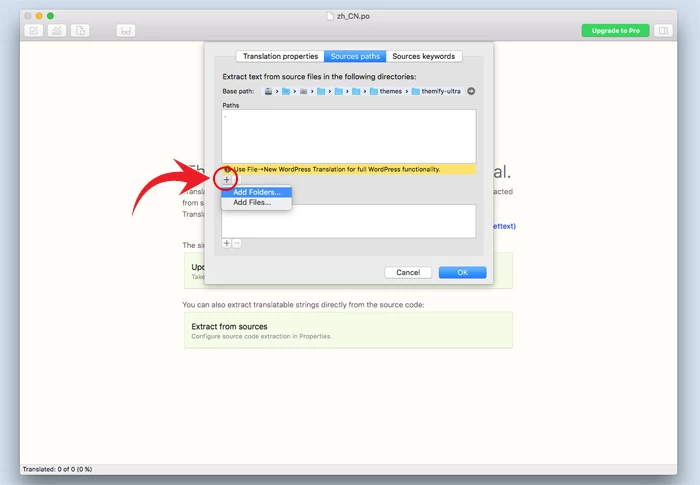
The properties option panel will then open. Click on the "+" sign then "Add folder". Select the theme folder that you're looking to translate (i.e. Themify Ultra).
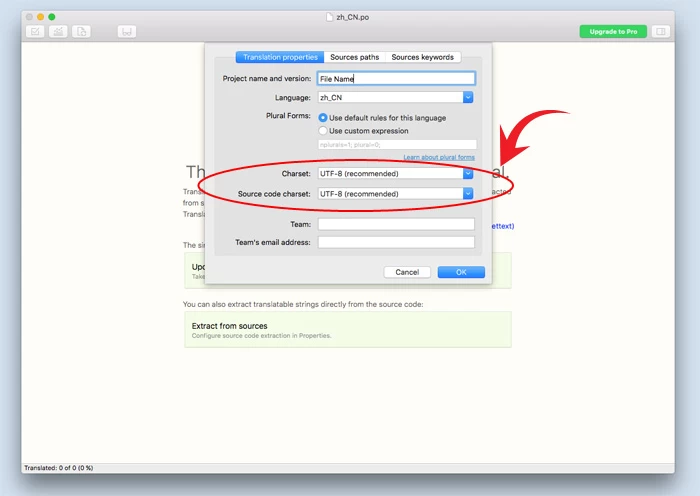
In the Translation properties tab, set the project name and version. You can dismiss most options, but make sure you set the Charset and Source code charset to "UTF-8 (recommended)".
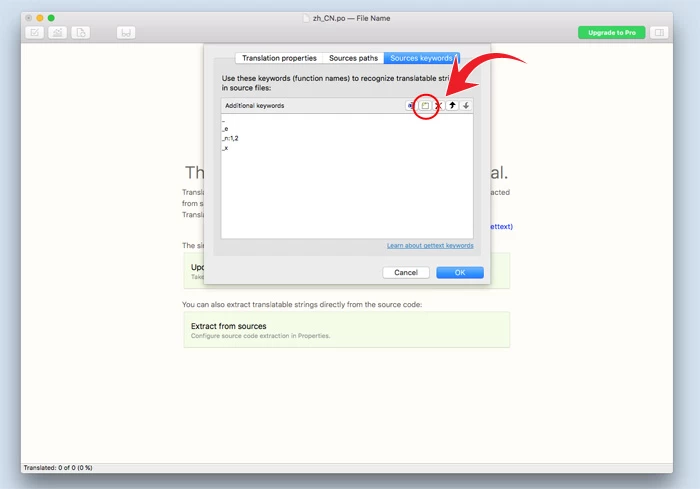
Go to the Sources keywords tab, for each of the following strings, click on New Item and type the characters indicated:
- __
- _e
- _n:1,2
- _x
Note: "__" string is composed of two underscore characters.
Finally click OK and save it in the languages sub-folder in your theme folder. Name the file after your language locale. For example, name it fr_FR for French, es_ES for spanish, pt_BR for brazilian portuguese and so on (read this list for more codes).
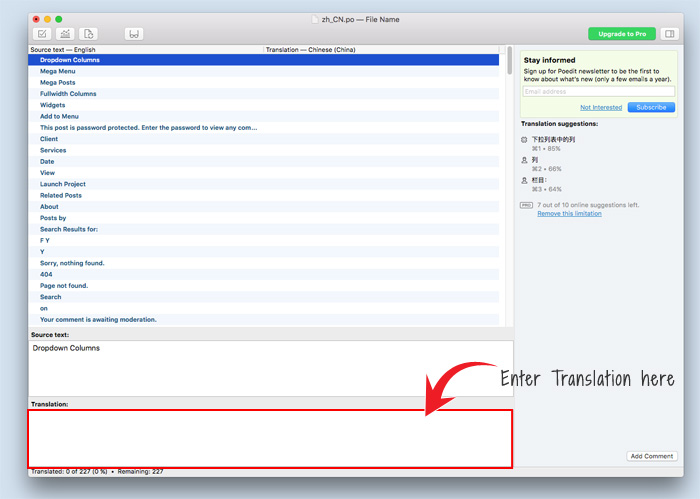
Step 2: Translating strings: After saving, Poedit will pickup all strings available for translation. When it's done, you should see a list of strings (in English) used in the theme. Go through the list and enter the translation text in the lower box. When you are done, click File > Save and Poedit will generate a .mo file (eg. fr_FR.mo) automatically on save. If you don't see the .mo file, go to Poedit > Preferences, under the "Editor" tab, check "Automatically compile .mo file on save".
Step 3: Upload the PO and MO File (if you were working locally) If you were working on a local test server, you'll have to upload the .po and .mo file (generated from Poedit) to the "theme/languages" folder through FTP.