
What is SSL and why do you need it? On today's tutorial series, we'll focus on getting down to the bottom this small but mighty detail. SSL (Secure Sockets Layers) is a set of encryption protocols used to secure users' information and ensures that the data transmitted to a website remains encrypted. Major search engines (such as Google) recommend all sites to have an SSL certificate and favours sites that do by ranking them higher in searches. Now you can probably imagine just how beneficial having an SSL certificate on your site is. Not only would it increase the security on your site, but it would potentially create more visitors because of your higher Google search listing.
On top of this, providing visitors and customers peace of mind when submitting personal information and buying products on your site allows for more trust, less buyer's remorse, and happier clientele. If you have a website that accepts payments, such as an online store, then having an SSL certificate is an absolute must. Typically, you can purchase an SSL certificate via your host provider or from an SSL authority. Here are a few options that you can use to get you started: Symantec, Comodo, and Let’s Encrypt.
Before You Start
Before we begin, check with your host provider on how to install an SSL certificate as every host might be different. Some host providers can also purchase the SSL certificate on your behalf and install it. If they don't provide that service, follow the tutorial below to install an SSL certificate manually.
How to Add an SSL Certificate From Your Host
You can contact an SSL Authority to get an SSL certificate which you can then install onto your website. It will usually be in the form of code. Once you have purchased the certificate, use the code provided and install onto your website. Here's how to install the SSL Certificate:
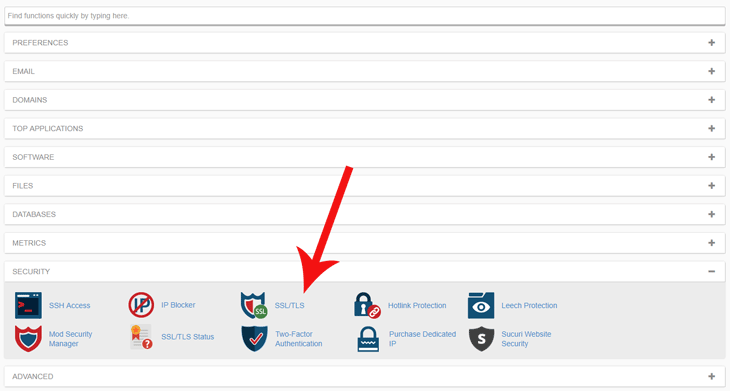
- Login to your site cPanel, then go to SSL/TLS Manager (note that screenshot may vary depending on the host provider).
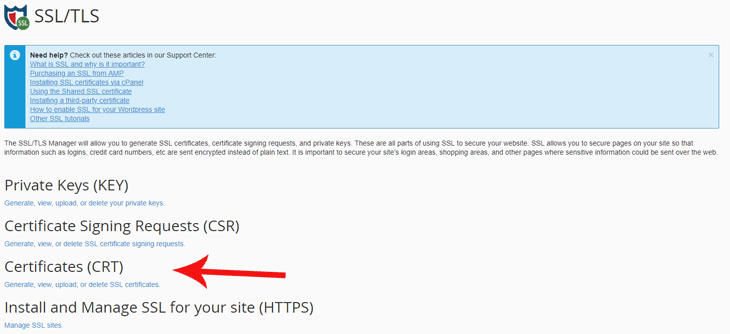
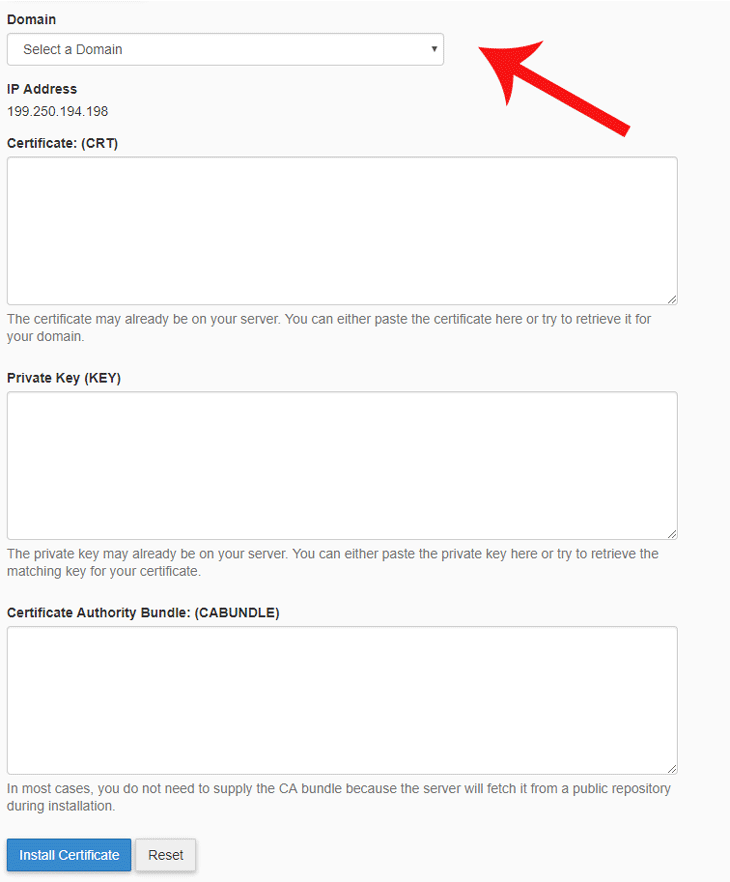
- Select the Certificates (CRT) option.
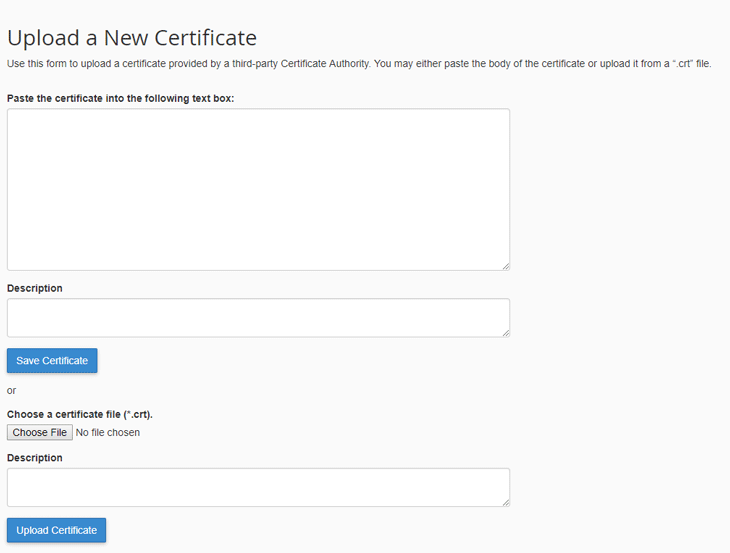
- Scroll down to upload a new certificate and paste your certificate. Or you can use the upload option to add a certificate (.crt) file instead.
- Now we need to activate the SSL certificate, so go back to the SSL/TLS Manager section.
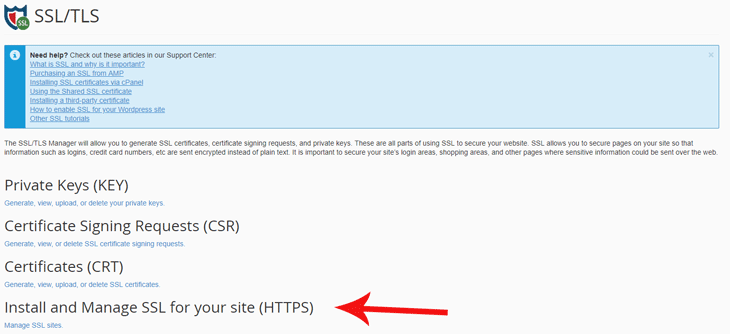
- Select the option Install and Manage SSL for your site (HTTPS).
- Select your domain from the drop down menu then click the Autofill by Domain button.
- Click Install Certificate.
Change the Website URL to HTTPS
After you have the SSL certificate insalled, the next step is to change your website URL to use HTTPS instead of HTTP. Follow the steps below to change your WordPress URL to HTTPS.
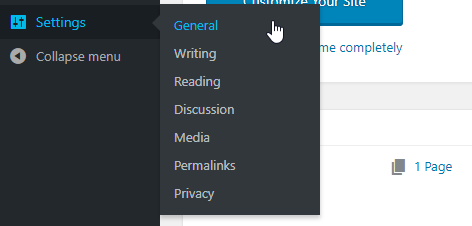
- Login to your WordPress administrator dashboard
- Go to Settings > General
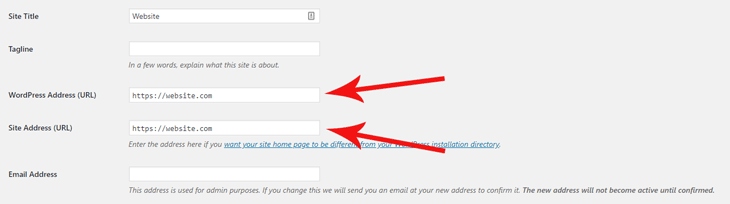
- Change the URL in WordPress Address (URL) and Site Address (URL) from http to https. So, simply add an “s” to http and the result should be “https://website.com”.
- Save the changes
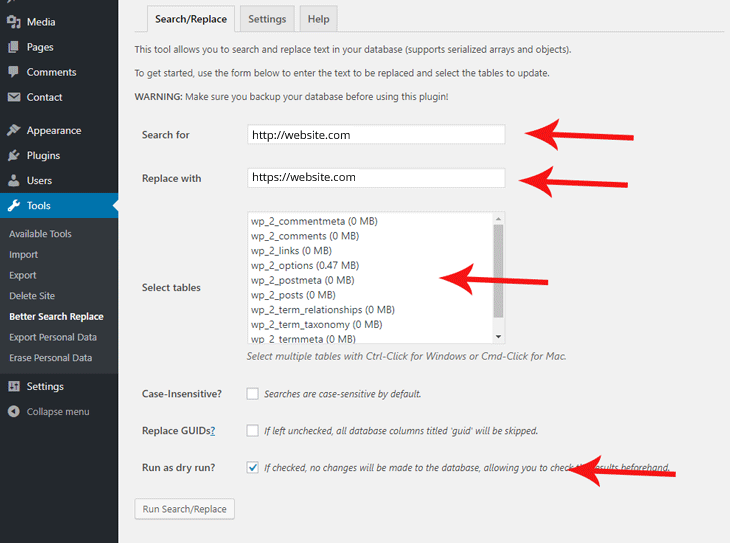
Find & Replace all URLs Using the Better Search Replace Plugin
After your WordPress site URL is done, you then need to replace all the URLs in your content database from HTTP to HTTPS. If you miss this step, it's possible you'll get SSL mixed content error on your site frontend. For example, if you have an image on a page still referencing the HTTP URL, the browser might block it in HTTPS viewing and show an SSL error in the address bar. Therefore it is critical to ensure all files are referencing the HTTPS URL.
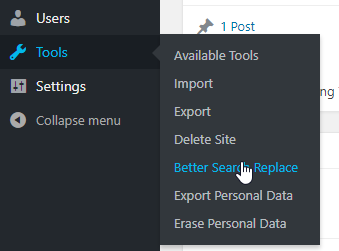
- Install and activate the plugin called Better Search Replace.
- Go to Tools and select Better Search Replace.
- In the "Search for" field, enter your URL (eg. "http://website.com"), then in the "Replace with" field, enter "https://website.com" (basically just add an "s" in the http URL)
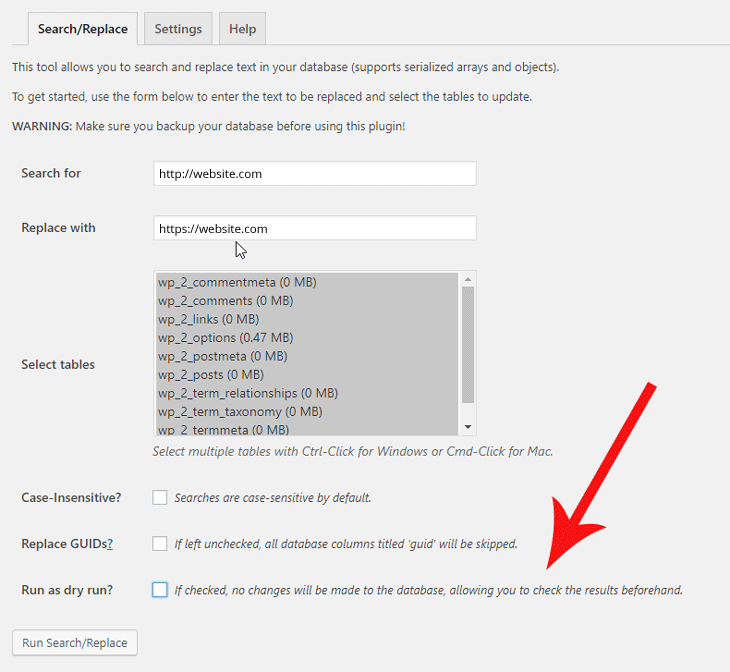
- Select all the tables and enable the checkbox “Run as dry run”. Then click the “Run Search/Replace button”. We want to do a dry/test run to see what the results are and to see if there are any that do not want to complete the replace.
- It will show you the links that will be changed so this way you can see what will be changed in advance, and omit the ones that you want remaining the same.
- If you are comfortable with the changes then you can run it once more but this time uncheck the “Run as dry run” box.
- Once it is completed, a confirmation notification will appear and, just like that, you are finished!
This may be a slightly lengthy process for some, but it is hugely beneficial to have an SSL certificate installed on your website. Not only will you have a more professional appearance, but you can guarantee the safety of your clients and their information. Increasing their trust in your services and ensuring that you have a good track record when it comes to protecting their information is paramount in customer care and service. So why not? Go ahead and start getting SSL'd up!
We hope you've enjoyed this edition of our tutorial series. Let us know in the comments if you found it helpful or if you have a tutorial request as well. Cheers!
January 31, 2019 @ 3:11 pm
Al SSL certificate is a must have for all sites especially WordPress. The good news about an SSL certificate installed is it significantly boosts SEO. Oooooohhhhhh YESSSSSS it does. It provides secure socket layer protection to any domain and WordPress site and builds trust among the target blog reading audience. My site suffered significantly years ago when I didn’t have an SSL certificate installed and saw the reverse of that after installing it. My rankings have improved, revenue, and I wouldn’t go without it. :-)
February 1, 2019 @ 9:42 am
SSL is really required for all site. Now Google officially announced that SEO wise they give priority to the site which implements SSL. This article clearly explains about the significance of SSL and its implementation.
February 9, 2019 @ 6:45 pm
Hi and thanks for the instructions.
Does AutoSSL ~ FreeSSL have a better impact or less impact then Paid one?
Thanks in advance
Josef