
In this week's tutorial series, we'll be discussing staging sites. Every time you wish to change your WordPress website, doing it without a staging site is pretty much a gamble. You would never want a visitor to see your site while it's broken, or while you're implenting and testing out a new plugin. That's pretty much the equivalent of being caught with your pants around your ankles! In any case, having a staging site would be great for everyone.
You may be asking, what exactly is a staging site? Well it's an exact duplicate of your live website but it isn't available for the public to see, and any changes you make have no effect on your live site.
The Benefits of a Staging Site
- Test out new features and updates with zero risk
- The developers can work on bug fixes while the live site is operational
- Reduces the downtime your customers may experience
- Test out WordPress, theme and plugin updates before using them on the live website
Create a Staging Site with Your Host
You can create a staging site by using the built-in staging feature offered by your hosting provider. However, not all hosting providers might have this option, so here is a list of some who do:
You can use the guide assigned to each hosting provider to see how to make a staging site with them.
Creating a Subdomain
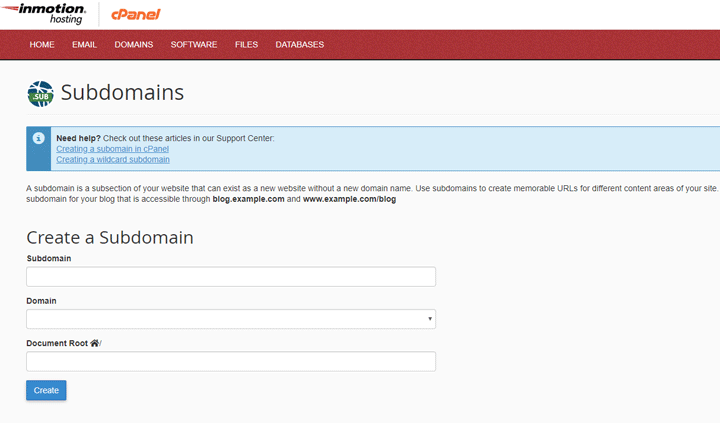
If your host provider does not have staging site feature, you would have to install a new WordPress site on a sub folder/domain. In order to do this, you will have to access your cPanel > Domains > Subdomains and fill out the fields to create your subdomain.
Below is an image of the InMotion cPanel (screenshot may vary depending on different host providers).
Next, we have two options when it comes to duplicating your WordPress site: Duplicator or WP Staging.
Option 1: Using Duplicator
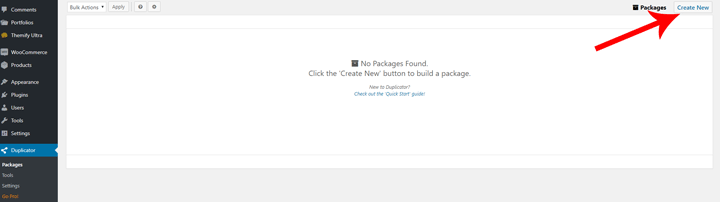
Now, we need to make a duplicate of the website and transfer it to the newly created staging site subdomain. We can use a plugin called Duplicator to do this. You can install the Duplicator plugin then go to Duplicator > Packages from the admin panel and click 'Create New' to create a new package..
After creating the package, you will then have to download the installer and archive files, so that we can upload them to the staging site.

Once you have the files, you will now have to navigate to your staging site that you have created on your host and upload the files. You need to copy the files into an empty folder under the staging site folder.
Note: If you run the installer from the wrong file location then it will rewrite the database information - but the installer is already a backup of your website so it should not cause too much of an issue.
When the files have been copied, in a new tab, visit the URL for the install file (e.g. http://websitename/my-staging-directory/installer.php) and this will have the installer run itself.
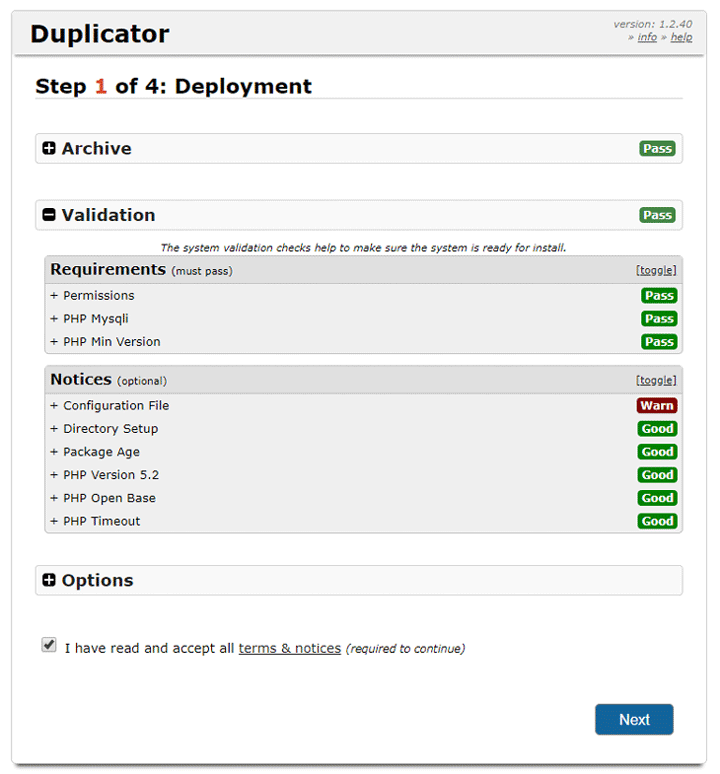
From here, you can continue and click the 'Run Deployment' button to run the installer, which can take some time, so you can leave it to complete. After the wizard has completed, you can then start testing the stage site with whatever experiments you need to have done.
Option 2: Using WP Staging
WP Staging is another plugin option that can be used if the first feels a bit too intimidating. Once, you have installed the WP Staging plugin you can access the cloning feature via WP Staging > Sites/Start from the WordPress admin panel.
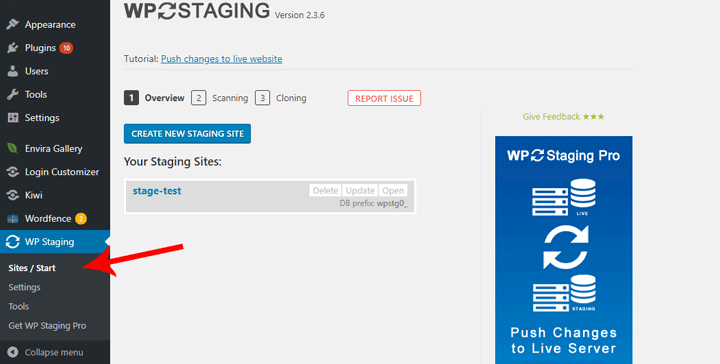
Simply click the 'Create New Staging Site' button to start the cloning process.
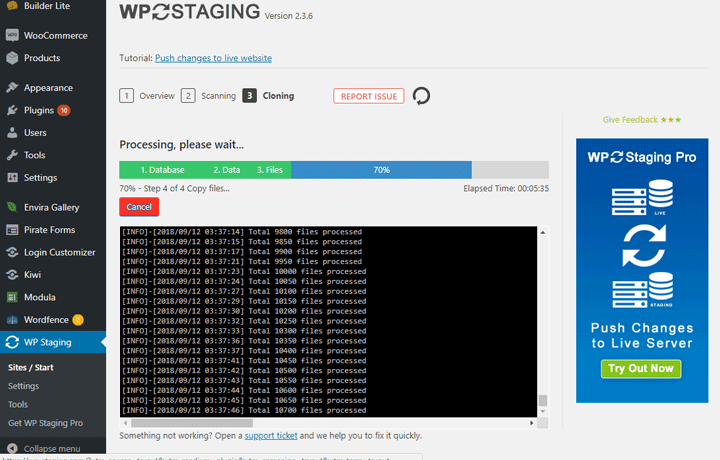
Note: The creation process can take some time as it depends on the resources available to the host that you are using.
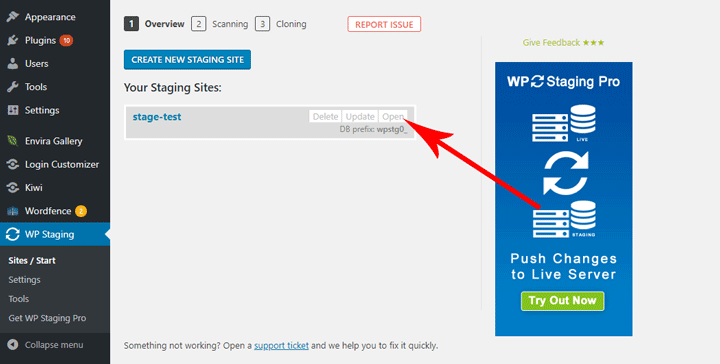
Now, that you have created the clone of your website, you can click the “Open” button to access your new staging site and start making changes to it so that you can run your tests.
And with that, you have created your staging site. Nice work! Now there will be little to no downtime when grooming and perfecting your website for clients and visitors.
We hope you all enjoyed another segment of our basic How-To tutorials. We've still got more to come, so please stay tuned, and as always, enjoy.
December 11, 2018 @ 4:54 am
This’s a good tutorial and I’ve been there. Thanks Themify!
December 11, 2018 @ 5:39 am
Great post – really useful! we can understand How To Make A Staging Site With Duplicator & WP Staging very easily
December 11, 2018 @ 4:09 pm
This article saved me. Thank you!
December 17, 2018 @ 5:52 pm
look good idea, i will try…
December 17, 2018 @ 5:57 pm
this is very helpful and the tutorial is very clear
April 24, 2019 @ 8:03 pm
Hello, does this work with iThemes BackupBuddy?
Cheers.
Denis
April 25, 2019 @ 5:02 pm
Hi Denis,
iThemes BackupBuddy is a premium plugin, so we can’t test it, but it should work fine. Alternatively, you can use the free plugins from our tutorial to backup / duplicate your website!
March 13, 2021 @ 10:38 am
After a successful update test, how do you delete your staging site (with all it’s content and database) and the subdomain the right way? Thanks!
August 21, 2023 @ 5:58 pm
Does the clone option update the main site as you make the changes on the clone?