
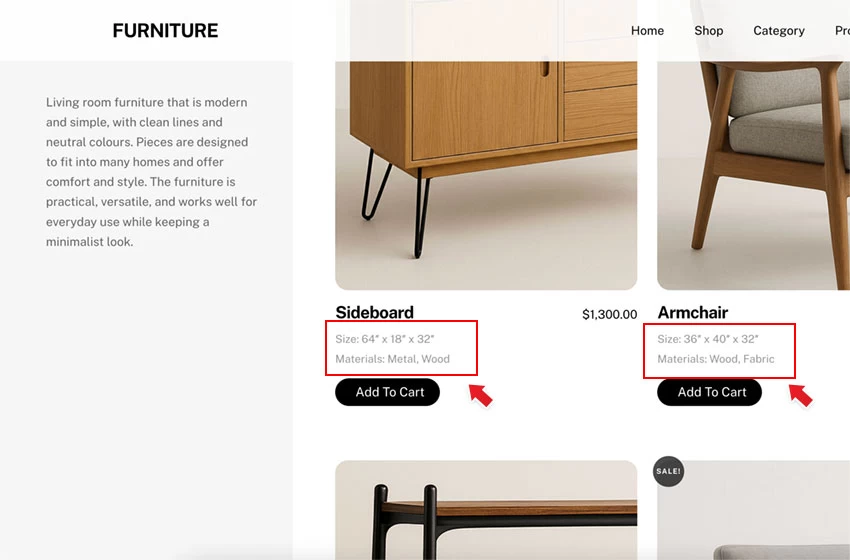
In this tutorial, we’ll guide you through adding custom fields to WooCommerce products using Post Type Builder (PTB) and displaying them dynamically with Builder Pro. To illustrate the process, we’ve prepared a clean, minimalist demo featuring a product page (see example) with a stylish sticky buy button that releases once you reach the related products section. You’ll learn how to add simple text and checkbox fields to show details such as product dimensions and materials—all without any coding, and easy to implement.
Demos
Install the Required Theme and Plugins
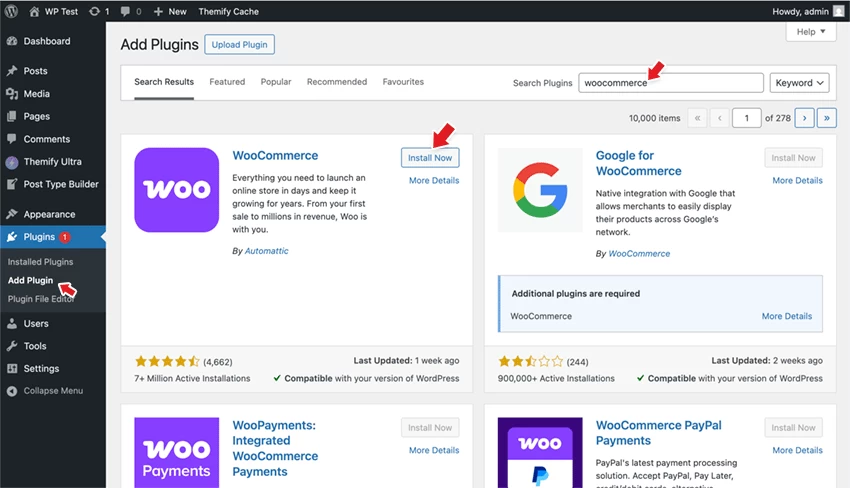
- WooCommerce
- It is a free plugin, which you can install at "wp-admin > Plugins > Add Plugin". Search for the plugin "woocommerce" and install it.
- After you activate the WooCommerce plugin, follow the instructions to set up your store.
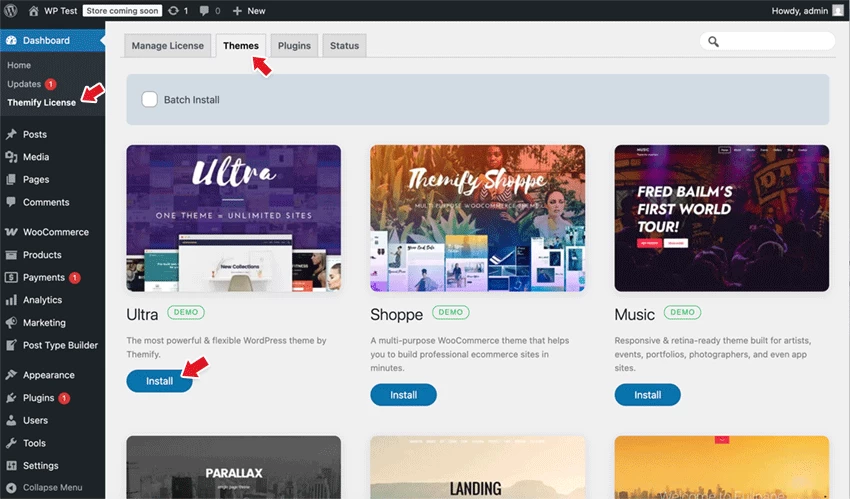
- The following are Themify paid products which are included in Master Club or Lifetime Club membership. If you don't have the membership yet, you can sign up here. If you already have the membership, follow the Themify Updater documentation to install Themify Updater and insert your Themify username and license key. To install Ultra theme, go to "wp-admin > Dashboard > Themify License > Themes", click "Install" under the Ultra theme. Then go to the "Themify License > Plugins" tab to install the PTB and Builder Pro plugin.
Add Custom Fields to WooCommerce Product Post Type with PTB
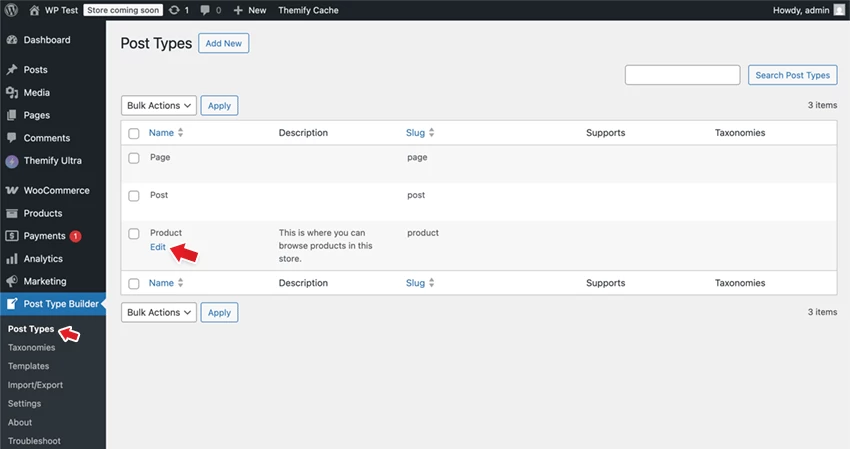
To add custom fields to the "product" post type with PTB:
- Go to "wp-admin > Post Type Builder > Post Type", hover "Product" and click the "Edit" link.
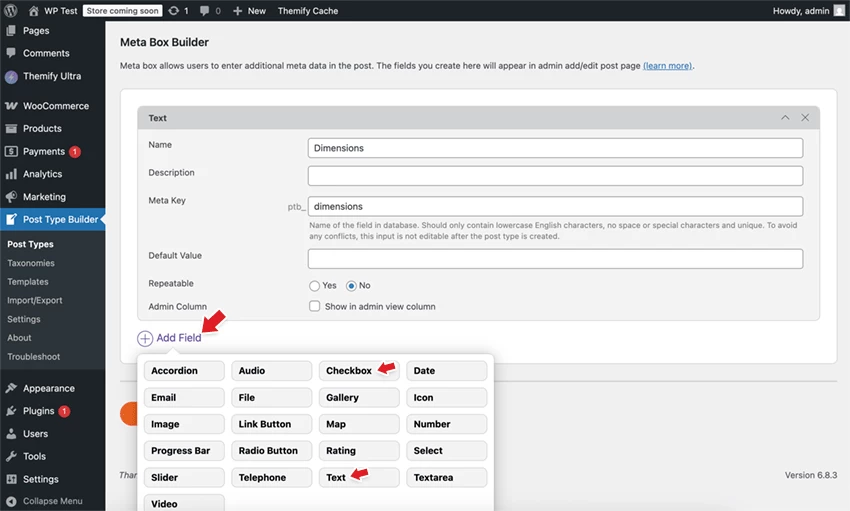
- Hover "Add Field" and select "Text" type, enter "Dimensions" as the field name.
- Then hover "Add Field" and select "Checkbox" type, enter "Materials" as the field name, and add the following checkbox options: "Metal, Wood, Fabric, and Leather".
Add Products
To add WooCommerce products:
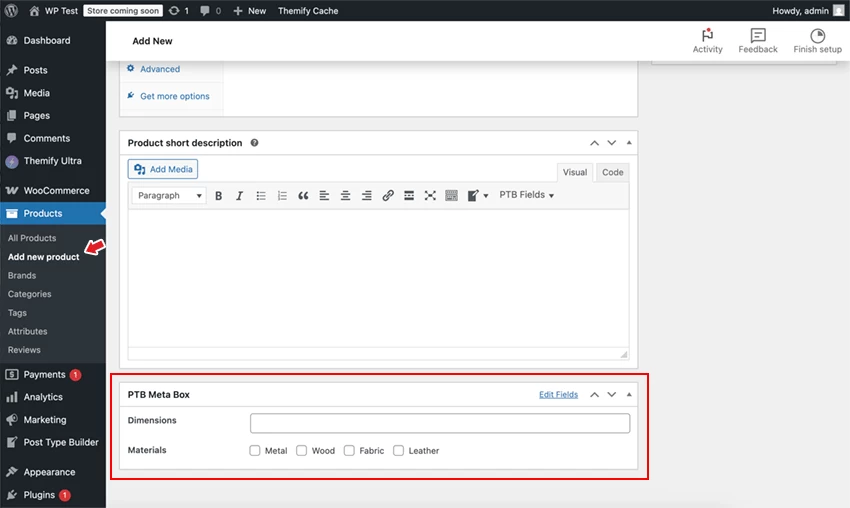
- Go to "wp-admin > Products > Add new product", enter the product name, description, product images, product gallery, price, product category, etc.
- If you scroll down, you will see a meta box "PTB Meta Box", where you can find the extra custom fields you added previously with PTB. Enter the product dimensions and select the product materials.
Import the Tutorial Demo Pro Theme and Content
Now that you have the product and custom fields entered, you will need to use Builder Pro to create the product templates. To make this process easier, we've prepared our demo Pro theme and content data file, which you can import to your site. We recommend importing demo data only on a fresh or test site to avoid interrupting your live site.
To import the Builder Pro theme:
- Download the Builder Pro theme data zip.
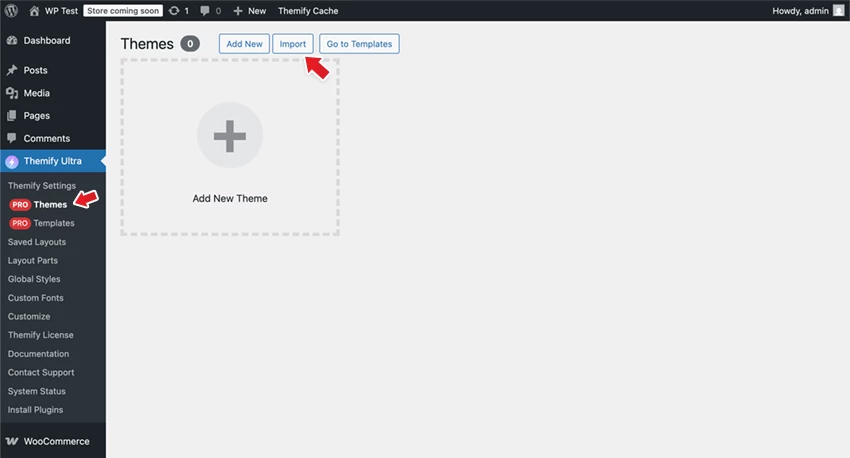
- Go to "wp-admin > Themify > Pro Themes" (make sure you have the Builder Pro plugin activated), click "Import", and then upload the Pro theme data zip you downloaded. Activate the Pro theme after the import.
Import the demo content which consists of the products and the home page:
- Download the WP content XML file (save it as .xml file on your computer).
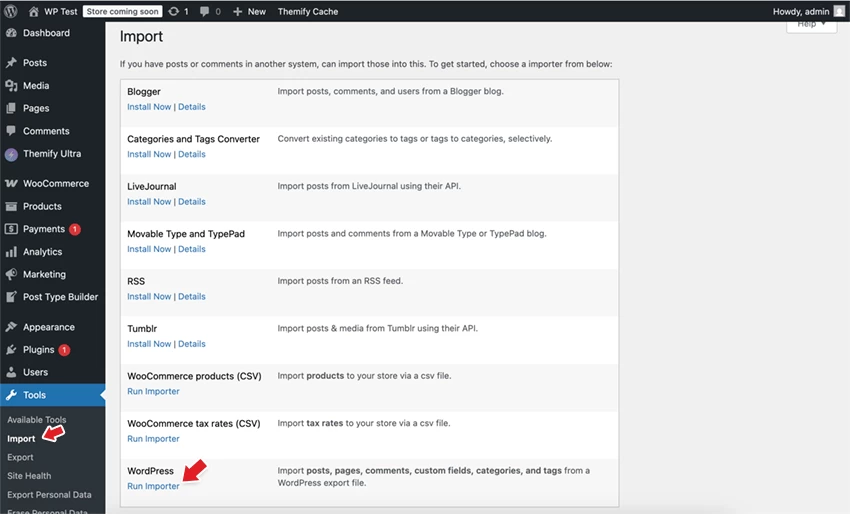
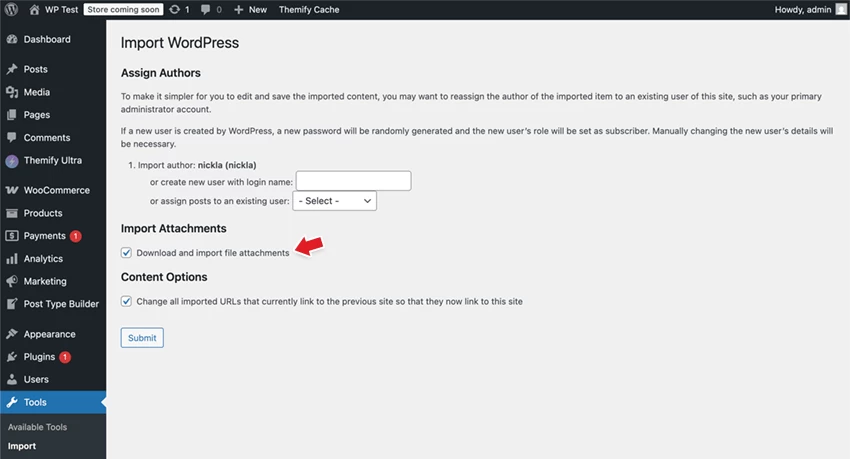
- Go to "wp-admin > Tools > Import", under "WordPress", click "Install Now" if you don't have the importer installed yet. If you have the importer installed, click "Run Importer".
- Upload the XML file you downloaded and click "Upload file and import".
- On the next screen, be sure to select the "Download and import file attachments" checkbox — this will download the demo images.
Display the Custom Fields with Builder Pro
After you successfully import the Pro theme and demo content XML, you should see the shop page, product page, and "Home" page design like our tutorial demo. Now we will explain the key steps on how to display the custom fields with Builder Pro.
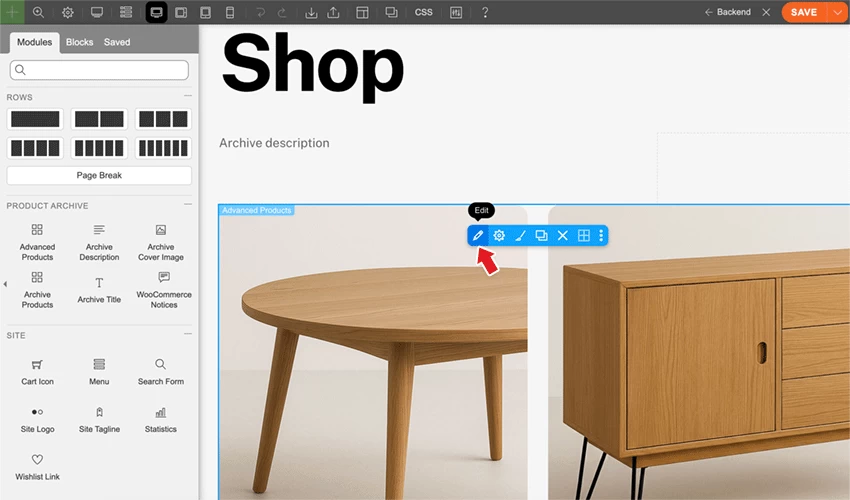
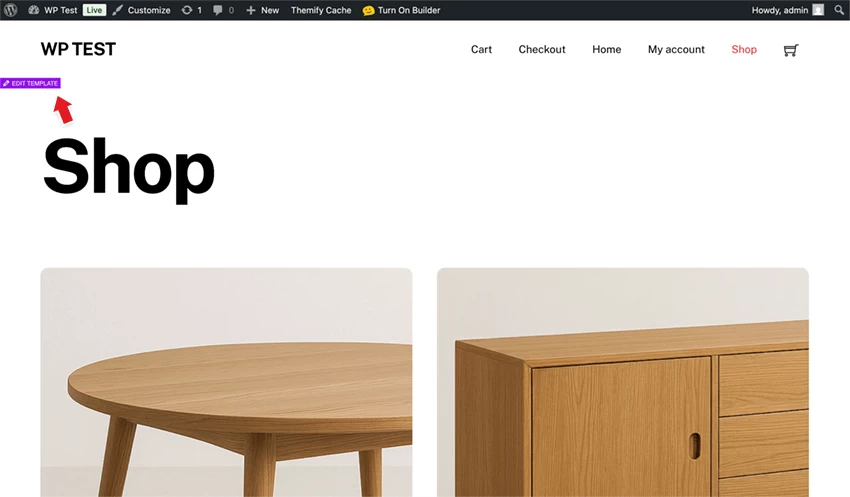
- View the "Shop" page on the frontend, hover the content, then click "Edit Template". You will see the "Archive Title", "Archive Description", and "Advanced Products" module on the template.
- Hover the "Advanced Products" module and click the pencil icon to edit it. Then you will see the following modules: "Product Image", "Product Title", "Product Price", "Add to Cart", and the two "Text" modules where the dynamic custom fields are displayed.
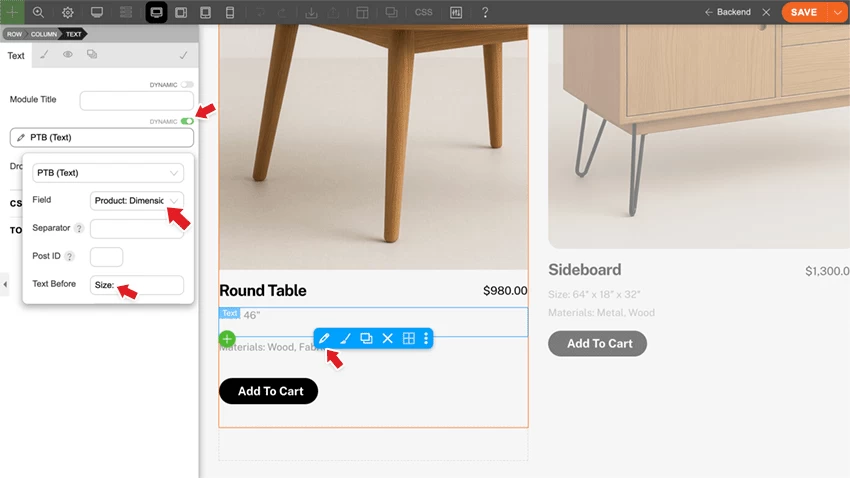
- Edit the "Text" module. Note that the "Dynamic" toggle is enabled and the "Field" is set to the custom field created by PTB. The "Text Before" is optional.
Create Builder Pro Theme & Templates From Scratch
The above step shows how the template displays the dynamic content fields; this step will show you how to create the templates from scratch.
Pro Theme
To create Pro templates, you will need to have a Pro theme created & activated first.
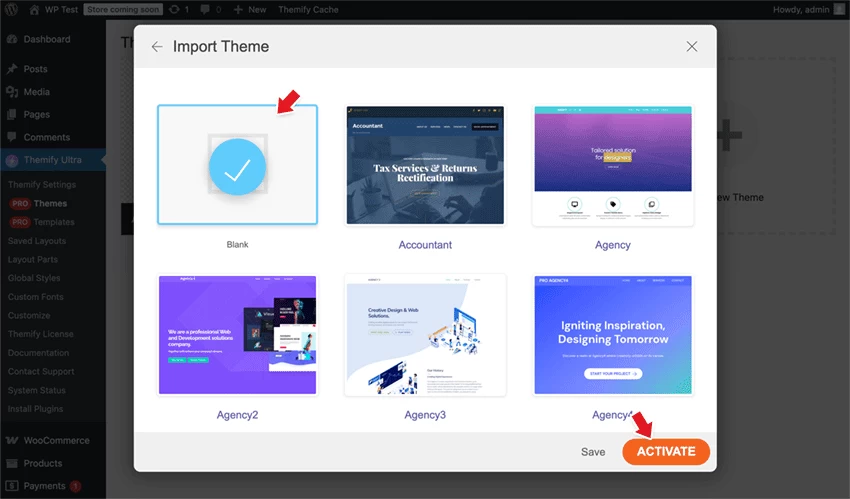
- Go to "wp-admin > Themify > Pro Themes", click "Add New", enter the theme name, upload the optional theme thumbnail, click "Next", select the "Blank" thumbnail, and click "Activate".
Product Archive Template
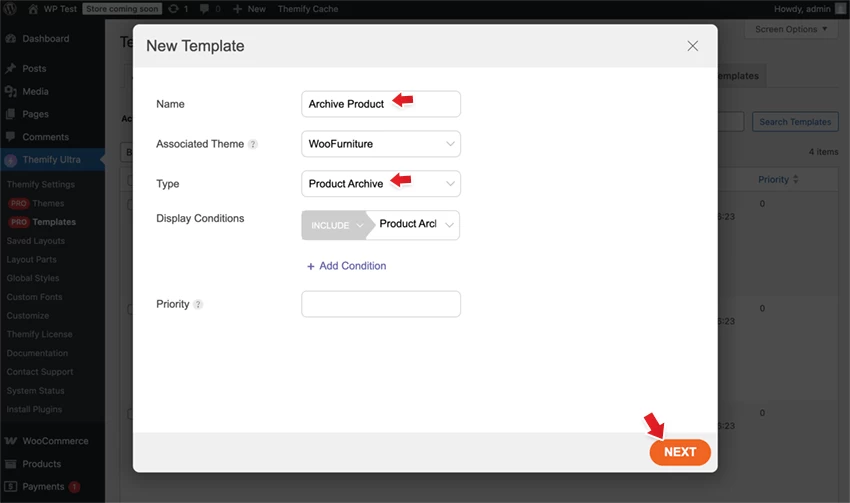
- After a Pro theme is created & activated, go to "wp-admin > Themify > Pro Templates", click "Add New Template".
- Enter the template name (eg. "Archive Product"), select "Type = Product Archive" and click "Next". Select the "Blank" thumbnail and click "Publish".
- Then it will redirect you to the frontend template edit mode. Drop in the "Archive Title" module.

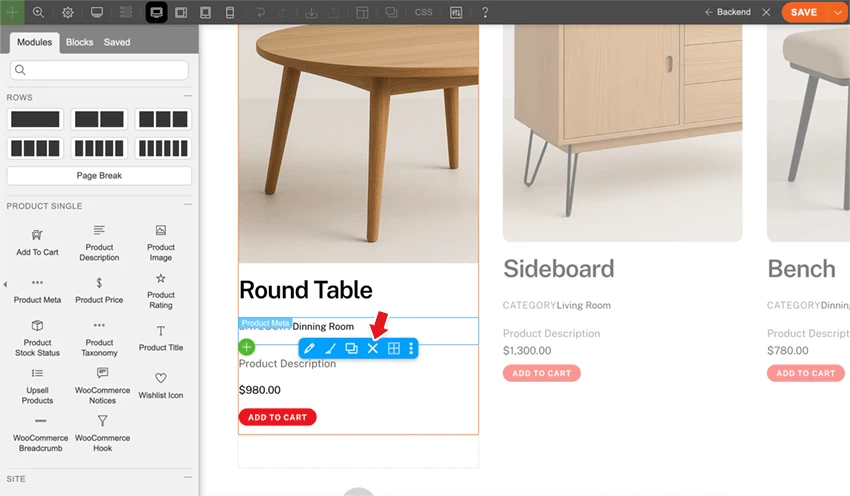
- Then drop in the "Advanced Products" module, click the pencil icon to edit it. You will see a bunch of prefilled modules such as "Product Image", "Product Title", "Product Price", "Product Meta", "Product Description", and "Add to Cart". On our demo, we don't want to show the product meta and description on archive view, so we've deleted them. You can add, remove, and style the modules as desired.
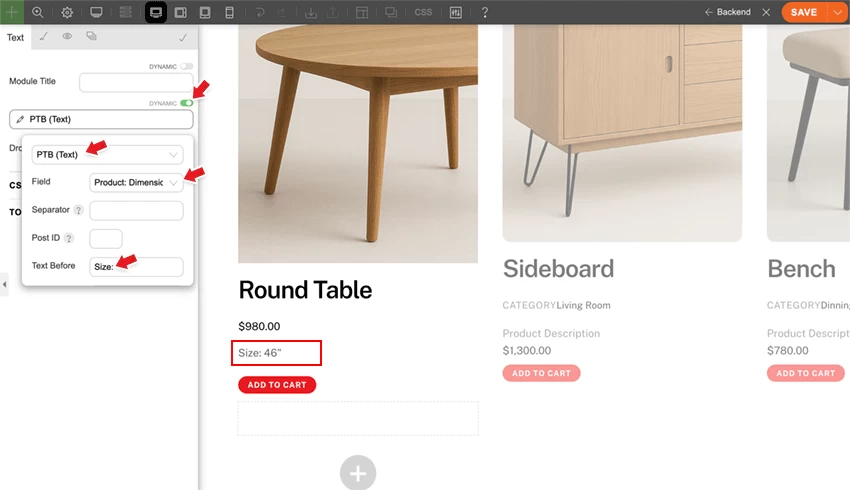
- To display the custom fields, drop in a "Text" module, enable the "Dynamic" toggle button, select "PTB (Text)" type, select "Field = Product: Dimensions", and enter "Size: " as the "Text Before". Now you should see the Text module displaying the custom field value as you entered in the product.
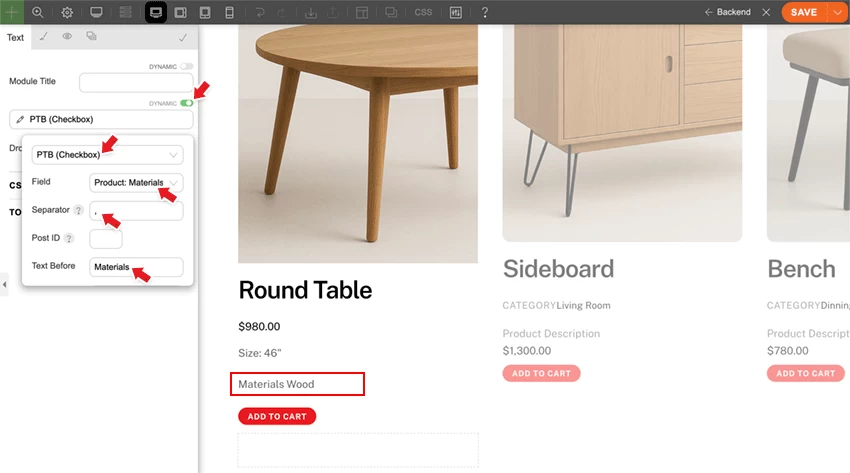
- To display the "Materials" checkbox custom field values, repeat the above step. Drop in another "Text" module, enable the "Dynamic" toggle button, select "PTB (Checkbox)" type, select "Field = Product: Materials", enter a comma as the "Separator", and enter "Materials: " as the "Text Before".
- Now if you view the "Shop" on the frontend, you should see the product archive template being used to render the shop page. This means the template is successfully done.
- Tips: You can click the "Edit Template" link to edit the template with live preview.
Product Single Template
Now you will need to create the product single template to display those extra custom fields.
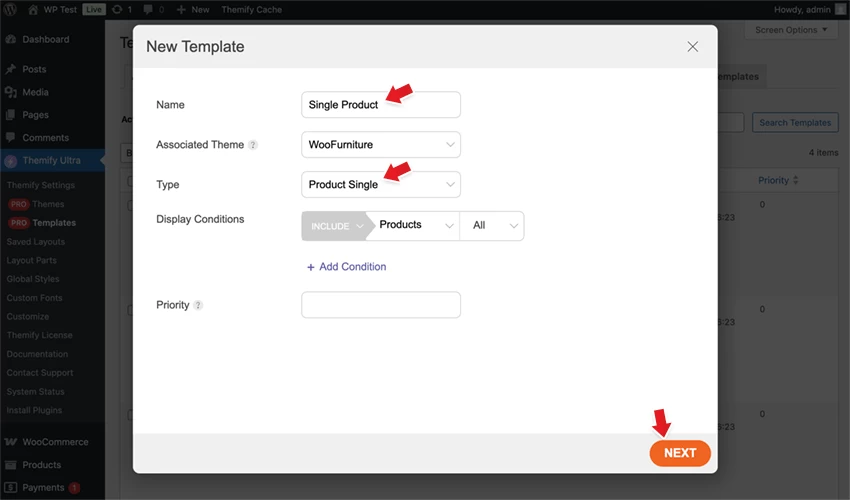
- Go to "wp-admin > Themify > Pro Templates", click "Add New Template".
- Enter the template name (eg. "Single Product"), select "Type = Product Single" and click "Next". Select "Blank" thumbnail and click "Publish".
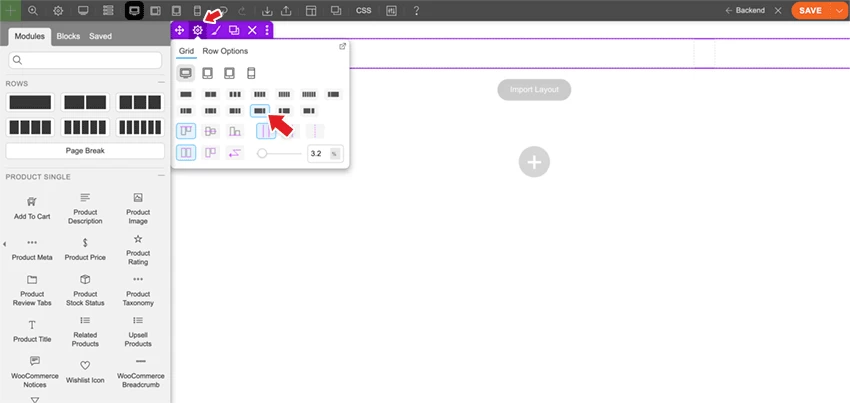
- It will redirect you to the frontend edit mode. On the first row options, select a 2-column layout, then you can drag the column vertical gutter to resize the column width.
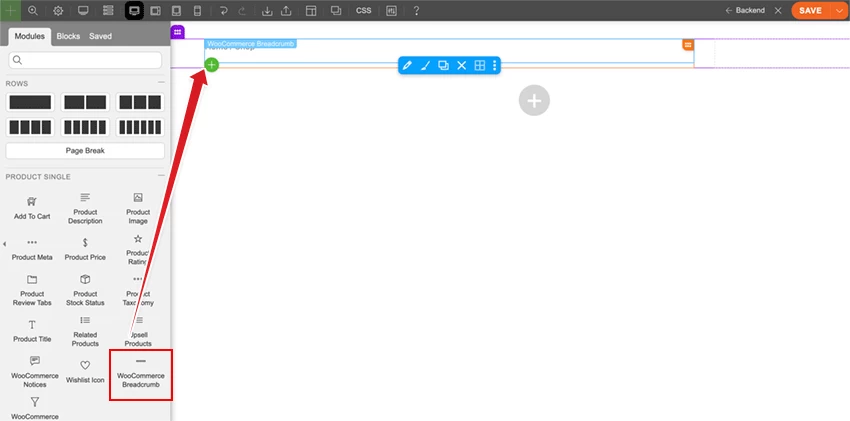
- On the left column, drop in the "WooCommerce Breadcrumb" module.
- Then drop in the other modules: "Product Image", "Product Title", "Product Description", and "Product Review Tabs".

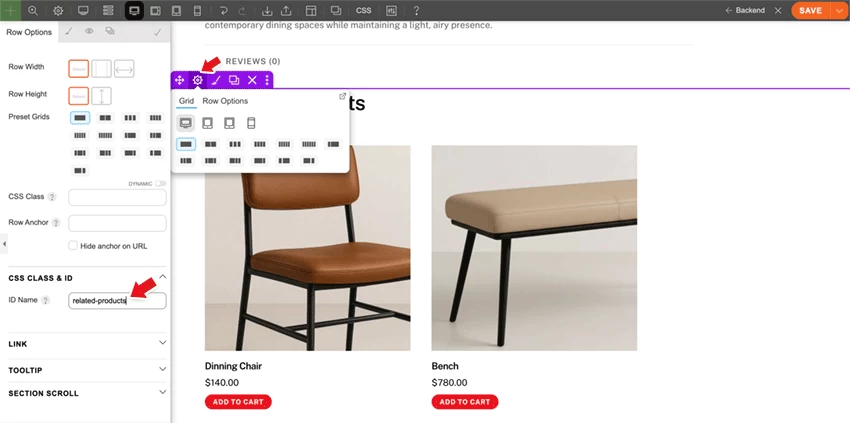
- Add a new row, drop in a "Related Products" module. On the row options, enter "related-products" ID name (we will use this row to unstick the add to cart sub-row).
- On the right column, drop in a sub-row.
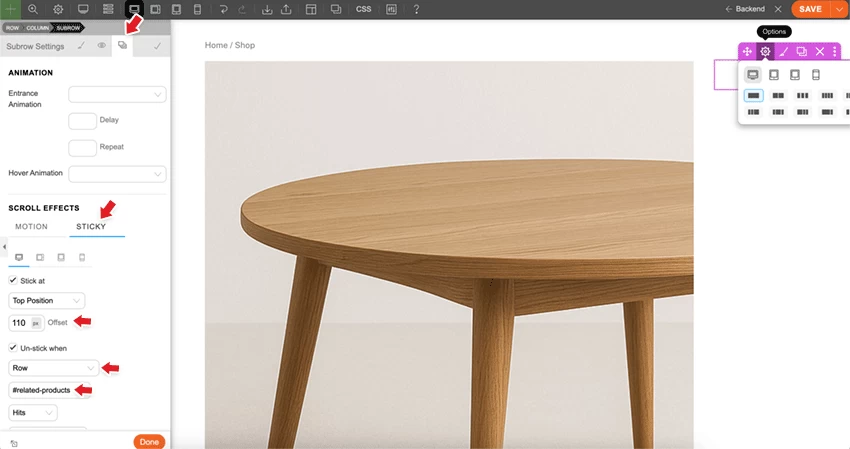
- On the sub-row > Animation tab, click "Sticky", enable "Stick at", enter "110px" offset, enable "Un-stick when", select "Row", and select the "#related-products" row. This will make the sub-row stick at 110px top position and unstick when the related products row hits it.
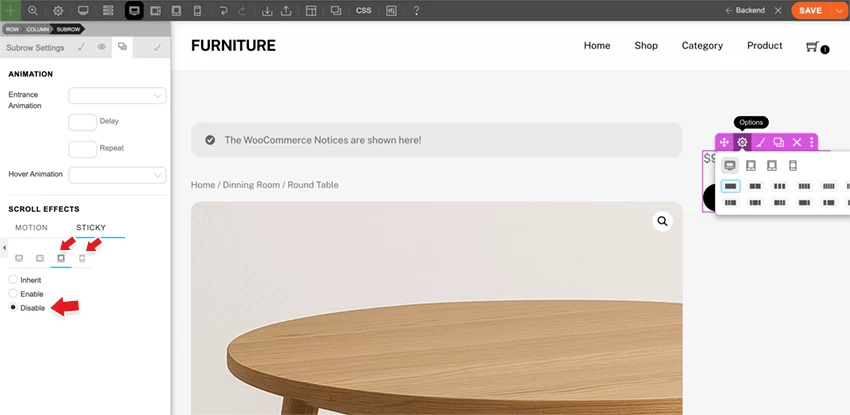
- You can disable the sticky function on different device breakpoints. Click the device icon, then select either "Inherit" (which will inherit the desktop setting), "Enable" (which allows you to change the sticky position), or "Disable". On our demo, we have the sticky disabled for tablet portrait and mobile breakpoint.
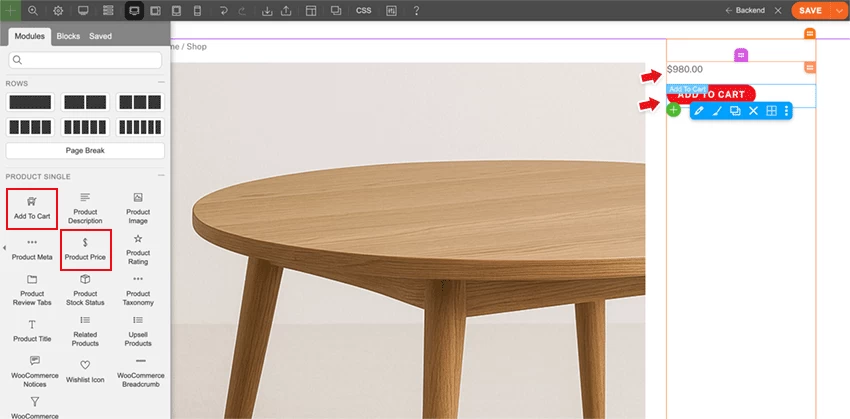
- On the right column sub-row, drop in the "Product Price" and "Add to Cart" modules.
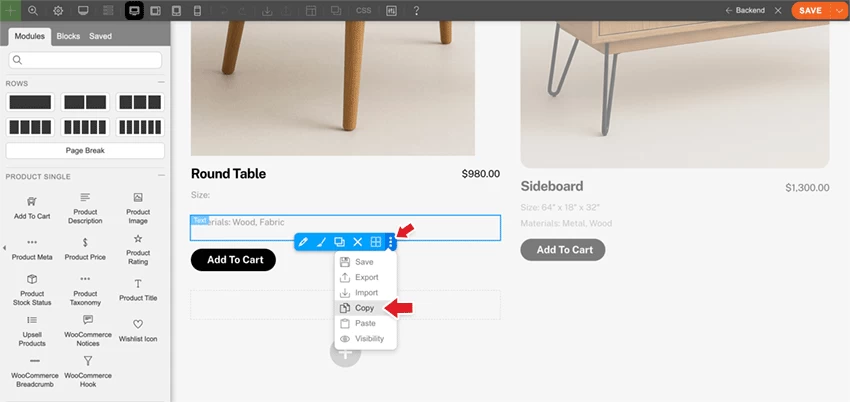
- Now you can view any product on the frontend to see the template in action. The final step is to display the custom field values on the product single view. To save time, copy the Text modules from the product archive template which already have the dynamic content setup and paste those modules into the product single template. First edit the product archive template, edit the Advanced Products module, and copy the Text module with the dynamic content.
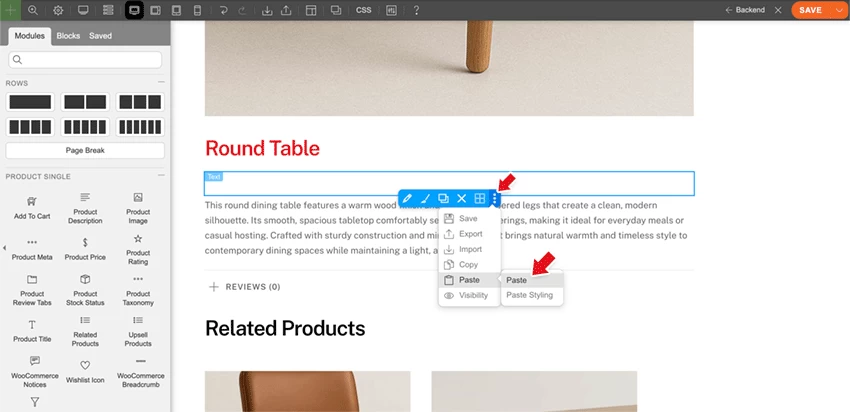
- Go back to edit the product single template, drop in a "Text" module under the product title, then paste in the module data.
The product templates are successfully created at this point. You can add other templates such as the header, footer, cart & checkout to have a complete customized site.
November 21, 2025 @ 2:17 pm
Issue on mobile view product single page. Scroll down, buy button row appears. Press cart icon. Ajax cart appears, but bottom links and button are covered by the buy button row. Cart should be on top.
This might be an existing issue on other versions as well; didn’t test. But happened to run into it now, so letting you know so you can fix it.
Besides that: great tutorial. Not sure why you wouldn’t use woo fields for just custom properties like material, but I can see great options for additional pics, galleries, audio, video, documents, link buttons and whatnot.
November 21, 2025 @ 8:25 pm
Like the demo. It is very simple and effective for a furniture shop. You should make it as a theme as premade demo.
February 13, 2026 @ 7:25 am
seems like a lot of faff just to add some fields to products. can this not be done with CSS? I hate adding more plugins to my website /
February 20, 2026 @ 9:03 pm
We need to add them as custom fields so each product can have different values. Using CSS to add text is not dynamic and not SEO friendly.