
Google Fonts is probably the largest free font community in the industry. All Themify themes and Builder come included with the entire Google Fonts collection. But in case you want to host Google Font files on your own server (for privacy concerns), here's a tutorial for you.
Update: All Themify themes now have the option to download Google Fonts automatically to your own server. Go to Themify > Settings > General > Google Fonts, enable "Download Google Fonts to Local". We are keeping this article just for references.
In this edition of our tutorial series, we'll show you how to manually add a Google Font or any font without a plugin. All you need is some CSS code, that we'll provide, and the font file. This is a surprisingly easy hack that anyone can do without any coding knowledge.
We will be using the Lato font for this guide. Here is what you need to do to install the font:
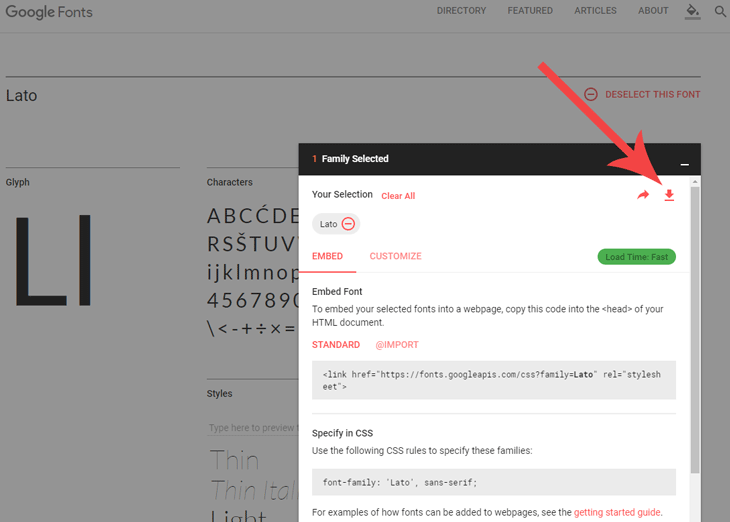
- Download any font that you want to use (it will be a .rar or .zip file), then extract it. The font file should be available in .otf or .ttf format.
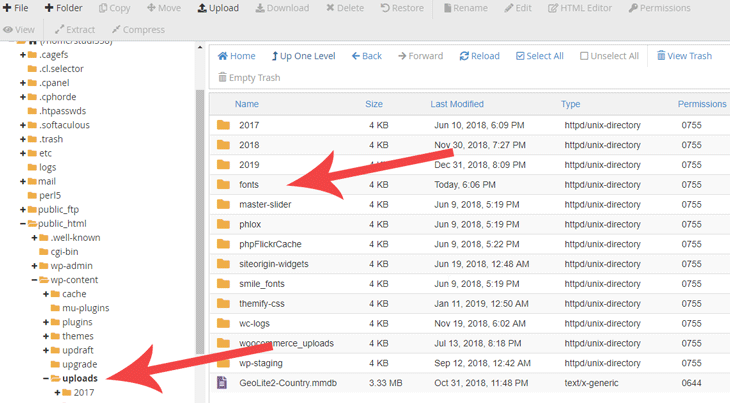
- Use a FTP Software or your cPanel's File Manager to create a font folder on your server (eg. create a 'fonts' folder in /wp-content/uploads/fonts').
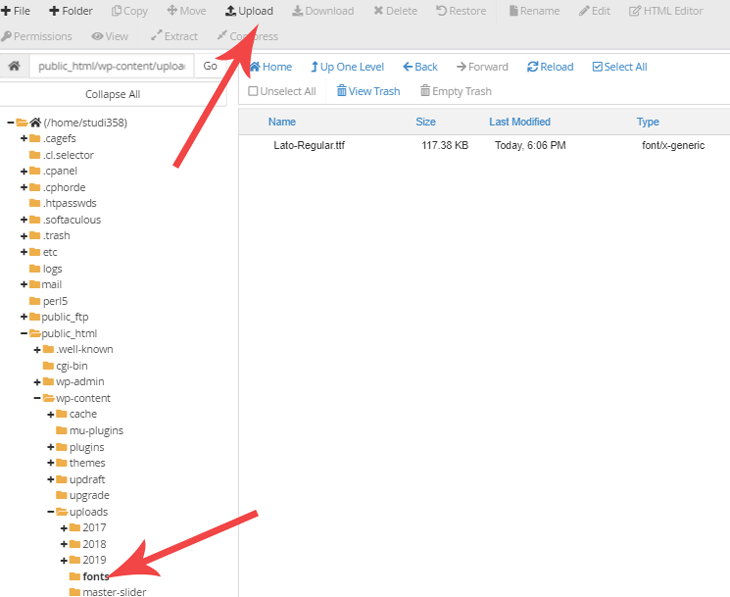
- Upload the font files to your newly created fonts folder
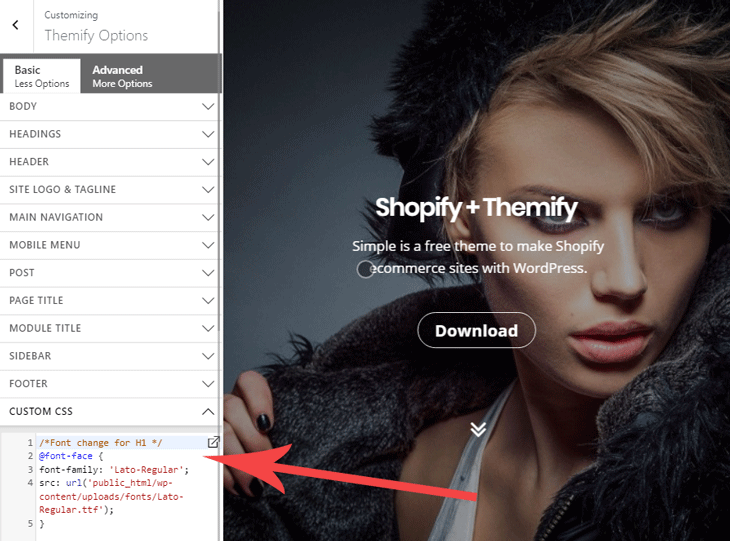
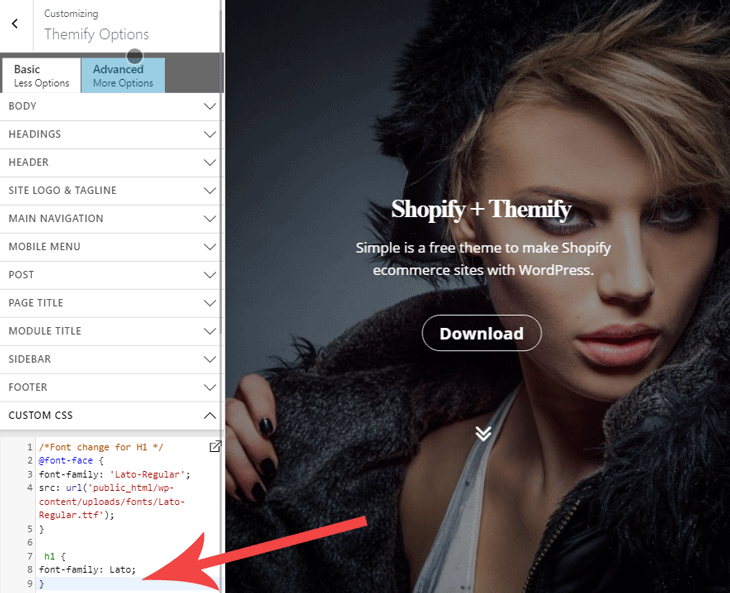
- Go back to your WordPress panel, and click on Appearance > Customize > Custom CSS and add the following CSS (if you are using a non-Themify theme, go to Appearance > Customize > Additional CSS to add the CSS code). The CSS code basically specifies the font name and where the font file is located on the server. Remember to replace the domain shown in the CSS code below to that of your own site URL.
			/*Font change for H1 */
			@font-face {
			font-family: 'Lato-Regular';
			src: url('https://yourdomain.com/wp-content/uploads/fonts/Lato-Regular.ttf');
			}
That is all you need to do to add the font. But now we need to specify which element will use that font. Add the following CSS code in your Themify Customize panel (WordPress Admin > Appearance > Customize > Custom CSS) to specify your H1 tag to use the Lato font.
	h1 {
	font-family: Lato;
	}
If you want all heading tags to use Lato, the CSS code would be as follows:
	h1, h2, h3, h4, h5, h6 {
	font-family: Lato;
	}
And that is all you need to do to host your own fonts on your server! You can use this tutorial with any Google font or any .ttf font file. We hope you enjoy this foundation tutorial, and check back for more soon!
Speaking of typography and content, if you haven't already translated your WordPress site into a multilingual one, see just why our multilingual tutorial could boost your web traffic easily!
February 27, 2019 @ 9:00 pm
I have to admit that some things I still struggle to install on my own server and need technical assistance.
March 1, 2019 @ 9:37 pm
Hi,
If you need technical help, please post a topic on our support forum: https://themify.me/forum we are happy to help.
March 1, 2019 @ 7:33 am
How to if i am haven’t already translated into a multilingual, i can’t understand
thanks for your review but i need technical for install on my own server
March 1, 2019 @ 6:29 pm
Did you delete your most recent blog post by chance? I assume I saw another blog after this one. L :-P L
March 1, 2019 @ 7:15 pm
Are there any benefits to doing this, outside of privacy?
The largest downfall I see is performance – Google fonts which are hosted by Google may already be cached in a visitor’s browser so they would not need to be downloaded again (so the website would load faster, overall).
March 1, 2019 @ 9:49 pm
Hi,
Apart from Privacy and Privacy Policy changes in some EU Countries where you should host your own fonts, the reason to host your own font might be, that google fonts can be removed or modified anytime, so your website’s font is not controlled by you unless you host it.
March 3, 2019 @ 8:08 am
Great topic, thanks for the blog post.
March 5, 2019 @ 9:25 am
Much too complicated and not clearly complete tutorial… Font Family and all Variations does not have good effects and leads to problems. For example if you do not understand which specific font variations and size you are using, the connection to google is still used for nothing… Pitfalls all over
Just use the wp plugin -selfhosted google fonst- for ordinary users, the nerds allways love to code and show their knowledge…
March 15, 2019 @ 5:43 am
Will this affect the search engine?
April 17, 2019 @ 9:59 pm
I tried these directions to try to add a google font that is missing from Themify’s list, and it didn’t work for me. Used a plugin instead, but would like to try to figure it out the “right” way (or maybe Themify could update its Google Fonts list?)
April 18, 2019 @ 6:02 pm
Hi,
If you want to show all Google Fonts we have integrated, please go to Themify Settings > General > Google Fonts and select “Show all Google Fonts”: https://cl.ly/a00dbeb46f9f in case you still see missing Google Fonts, please let us which font(s) are missing.
April 19, 2019 @ 1:52 pm
Yes, that was how I was trying to choose fonts. The font Major Mono Display is missing from the list. Thanks!
September 9, 2020 @ 11:02 pm
Can I host fonts in Google Drive?
March 21, 2025 @ 1:08 pm
“… Themify > Settings > General > Google Fonts, enable “Download Google Fonts to Local”. ”
This option is not available in Ultra 5.7.4. Could it be that this tutorial needs updating? Pulling open source fonts from Google, allowing that advertising company to monitor every move of your visitors is not what we want in 2025
March 21, 2025 @ 5:20 pm
You would need to update your Ultra theme to the latest for this feature. The version you have is very old.