
Sticky scrolling is a cool way to grab a reader’s attention as it makes your web page feel animated with various elements sticking to the forefront, then disappearing. It hasn’t yet been a year since we’ve launched the Builder’s sticky scrolling, but we’ve been receiving great feedback on it, and have noticed parallax layout sites having a bit of a resurgence as well.
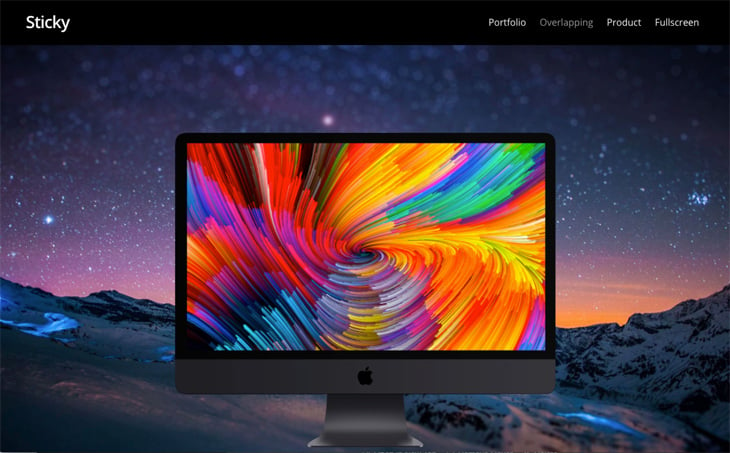
To see what goes into creating a sticky scrolling layout, we’ll be breaking it all down and explaining it to you in this foundational tutorial. Take a look at the Sticky Scrolling demo below to see it in action.
The easiest way to create a sticky scrolling layout, is by importing this specific demo’s layout onto the page of your choice, then changing the images/text and fine-tuning the details to your liking. So let’s go ahead and import this layout!
Importing a Sticky Scrolling Layout
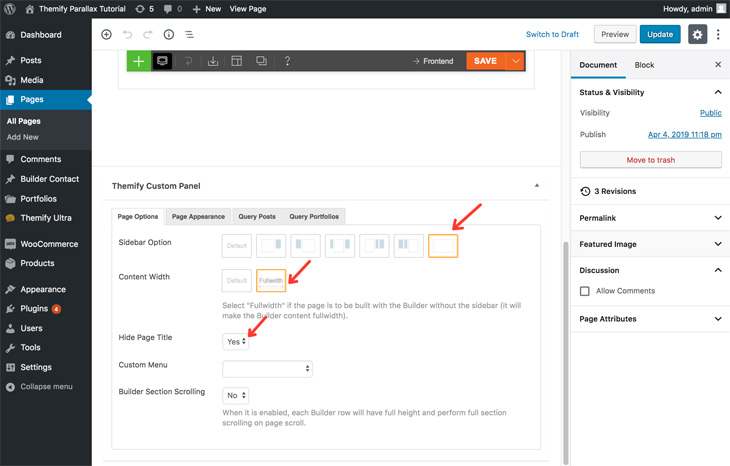
1. Create a new page and customize it.
- Pages > Add New
On the Themify Custom Panel, select:
- Sidebar = No Sidebar
- Content Width = Fullwidth
- Hide Page Title = Yes
Select Publish > View Page
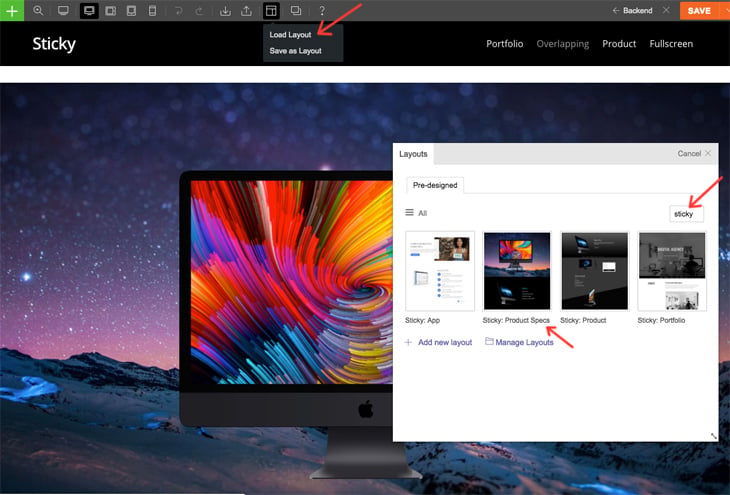
2. Turn on the Builder and load a layout.
- Hover over the layout icon > Load Layout > type ‘sticky’ > Sticky: Product Specs > Replace Existing Layout
3. Now all you need to do is upload your own images and insert your own text.
However, we’re going to go ahead and fully explain everything you’re seeing, so that you feel empowered to edit the heck out of this layout and the sticky scrolling elements. Let’s take this section by section, or row by row.
Sticky Scrolling Explained
(This part is easiest to follow with two tabs open. One tab on the page you just created with the Builder on, and another tab opened to the sticky Builder demo page. The sticky element preview won’t show with the Builder turned on.)
Row 1:
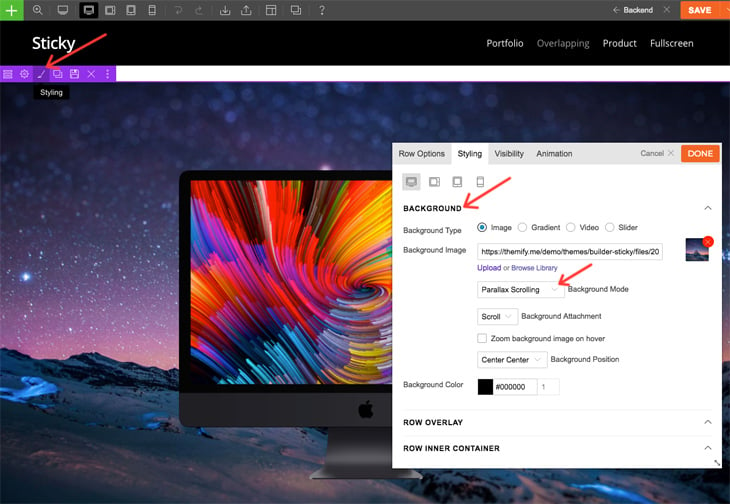
Welcome to the first row. You can see a slight parallax effect happening on the row’s background image.
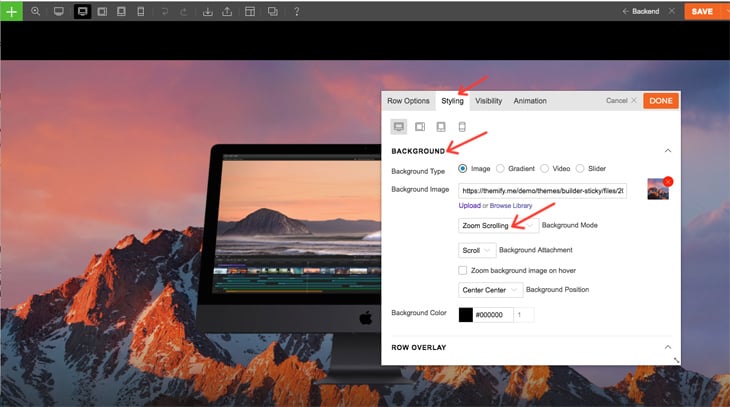
To Enable Background Image Parallax Effect:
- Row Styling > Background > select Parallax Scrolling from the Background Mode dropdown menu
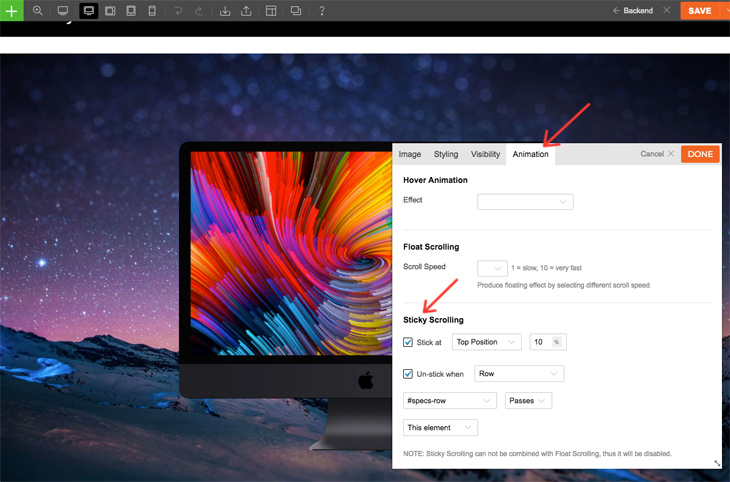
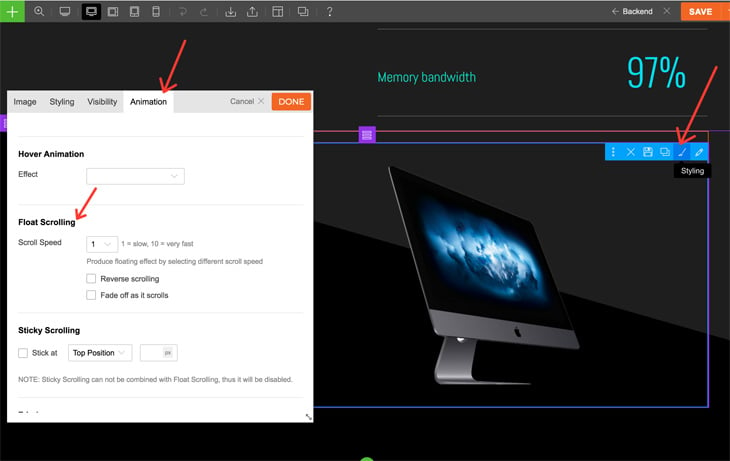
Next, you’ll see the iMac image in the centre of the screen scroll up and stop below the top of the screen. The image is set to scroll until it hits 10% of the view port from the top of the screen. It sticks there in that position, and will unstick once the row below, passes this element.
Enable Image Sticky Scrolling:
- Image Styling > Animation > Sticky Scrolling > check ‘Stick at’ > Top Position > 10
Unstick Image Sticky Scrolling:
- Image Syling > Animation > Sticky Scrolling > check ‘Un-stick when’ > Row > select row name* > Passes > This element
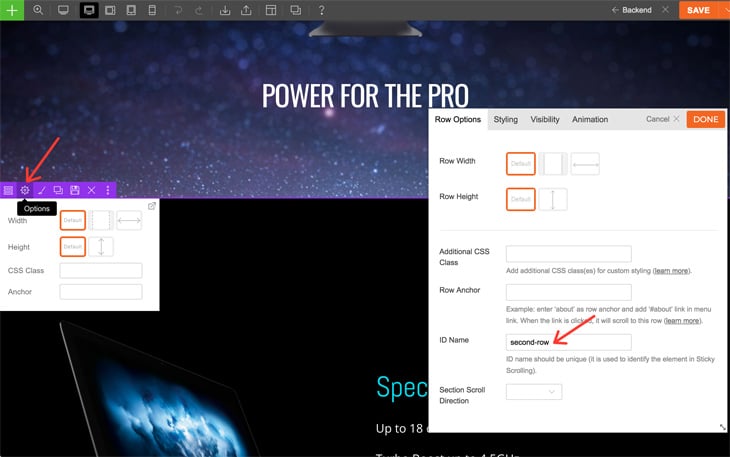
*You can custom label your rows, instead of using the auto-generated row names:
- Row Options > ID Name > insert name (use dashes instead of spaces)
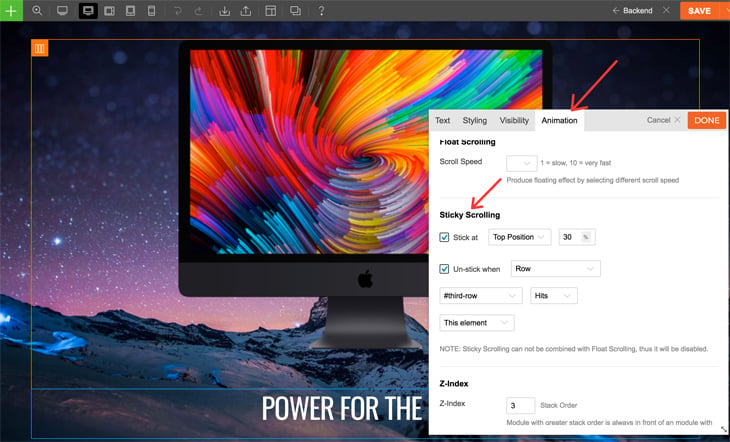
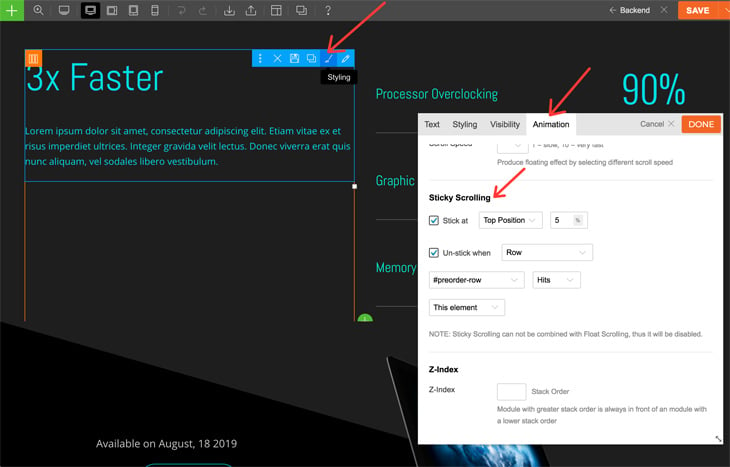
Finally in this row, the text has its own sticky scrolling enabled also. The text is set to scroll up until it hits 30% of the view port from the top of the screen, and is set to unstick only until the third row passes this element. This creates the effect of an element being suspended on the screen, as the row below scrolls upward.
Enable Text Sticky Scrolling:
- Text Styling > Animation > Sticky Scrolling > check ‘Stick at’ > Top Position > 30
Unstick Text Sticky Scrolling:
- Text Syling > Animation > Sticky Scrolling > check ‘Un-stick when’ > Row > select row name* > Hits > This element
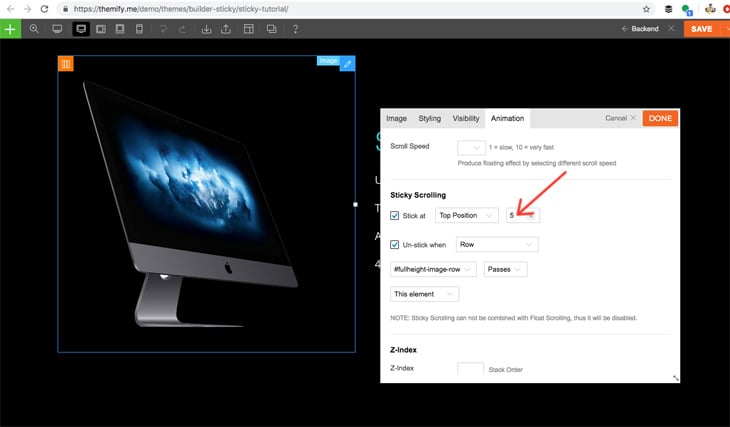
Row 2:
So this row uses pretty much the same technique as the first row. However you can see how you can stick your element to any top position of the viewport as you’d like for a different effect. The angled iMac image is set to stick at 5% of the top position.
Row 3:
This row’s background image involves zoom scrolling. You can see the background zooms in slightly as you scroll downwards.
Set A Background’s Zoom Scrolling:
- Row Styling > Background > Background Image > select ‘Zoom Scrolling’ from the Background Mode menu > select ‘Scroll’ from the Background Attachment menu
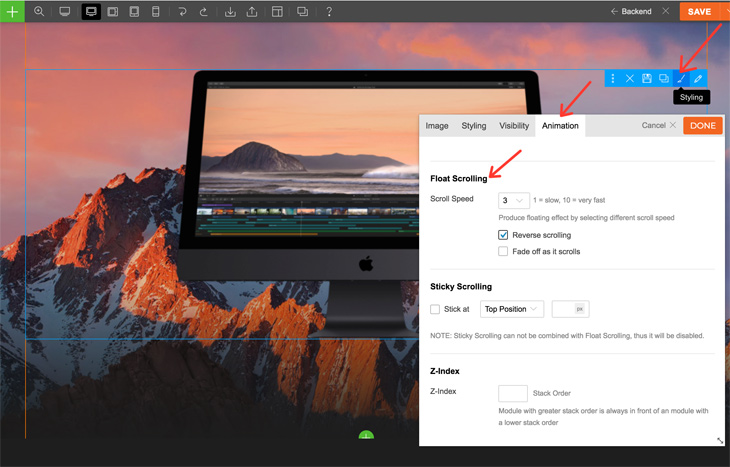
Next, the image in the middle is actually float scrolling downward as you scroll, not up.
Enable Image Float Scrolling:
- Image Styling > Animation > Float Scrolling > enter scroll speed number > click ‘Reverse scrolling’
Row 4:
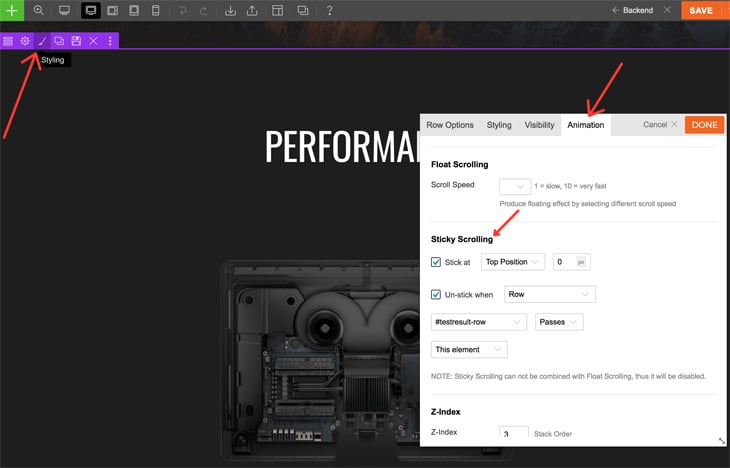
Previously, we showed how to enable sticky scrolling on text/image modules, now we’ll see how to do it for a row. On the fourth row, as you can see on the demo, the entire row stays sticky when it hits the 0 position of the viewport.
Enable Row Sticky Scrolling:
- Row Styling > Animation > Sticky Scrolling > check ‘Stick at’ > Top Position > 0
Unstick Row Sticky Scrolling:
- Row Syling > Animation > Sticky Scrolling > check ‘Un-stick when’ > Row > select row name* > Passes > This element
Row 5:
This uses the same logic and technique as the previous rows. For example, the text on the left sticks at the top until the 6th row slides up.
Row 6:
You made it to the last row! Again, you can see the same float scrolling technique, from row 3, applied to the iMac image. It floats slightly upward as you scroll down.
And there you have it! As you can see, importing a layout from any page from our demo features or skins, is the fastest and easiest way to create amazing parallax effects on your own WordPress site. We hope you enjoyed this foundational tutorial. But if the work ahead of you feels all too overwhelming, read our tutorial on managing these negative emotions to create a more productive you!
April 14, 2019 @ 5:27 pm
Amazing !! Thaks Themify