One of the awesome features about WordPress are all the extendable plugins. But sometimes plugins can have issues from updates or conflicts with other plugins. For example: a plugin update could crash your site due to an invalid/incompatible code, or the update process could be hung half way. With any plugin issue you may experience, the best fix is by reinstalling the plugin. In this foundational tutorial, we'll guide you on how to properly reinstall plugins using the WordPress plugin installer or with an FTP software.
Before You Start
Before you start reinstalling the plugin, check with the plugin's author first to see if it is ok to reinstall it. Some plugins might lose data when it is deactivated, uninstalled, or reinstalled. However, with all Themify themes and plugins, you can uninstall or reinstall at any time without losing any data.
Method 1) Using the WordPress Admin Panel (Easy)
The easiest method to reinstalling a plugin is to delete the plugin using WordPress plugins admin and then re-installing it. This method is suitable when you still have access to the admin dashboard. Sometimes you might not have access to WP-admin, then you would need to use the FTP method as documented below.
- Login to your WordPress Dashboard, then go to Plugins > Installed Plugins
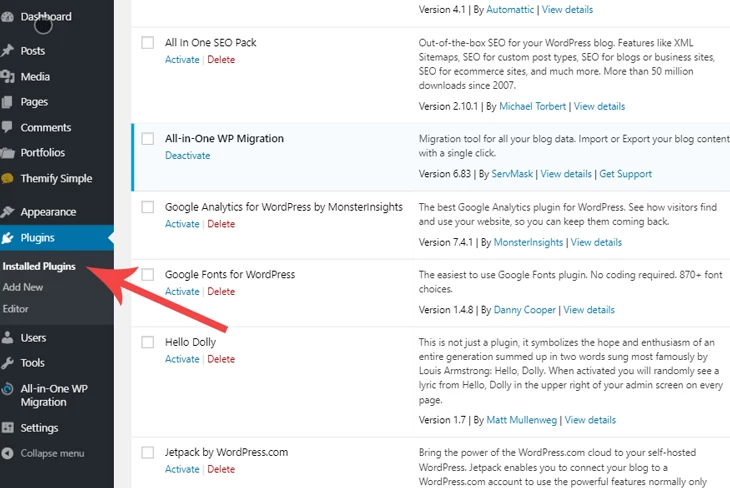
- Locate the plugin that you want to reinstall (for this tutorial we will use the Themify Builder plugin). Hover over the plugin, then click “Deactivate”.
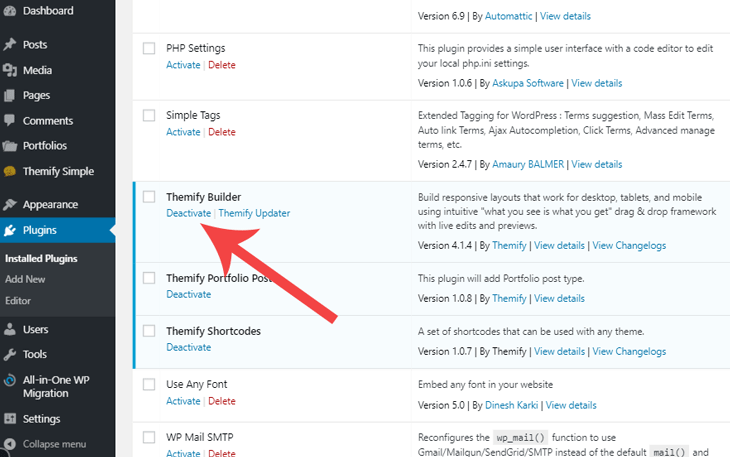
- The “Delete” should appear on hover (note that you need to deactivate it first in order to see the delete button). Click "Delete" and then confirm removing it.
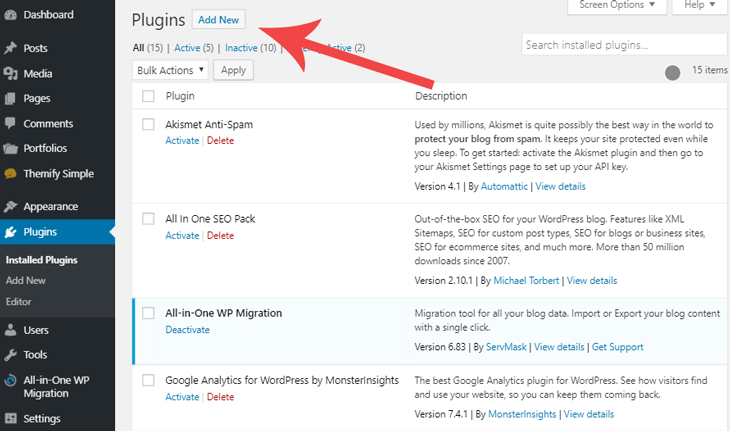
- Now you need to install the plugin again. Again, go to Plugins, then click the “Add New” button.
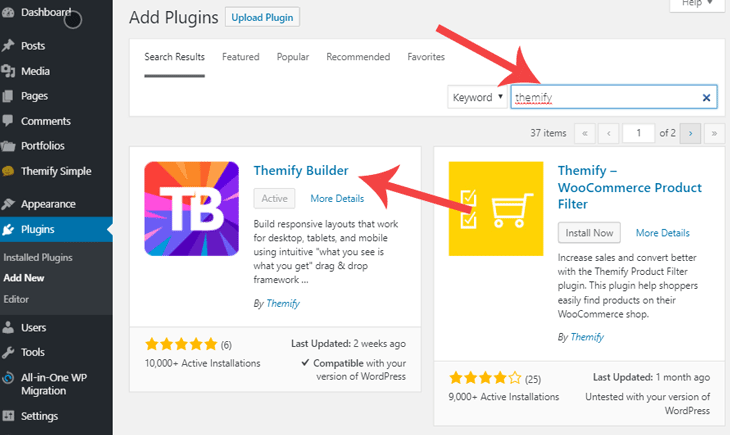
- In the search field on the right, type in the plugin name that you want to install. In our case, it is "Themify Builder". Once you have found your plugin, click "Install Now" and then click "Activate" to activate the plugin. The process is done! (If the plugin that you want to install is not available on WP.org plugin directory, you would need to click "Upload Plugin" and upload the plugin zip file manually.)
Method 2) Using FTP (Requires Some Technical Knowledge)
You can also use an FTP software or File Manager available in the cPanel to reinstall the plugin. This method requires some technical skills with using FTP and file upload/download, etc. But if you follow along closely, you should have no trouble.
- Use the FTP or File manager to connect to your FTP server. Go to the root folder where your WordPress is installed (normally it is in the “www” or “public_html” folder).
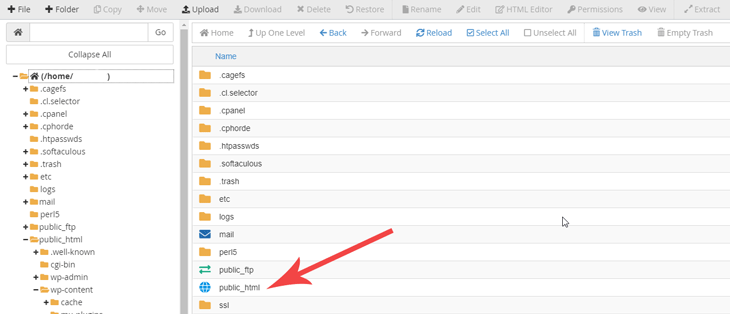
- Now go to "wp-content > plugins" folder.
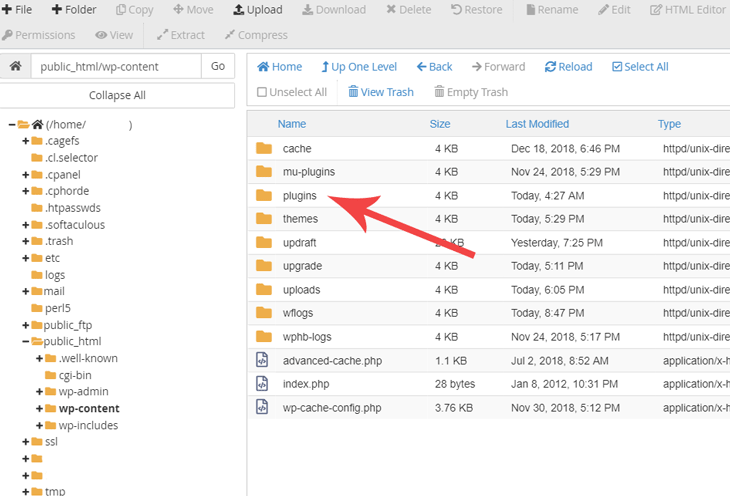
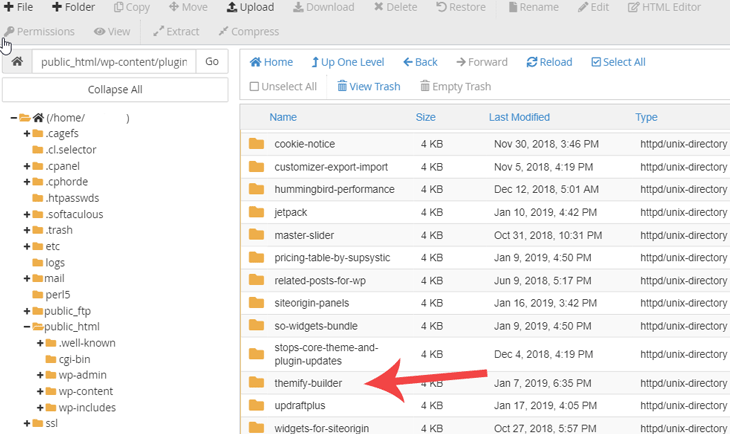
- Locate the plugin that you want to reinstall. In our case, it is the “themify-builder” folder. You can either rename it to have a backup copy on the server or delete it.
- After deleting the plugin, you would need to install the plugin once more. So you need to download the Themify Builder plugin zip file.
- Once you have downloaded the plugin zip file, go back to the FTP or File Manager and upload the zip file to the plugins folder.
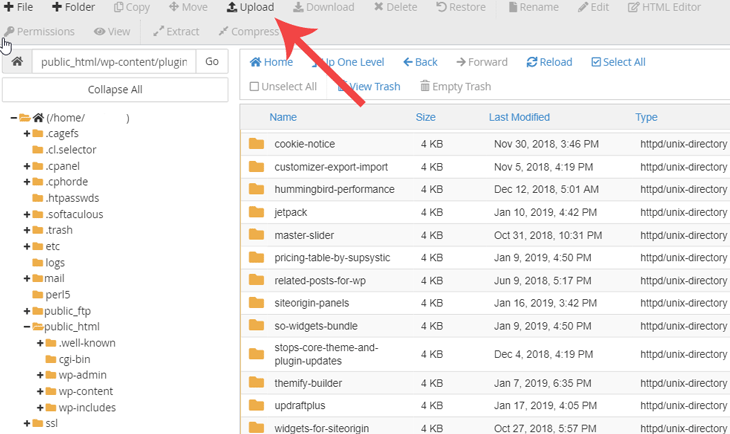
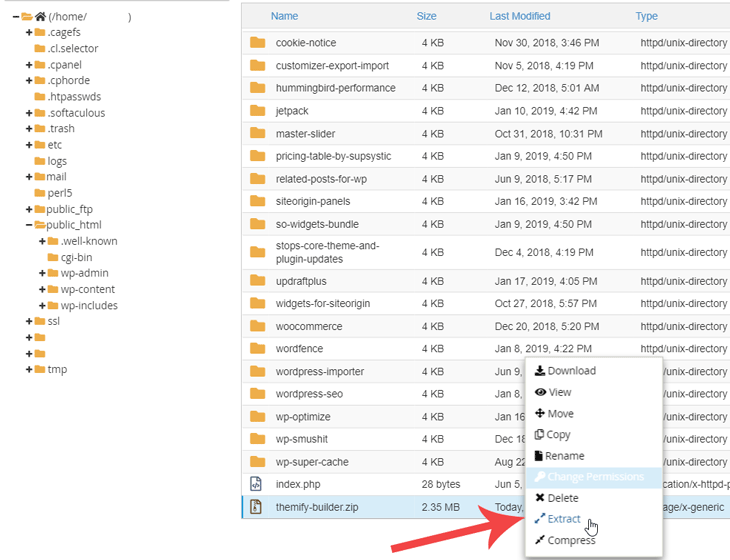
- Then right-click on the plugin zip file and extract it.
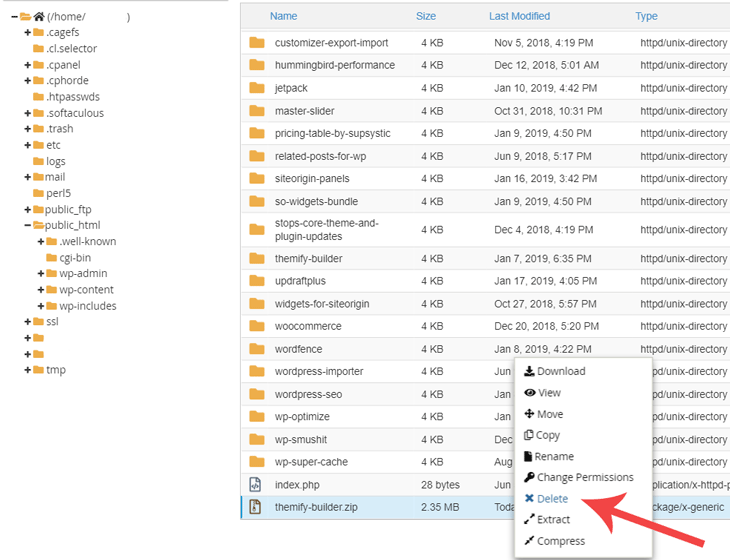
- After the content have been extracted (you should see the plugin folder appears after the zip is extracted), you can delete the zip file. The re-install process is done here. Now you can go back to WP admin > Plugins to activate the plugin.
And that's it! That wasn't so hard now was it? Pretty soon you'll be coding like a wiz in no time. But for now, the next step up might be making sure you have enough space for all awesome things you want your website to display. Follow our tutorial on how to increase your server memory when you get an error message saying the memory size has been exhausted.

March 24, 2019 @ 5:31 pm
I love WordPress! :-)
April 1, 2019 @ 3:22 pm
If I delete a plug in like Themify Popups i.e., I will delete all popus I made with it… or I will not?
When I will re-install the plugin, I will still have what I made before deleting it or I not?
April 1, 2019 @ 5:24 pm
Hi Fausto,
If you only remove the Themify Popups plugin, the popups you’ve created won’t be removed, so if you will re-install the plugin your popups will be there ( if you don’t reset your database ).
June 3, 2021 @ 4:30 pm
Nice step by step by step plugin reinstall guide. I might add that it’s never bad idea to have a complete backup of the whole website with an easy rollback process as plugins can sometimes do very strange things.