Quick Starter Guide
This quick tutorial will show you how to install and use Themify's WordPress themes. NOTE: Some screenshots and features may vary from different themes as they might have different features.
1. Installing The Theme
Note: you need to have a self-hosted WordPress site in order to install themes (works on wordpress.com with Business Plan only).
To install the theme:
- Download the theme zip from the Member Area. The theme zips in the Member Area are always the latest version.
- Login to your WordPress site's admin
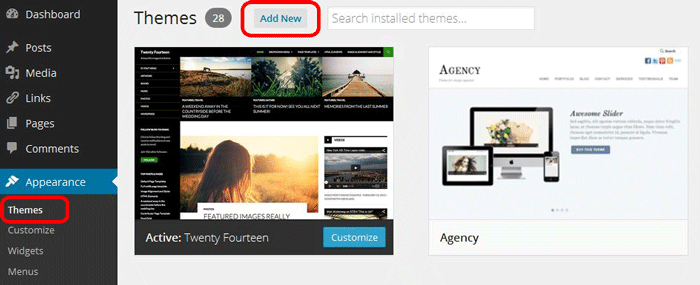
- Go to Appearance > Themes
- Click on the "Add New" button, then click on the "Upload Theme" button
- Upload the theme zip that you've downloaded from our server and click "Install Now"
- Click "Activate"
Common issues:
- If you get "upload_max_filesize" error, this means your host/server has limited file upload size. You can either request your host provider to increase file upload size or install the theme with FTP, read Installing Themes for details.
- If you get "missing the style.css stylesheet" error, make sure the zip file you selected is 'theme_name.zip', not 'theme_name-psd.zip' (the psd.zip file is the Photoshop file).
2. Theme Option Panel
After the theme is activated, it should redirect you to the Themify panel (theme option page). Under the Theme Option panel, there are four main tabs: Settings, Skins, Transfer, and Demo Import. The theme update notification can also be found on the Themify panel page as well.
Theme Auto Update
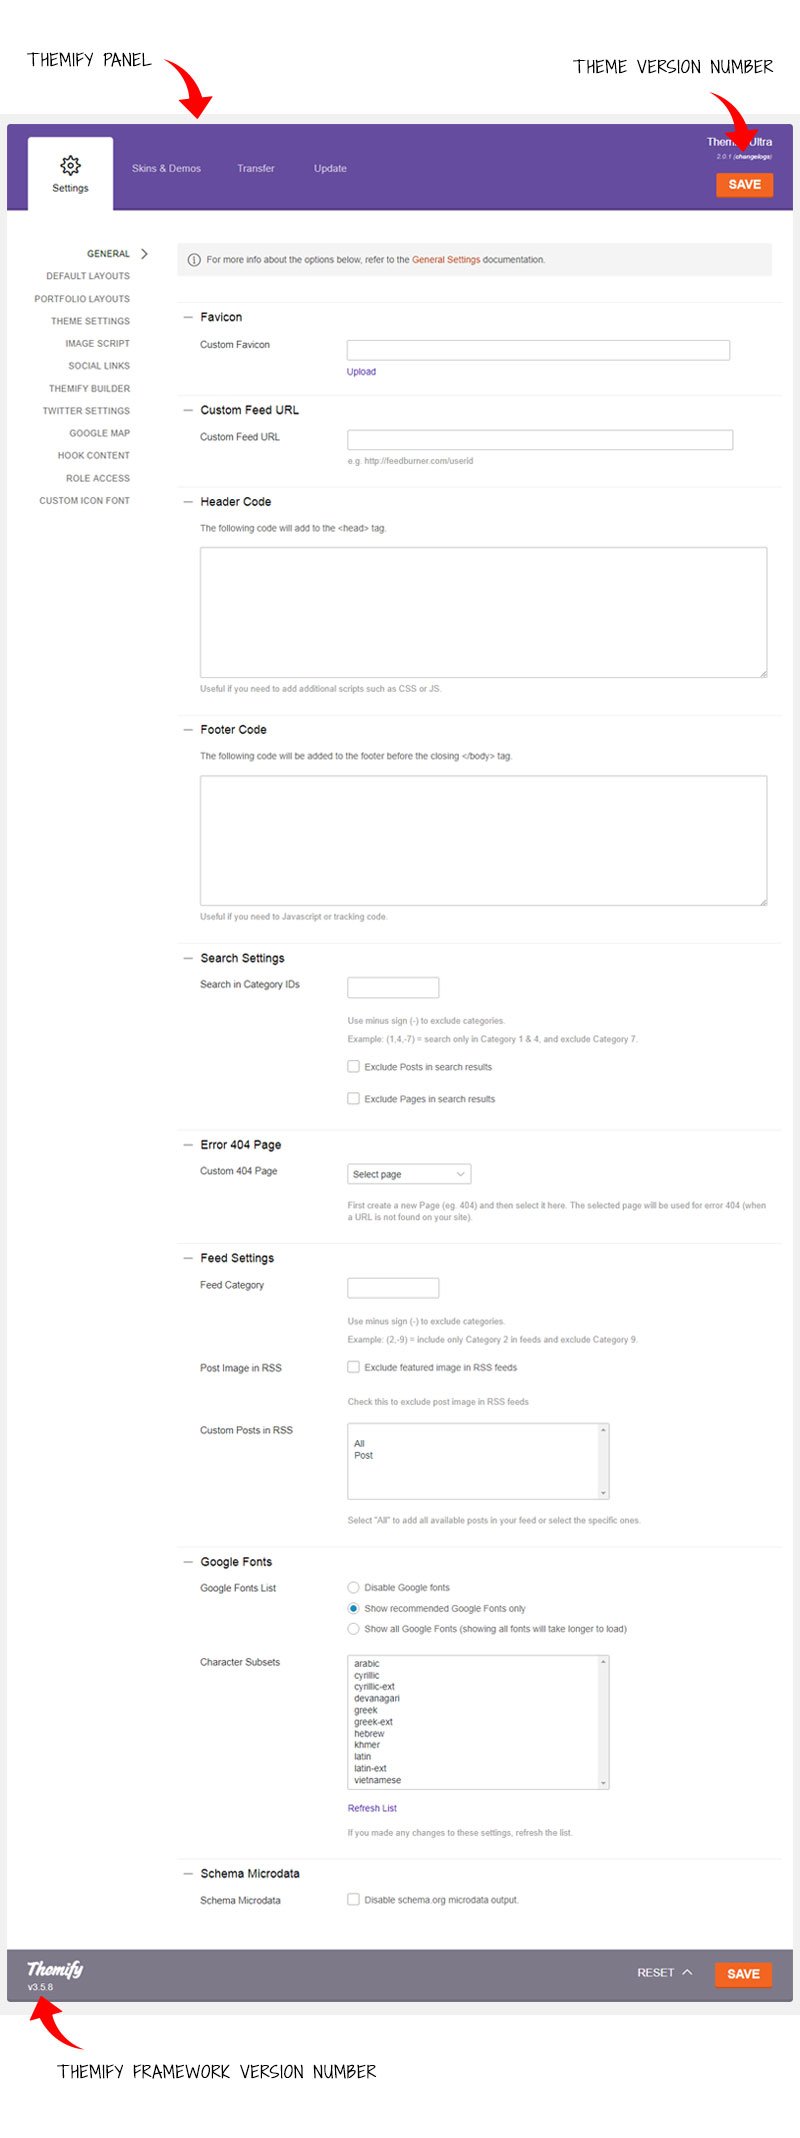
All Themify themes have auto update feature. When a theme update is available, you will see a notice above the Themify panel. On the Themify panel, you can find the theme version number on the top right corner and the framework version number is located at the bottom left corner.
Settings
- General Settings - Under the General Settings tab, you can customize the favicon, feed URL, insert header code, footer code, set search categories, RSS feed, and Google Fonts options.
- Default Layouts - Under the Default Layouts tab, you can choose the global layout options for: archive/index pages, single post page, and static page.
- Theme Settings - Under the Theme Settings tab, you can customize the theme specific features such as WordPress gallery lightbox, exclude RSS icon, exclude search box, footer text, footer widgets, etc.
- Image Script - Under the Image Script tab, you can disable the img.php script that we use to dynamically generate the featured image sizing.
- Social Links - Under the Social Links tab, you can manage social media links such as Twitter, Facebook and more.
- Themify Builder - Under the Themify Builder tab, you can enable/disable the Themify Builder and to exclude certain Builder modules.
- Twitter Settings - Under the Twitter Settings tab, you can insert the Twitter API access token (Note: required for Themify Twitter widget and Twitter shortcode).
- Hook Content - Under the Hook Content tab, you can add dynamic content to the theme without the need to edit any theme template file.
- Role Access - Under the Role Access tab, you can set which user role you'd like to give access to the Themify Custom panel, customizer, Builder front/backend. (Default is set to the default WordPress roles)
Skins
Under the Skins tab, you may apply one of the pre-built skins.
Transfer
Under the Transfer tab, you may backup or restore the setting data in the Themify panel. Click on Export to download the setting data for backup. You may restore the data by clicking on the Import button. The data in the option panel is stored in the database. Updating or reinstalling the theme does not affect the setting data.
Reset
At any time, you may clear the Settings by clicking on the RESET setting button located at the bottom of the Themify panel.
3. Importing Demo Content (Optional)
If you are starting a new site and would like to import the sample content as seen on the demo site:
- Go to Themify panel > Demo Import.
- Click on the "Import Demo" button.
- A popup box will appear with the message "This will import demo and Override current Themify panel settings," just choose "Ok" and the importing process will start.
- Now sit back and let the importing process finish.
- As soon as the importing process finishes, you will see a "Done" message and your demo content.
- Now you may edit or delete the contents as you like.
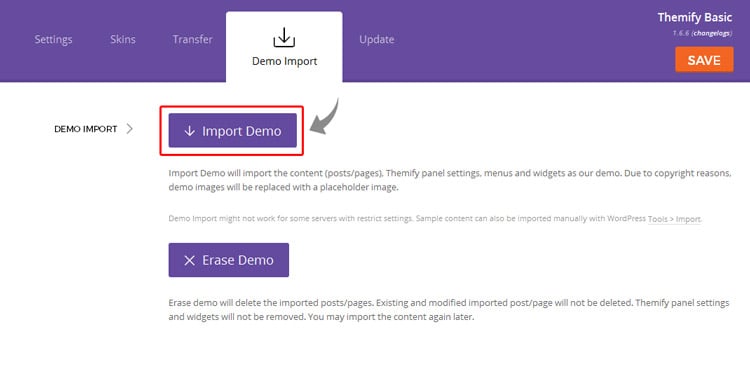
Note: The Demo Import feature will import the content including (posts/pages), Themify panel settings, menus, and widgets. Due to copyright reasons, demo images will be replaced with a placeholder image. Simply upload the "Featured Image" in the Themify Custom Panel to replace the placeholder image.
Common issue: The Demo Import might not work on some servers with restrictive settings or low performance resources (i.e. it blocks files from importing to the server). If the Demo Import fails, you may also import manually using WP Admin > Tools > Import.
4. Adding Posts
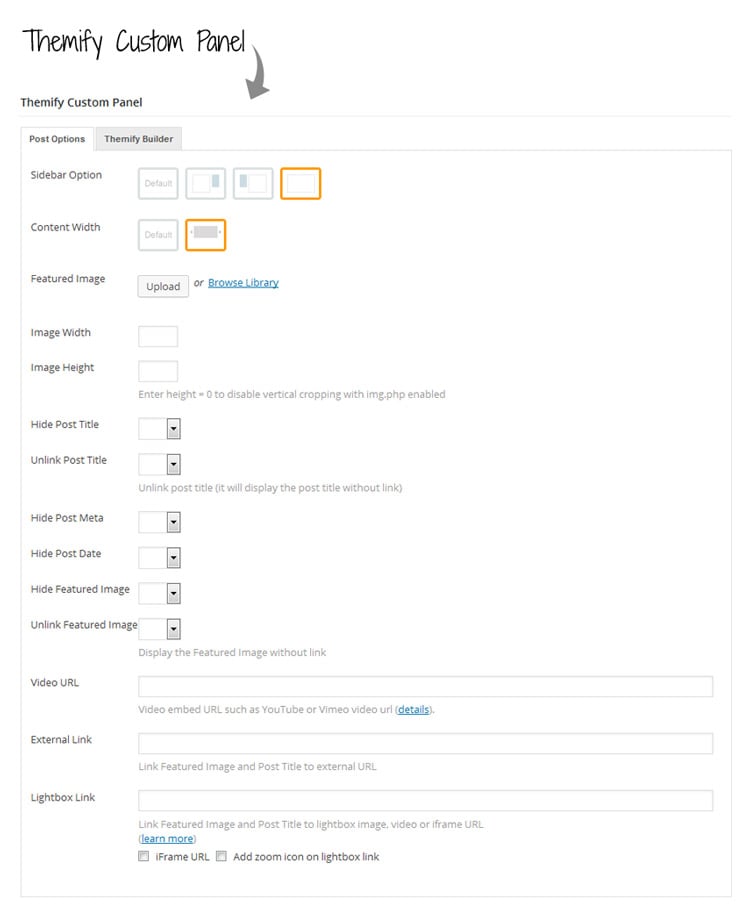
When adding or editing a post, there is a Themify Custom Panel under the content editor which allows you to override the "Default Single Post Layout" set in Themify > Settings > Default Layouts. You can override the sidebar option, content width, feature image, image dimension, and toggle the visibility of the post elements such as post title, date, image, etc.
5. Adding Pages
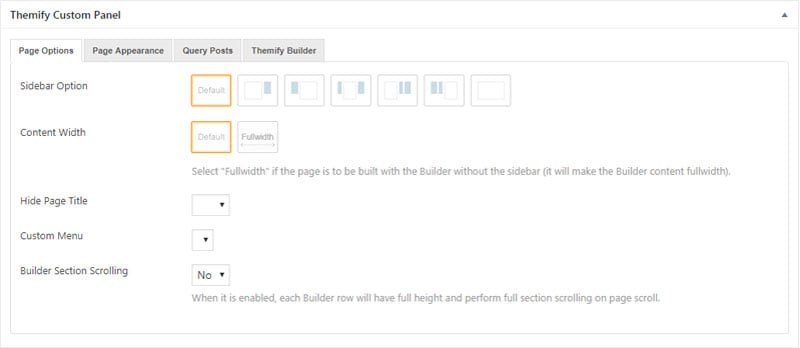
When
adding or editing a Page, there is also a Themify Custom Panel under the content editor which allows you to override the "Default Page Layout" set in Themify > Settings > Default Layouts.
Query Posts (Blog Page)
All Themify themes allow you to query blog posts on any static page (e.g. you can create a custom blog page). To query posts, on the Page's Themify Custom Panel, click on "Query Posts" tab then select "All Categories" or any category as you like.

Static Front Page
The default WordPress homepage is actually a blog archive page showing the latest blog posts. You may change it to a custom static Page in WP Admin > Settings > Reading (read Custom Front Page for details).
6. Using The Builder
You can build the post/page layout using the drag and drop Builder in either the backend or frontend mode. Read the Builder documentation for more details on how to use it. Below is a quick guide:
A) To use the Themify Builder in backend:
- First, add or edit a post/page.
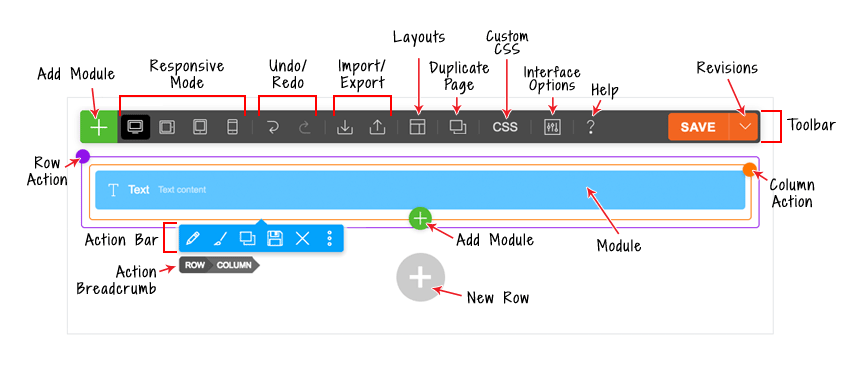
- If you are using WordPress 5+ with Gutenberg enabled (default), you should see a Builder Block like the screenshot below.
- If Gutenberg is disabled, you will find the "Themify Builder" tab below the WordPress classic editor.
- Drag and drop the module to the column/grid to add modules.
B) To use the Themify Builder on frontend:
- View any post or page on the frontend (Note: WordPress default homepage is actually a blog archive page, you will need to create a static front page to use the Builder on homepage).
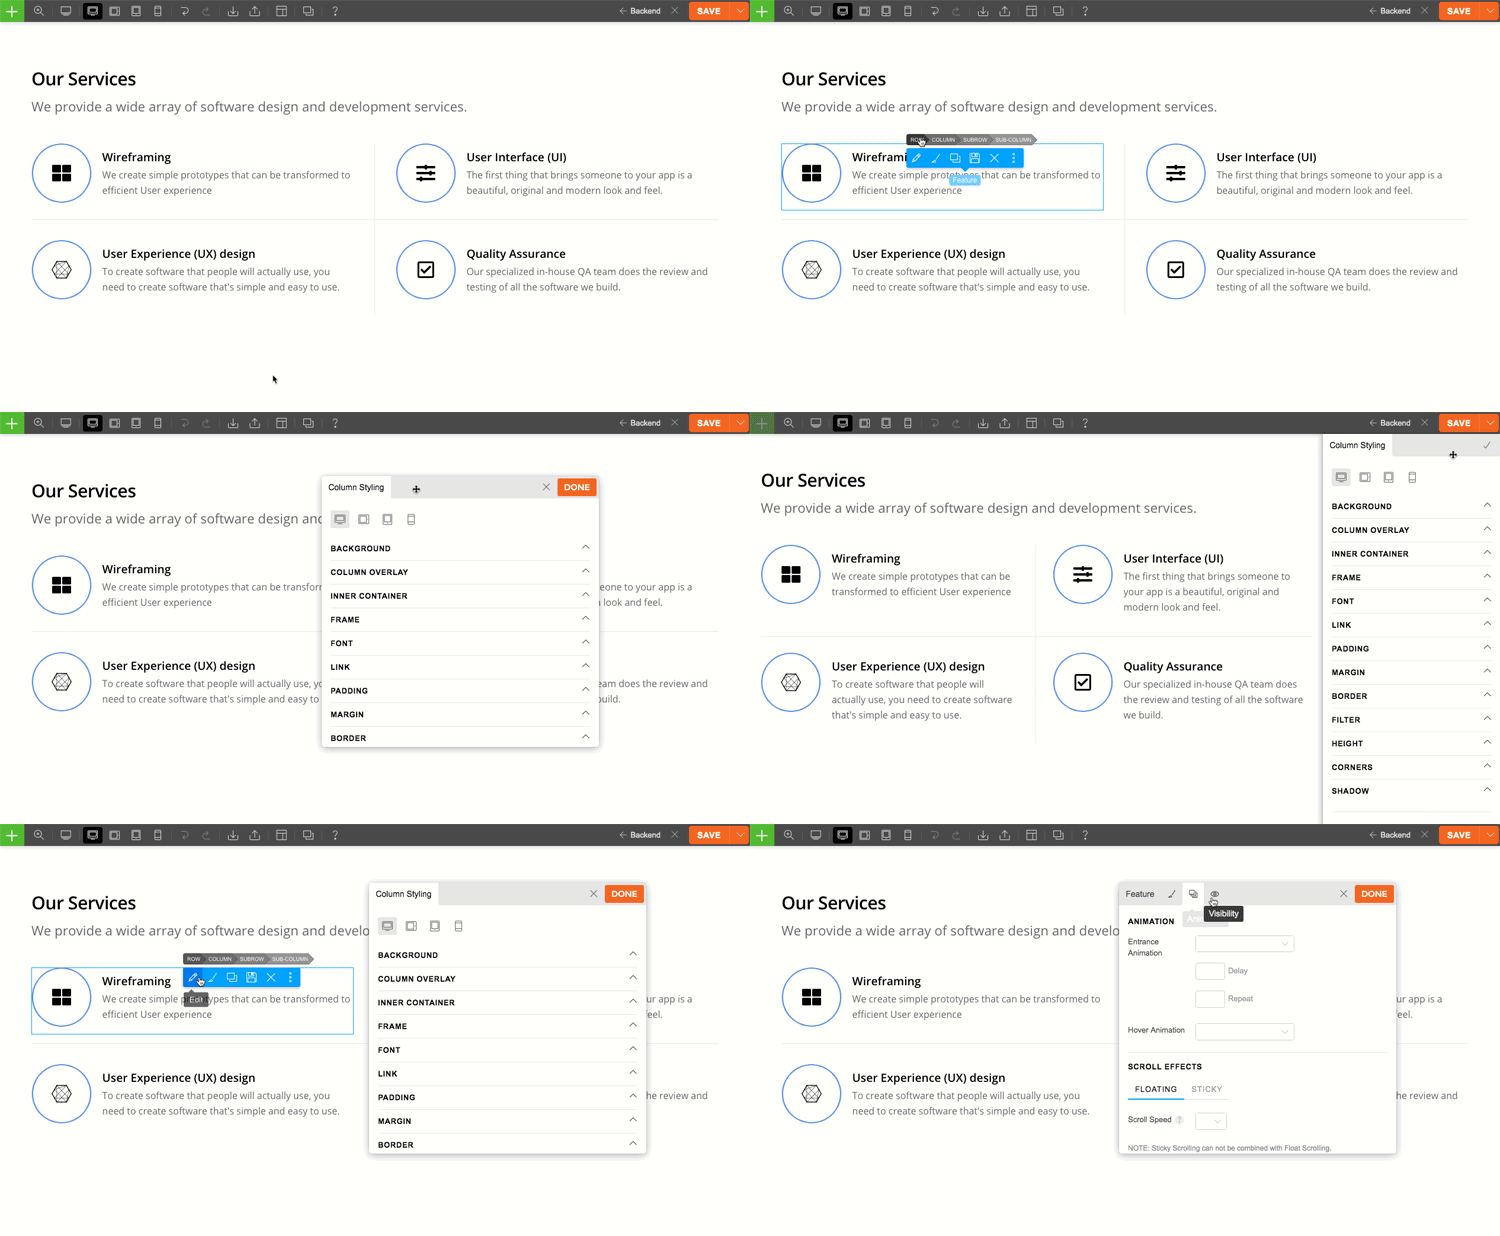
- On the frontend, from the top admin bar (make sure your Toolbar is enabled), select Themify Builder > Turn On Builder.
- You will see the module panel slide up and a grid on the page.
- Drag and drop the module to the grid to add modules.
7. Customize Panel, Site Logo, and Tagline
Customize Panel
The Customize panel allows you to customize the appearances of the theme (e.g. font, background, color, border, position, spacing, custom CSS, etc.).
To access the Customize Panel:
- Go to WP Admin > Appearance > Customize.
- On the Customize, there are "Basic" and "Advanced" tabs:
- Basic = shows only the basic options which is good for beginners
- Advanced = shows all styling options which is good for experienced users
- Read Styling for more details on how to use the Customize Panel.
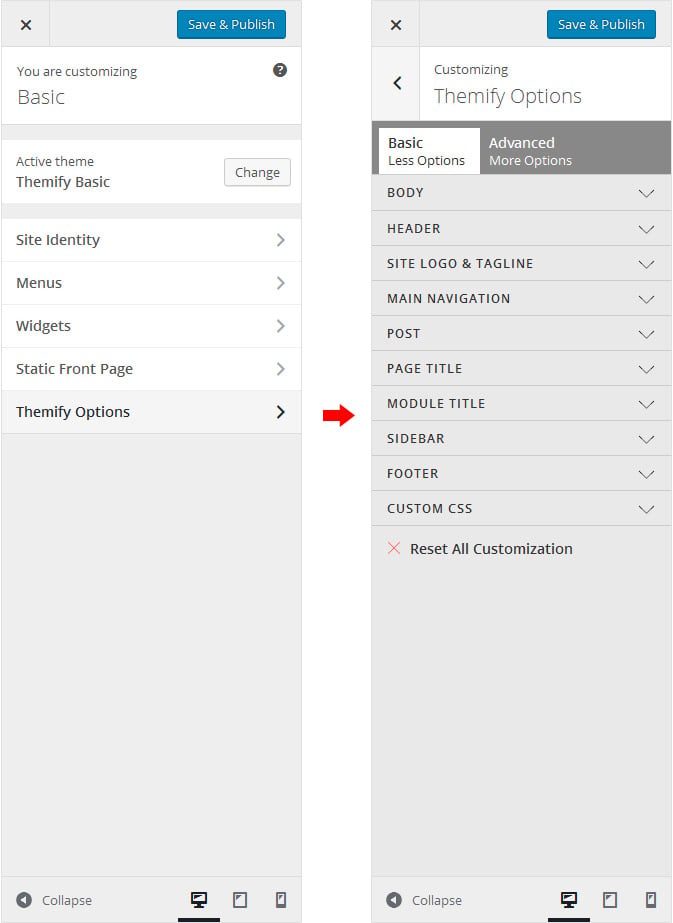
Common confusion in the Customize Panel:
- If you try to style something, but it is not reflecting on the preview window, it could be something else overriding the styling. Note that if you are using the Builder to style the module layout, the Builder styling will have higher priority. You may contact our Support team if you find the Customize panel is not working.
Site Logo Image
To display a logo image instead of text:
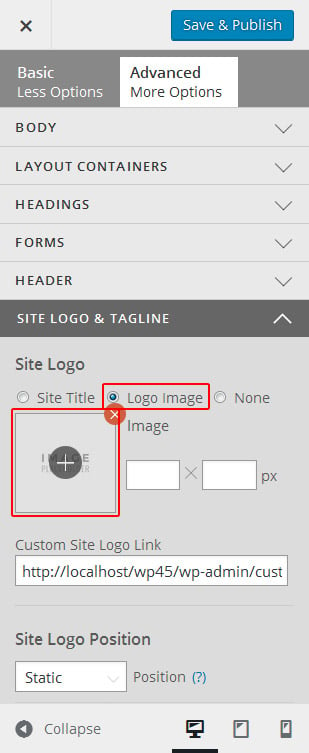
- Go to WP Admin > Appearance > Customize > Themify Options > Site Logo & Tagline.
- Under "Site Logo", select "Logo Image" radio button.
- Click on the plus (+) sign button, and upload a logo image.
- You can also use custom site logo link (optional).
- Specify the image width and height.
Site Description (Tagline)
A) To edit the Site Tagline using the WordPress settings:
- Go to WP Admin > Settings.
- Edit or remove the text in the Tagline field.
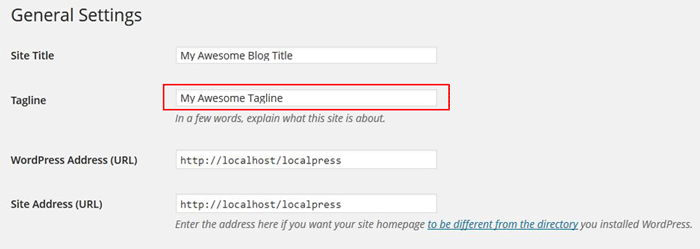
B) To edit the Site Tagline using the Customize panel:
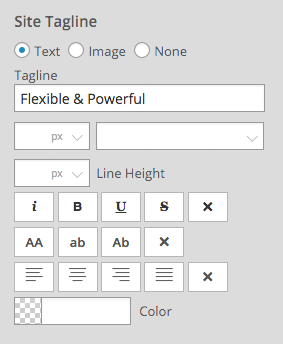
- Go to Appearance > Customize > Themify Options > Site Logo & Tagline.
- Scroll down to the "Site Tagline" section and you will see option to display Tagline as "Text, Image, or None".
- Enter the text in the Tagline field (alternatively you can choose to display an "Image" or "None" by selecting the radio button options).
- Under the Tagline field, you can customize the font styling, color, and text formatting.
8. Custom Navigation Menus
To customize the main menu navigation:
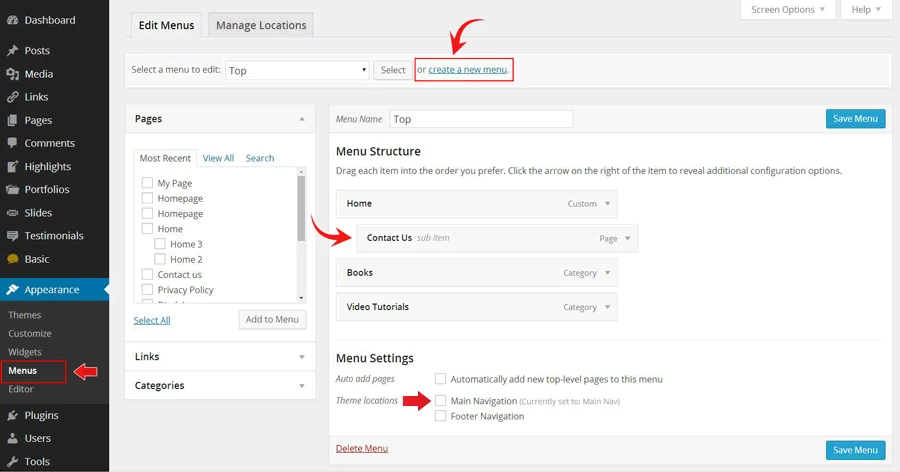
- Go to WP Admin > Appearance > Menus.
- Select a menu to edit or click on the "create a new menu" link to create a new menu (e.g. Main Menu).
- Add the menu items from the left panels (Pages, Links or Categories, etc).
- To create sub-level (dropdown) menu links, drag the menu item slightly toward the right (the item(s) will be indented).
- When you are done adding the menu items, on the "Theme locations" > check "Main Navigation" checkbox to assign this menu as the main site menu.
- Click "Save Menu" when you are done.
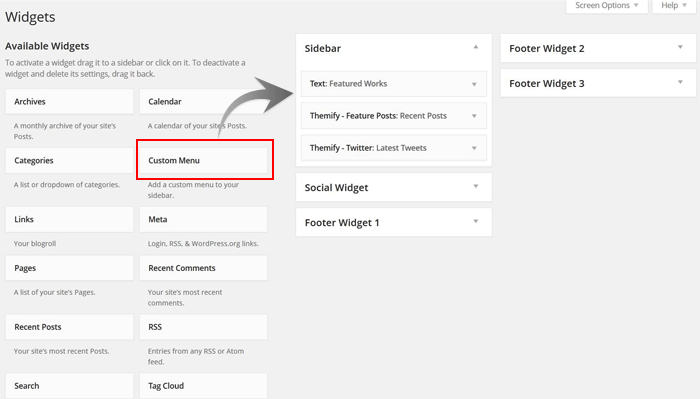
- Tips: the custom menu can also be used with the widget (go to Appearance > Widgets and drop in the Custom Menu widget).
Conditional Menus
If you need to show a different menu on different pages, we have the Conditional Menus plugin. As the name suggests, this plugin allows you to have different menus in different posts, pages, categories, archive pages, etc.
9. Widgets
A) To add/remove widgets:
- Go to Appearance > Widgets.
- Drag the widgets from the Available Widgets panel located on the left side to the widget area panel on the right (e.g. Sidebar, Social Widget, Footer Widget, etc).
- To remove the widgets, drag the widget from the widget area panel back to the Available Widgets panel. If you want to keep the widget setting for future use, drag it to the Inactive Widgets instead of the Available Widgets panel - this will save your widget settings. To retrieve the widget, drag the widget from the Inactive Widgets panel instead of the Available Widgets panel.
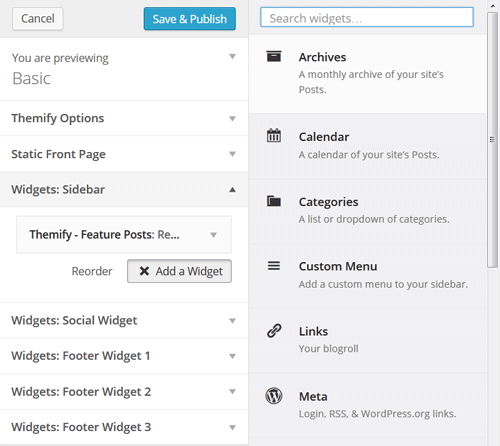
B) To add widgets using Customize with live preview:
- Go to Appearance > Customize.
- Choose the widget area where you want to add/remove the widget.
- Now click on "Add a Widget" button.
- A list of all the available widgets will appear, now select the desired widget.
- The selected widget will be added to the widget area.
- Give the title to your widget and your widget will go live on your site (Note: it might take a few seconds for the widget to populate in the preview window).
10. Footer Credit Text
To replace the footer credit links:
- Go to WP Admin > Themify panel > Settings > Theme Settings and enter any text in "Footer Text 1" and "Footer Text 2" box.
- HTML tags are allowed in the Footer Text.
- To have empty footer text, enter a blank space in Footer Text.
11. Updating the Theme
To update the theme, you would need to install the Themify Updater plugin. A valid license key is required to update the theme.
