06
Jan
2013
/
Training
Standard Themify Features
Read the Starter Guide first if you are new witth Themify. You must be familiar and able to do the following (try out Ultra theme with the following features):
- Themify Framework - Themify panel, post/page custom panel, Themify widgets, shortcodes, etc.
- Themify Builder - It is packed in all Themify themes and also available as a standalone plugin version.
- Customize - For theme styling and Custom CSS.
- Custom Menu - Create and assign custom menus.
- Demo Import - Import and erase demo content.
- Query Posts - Query posts / custom post types on any static page (eg. use it to create Blog / Portfolio pages)
- Hook Content - Add content via theme hooks without any coding or modifying any template file
- Shortcodes - Shortcodes like Twitter, Map, Slider, etc.
- Child Themes - For theme template modification (eg. loop.php), custom style.css, custom functions.php, etc.
Theme Training
It is recommended to setup a dedicated WordPress multisite on your localhost with the following themes with Demo Content Imported (ie. each theme demo should be a microsite with exact content and setup like our official theme demos). This will allow you to quickly debug issues on your localhost.
Themes to setup and demo import:
- Ultra
- Shoppe
- Music
- Parallax
- Split
- Fullpane
Important Notes About Themify Themes
- Theme/Framework:
- All Themify themes are powered by the same framework which is the 'themify' folder inside the theme folder.
- All styling/customization entered in Customizer are output in themify-customizer.css file and the ver number indicates the date when the file is generated (eg. themify-customizer.css?ver=16.01.18.23.45.06 means file created on 2016 Jan 18 @ 23:45:06).
- Themify Builder
- The Builder is included in the framework. If a Themify theme is used, user doesn't need the Builder plugin version.
- Builder content/layout styling:
- The styling entered in the Builder content are output in the generated.css file (view page source and look for generated.css file).
- NOTE: In login mode (ie. user is logged in), the Builder content styling will output on the same page as inline CSS.
- Script Minification:
- Note that users can set script minification and Builder Cache in Themify > Settings > Theme Settings (default is enabled). To check if it is enabled, view the page source and look for the theme/builder JS or CSS files (eg. instead of style.css, the minified version would be style.min.css)
- Builder Cache:
- If user's server has PHP 5.4+, then Builder cache will be enabled by default. If user's server does not support caching, it will state cache not support.
- NOTE: Builder cached files are only served/displayed on logout mode (public viewing). If user is logged in, Builder cached files are not in use.
- To check if Builder cached files are only enabled: view the site with logout mode, and look at the page source code. If Builder cache is enabled, you will see a minified CSS file (in the source code, look for:
id='themify_cache_header-css').
Debug Procedure
When reviewing issues, follow this standard protocol:
- Understand the problem first (be sure to understand what user says/wants before replying anything)
- Ask for user's site URL and screenshots if necessary
- Verify the problem with user if it is unclear
- Make sure user's theme & framework version is using the latest
- Theme version can be found in page source where the theme style.css is included (eg. style.css?ver=1.0.9).
- Framework version is output on the themify.framework.css file (eg. themify.framework.css?ver=1.7.5). If you can't find this version number, Builder cache is enabled, then look for the 'themify_cache_header-css' CSS file.
- To check our latest versions, view the changelogs
- If latest version is not in used, ask to upgrade theme first
- Check result on demos (ie. does our demo work?)
- Check online or you localhost demo, if something is not working as advertised, it is a bug. Log the issue on Github Issues and then reply the user that the issue has been logged.
- Check if issue has been fixed on Github's closed issues.
- Check inspector
- Check for console errors in Chrome Inspector.
- If console errors are found in inspector due to plugins, ask to deactivate all plugins.
- Try to disable all plugins and see if it is caused by the plugins. If the issue is caused by a plugin, it is not a bug, it is a plugin conflict.
- In case of plugin conflicts, check if the issue occurs on non-Themify themes.
- If the issue appears on third party themes as well, then it is a plugin bug. We don't have to support it.
- If the issue doesn't appear on third party themes, it could be our theme issues, log it.
- Ask for wp-admin and FTP if necessary.
- If the problem can not be resolved by viewing the frontend, ask user to provide wp-admin in the forum reply's "Private Message" (note: private message is only visible to Themify team with moderator role)
- Only ask for FTP access if necessary (ie. if it can not be resolved in wp-admin, then ask for FTP)
- Try to activate a non-Themify to see if the issue appears on other themes.
- If the issue appears on other themes, then it is not a theme issue. It could be server or WordPress issue.
- If child theme is used, try to deactivate the child theme.
Finding Solution
When finding solution for issues, follow this standard protocol:
- Always suggest the easy solution first:
- Check if the issue can be resolved in settings, theme options, and Themify features like: shortcodes, hook content, etc. (refer to our docs for existing tutorials if you are not sure)
- Check if the issue can be resolved in Customizer. If Customizer can not resolve it, suggest Custom CSS code (eg. use display:none to hide elements). Custom CSS should be entered in Appearance > Customize > Custom CSS.
- Suggest simple jQuery/JS function if it can resolve the issue (eg. use jQuery to append or change elements)
- Suggest custom PHP Functions only if necessary. PHP functions should be added in child theme functions.php or custom-functions.php.
-
If the issue can not be resolved from above steps, then see if it is possible to use a plugin (find a working plugin and suggest it to the user).
- NEVER suggest users to edit the framework core files:
- Do not suggest to edit the core theme/stylesheet/framework file
- Always suggest to create a child theme if template modifications is necessary
Writing Replies
When writing/handling a reply:
- Be polite and greet the user first (eg. Hi John, ..)
- When writing step-by-step tutorial, use the > sign to represent each step and use => to represent sub-section
(eg. Go to WP Admin > Themify > Settings > General => Header Code)
- Add screenshots if necessary to help user to understand your tips (upload screenshots to Snag.gy)
- Wrap code with ` character`
- Be brief about the steps. Here is a sample reply:
- Go to Themify > Settings > General => Header Code
- Add the following code:
`
code
code
`
- Save the panel
- If the theme works on your local or our demos, attach a screenshot to prove it.
- Close the thread if the issue is resolved
- For all business related issues (eg. refund, exchange, complains), ask user to email [email protected]
- IMPORTANT: Team members are not allowed to upsell or self promote personal services to any Themify customer.
Common Problems
- Theme/framework not using latest version
- To check user's theme/framework version: view site page source. In <body> class, you will find the theme name and framework version.
- You would compare that with our changelogs. All product changelogs have the same URL structure (basically, it uses the product folder name like this: /changelogs/themify-ultra.txt
- Fullwidth Content Width not selected.
- On Themify Custom Panel > Content Width, if "fullwidth" content width is not selected, it uses Javascript to force the row width container to be fullwidth. Sometimes this fullwidth row JS might fails. To verify if it is being selected, view page source and check <body> class. If fullwidth content width is selected, it would have 'full_width' body class, else it would have 'defaulf_width'.
- Another common related issue to the "Content Width" option is the #content padding. By theme default, the #content container has padding top and bottom. If users want to remove the padding on the #content container, select "Content Width = Fullwidth" would do (don't need to add custom CSS).
- Builder Cache issues
- Many layout and Javascript issues are related with Builder Cache - suggest to disable Builder Cache if it is enabled (to find if Builder Cache is enabled, in page source code, look for:
id='themify_cache_header-css')
- Server errors on frontend (ie. crashes, error 500, memory exhausted, etc.)
- Try to disable Image Script at Themify > Settings > Image Script
- Server errors on theme activation
- Try to disable Google Fonts, manually add custom-functions.php in theme folder, zip it and reinstall the theme
- Twitter feeds not showing
- PHP errors or site crash after theme update
- If user can not login to admin, ask user to rename/remove theme folder on server (refer to this tutorial)
- Suggest to deactivate all plugins before activating theme
- Check user WordPress (minimum requirement is WP 4+)
- Suggest to install with FTP last
- Missing theme styesheet error
- Suggest user to upload the correct theme zip (users sometimes up theme-psd.zip or plugin zip)
- Can't auto update themes/plugins
- Suggest user to use Themify Updater first. If user has issue with license key issue, ask them to contact [email protected]
- If user can not auto update themes/plugins and they confirm the Themify credentials are entered correctly, then the issue is because their membership has expired. Ask them to contact [email protected].
- Users can always reinstall theme or plugin.
Scope of Support
We provide support to any issue related with our themes and general WP admin stuffs (like how to create menus, how to add widgets, where to set front page, etc.). We also provide Custom CSS, JS, and PHP code to do basic customization. But we do not fix third party plugins and advanced customization.
We support:
- General WP and Themify usage.
- Customizer and simple Custom CSS tweaks.
- Issues caused by Customizer (eg. user enters wrong value in Customizer).
- How to resolve issues with third party tutorials and plugins.
We do not support:
- Plugin bugs/issues
- If the plugin doesn't work with other themes, it is not supported.
- Heavy customization
- If the request takes longer than 5 mins to perform, it is not supported.
- If the request requires heavy template modification (including js/css/php), it is not supported.
- Modified themes/framework
- If the issue is due to modification by the user and it can not be fixed quickly, it is not supported.
- Modification bugs created by the user are not supported (unless it can be fixed quickly).
Tips: Body Classes
You can use <body> classes to target specific elements and pages.
- Default WordPress body classes:
- home blog = default homepage
- archive category = archive/category pages
- single single-post_type_name = single post pages
- page page-id-## = single static pages
- search search-result = search results page
- Themify layout body classes:
- full_width = when "Content Width" in Themify Custom Panel selected fullwidth icon
- sidebar1, sidebar-right or sidebar-none = reflect the "Sidebar Option" that can be set in Themify panel > Settings > Default Layouts or individual post/page Themify Custom Panel.
- list-post, grid4, grid3, grid2, list-thumb-image, grid2-thumb, list-large-image = reflect the post layout selected in Themify panel > Default Layouts or Themify Custom Panel > Query Posts.
- Builder body classes:
- has-builder = when there is Builder content on the page (this body class is added by Javascript, so must use inspector to see it)
- frontend = added by Builder to indicate frontend
- themify_builder_active = when the frontend Builder is ON
- Brower/devices body classes:
- ie, not-ie, webkit, gecko = browser that is used viewing the page
- iphone = mobile devices
- touch or no-touch = whether user display is touch screen or not
Tips: Chrome Inspector - Console
- Go to the page where you're having this issue,
- press F12 to open Chrome Dev Tools,
- press Esc to open the Console or click on the button on Dev Tools top bar to open it,
- paste here any message in the console that is written in red.
- Now click on the Network tab, and then in the XHR button at the bottom
- paste here any message you might find here, and if it's empty, repeat the operation that fails while it's open to see if we can capture some error message.
Support Team Workflow
- All support threads are replied first come first serve basis (meaning the old threads should be replied first).
- To start:, on the forum page, there is a list of "Latest Discussions", click on the pagination at the bottom (page by page) to find pending threads to reply (if you see the poster's name has "@ Themify", that means it has replied by one our staffs). Open the pending threads on a new tab to reply (this will help you to keep track which page you are working on).
- If you are not sure how to reply certain threads, skip it first and re-visit it later when all pending threads are done.
- For work efficiency, keep the forum page on a browser window and open each pending thread in a new tab.
- If multiple staffs are working on the forum at the same time, each staff should work on a separate page and communicate each other via chat (eg. Staff_A can work on page5 while Staff_B works on page6). When you are done with the page, notify the other staff(s) and reload the forum pages again to work on. This will prevent double replying the same threads by different staffs.
- Experienced support staffs who can handle the threads faster should work on the older forum pages (this way we can reduce the response time for the users).
Support Mails
Sometimes users might send questions to [email protected]. Asking support mails is the same as the forum: first come first reply. If you don't know how to reply, mark the email as "unread" (this is important - you need to keep it unread so the next support guy can reply).
Read More
21
Dec
2012
Product Releases /
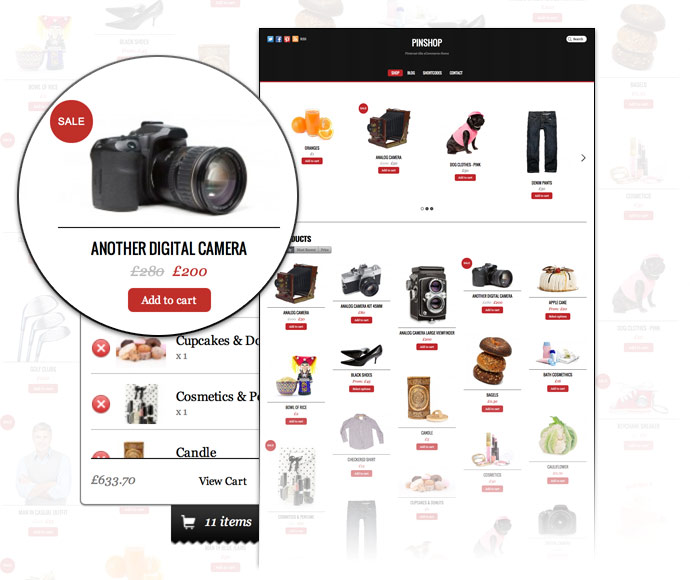
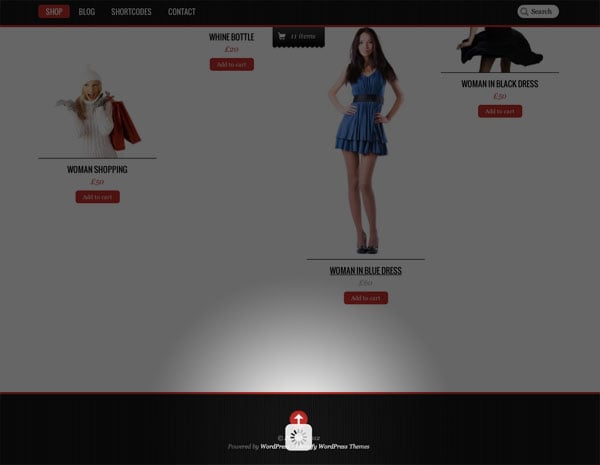
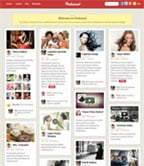
We are pleased to announce our latest theme, Pinshop, an ecommerce theme that functions like the Pinterest site and our popular Pinboard theme. The products load infinitely as you scroll down the page. Not only does it look fantastic, but it also provides a great user experience. Buyers can view all products without having to navigate through multiple pages. All your products are displayed nicely in stacking order. When the page is resized, it automatically re-positions the products. The shop items can be added to the cart instantly without having to go to the product page. All these features work consistently on desktop and mobile browsers.
We are offering 30% disount code for this new theme. Use the coupon code "pinshop" for a 30% discount off this theme until Dec 28, 2012.
Responsive Design
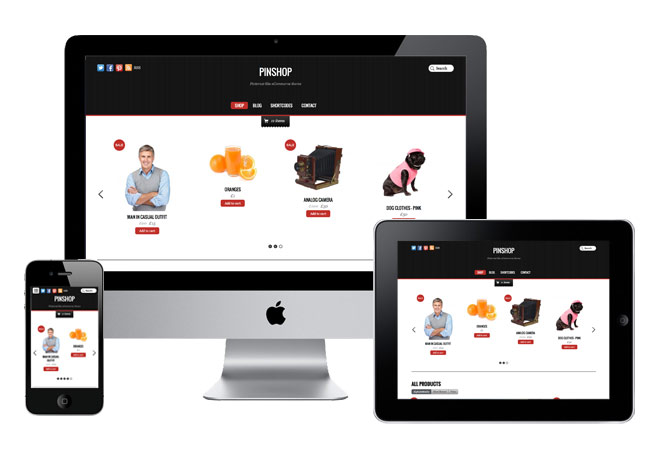
A responsive design that works on all mobile browsers and devices. To see the responsive design in action, view the demo and resize the browser window or view it with a mobile device.
Infinite Scroll
You can choose to use infinite scroll or the traditional page number navigation. The infinite scroll can be set to be automatically loaded or by clicking on the Load More button manually.
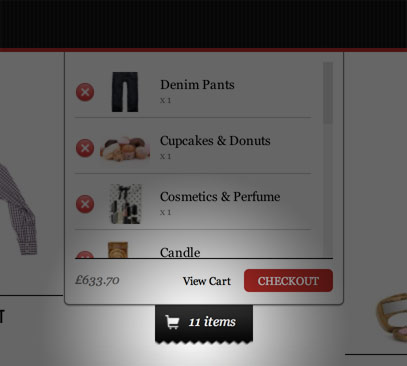
Top Bar Shopping Cart
The fixed top bar and shopping cart provide easy access for navigation. When an item is added, the cart is updated instantly. Buyer can slide down the cart to view all items in the cart. Try it yourself: go to the demo and add some items to the cart.
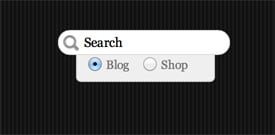
Custom Search Option
We've extended the default WordPress search form by adding an option to search either the blog or shop.
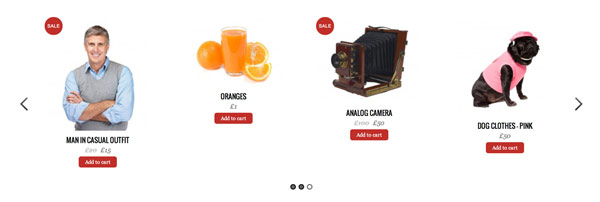
Product Slider
The product slider can be customized to display featured products or any product category of your choice.
Product Variation Lightbox
If the product has variations, a lightbox will be prompted for buyer to choose the variant.

WooCommerce
The WooCommerce is required to run with this theme. It is free for download. There are numbers of extensions for you to extend the shop such as different payment gateways, table rate shipping, importer, wishlist, and more.
Read More
22
Nov
2012
/
Installing the Theme
To install themes with the WordPress theme uploader:
- Download the "theme.zip" file from the Member Area
- Note: some browsers (eg. Safari) auto extract zip files automatically. Right-click on the download link and select "Save Linked File As". This will allow you to download the theme as a zip file.
- Login to your site's WP Admin.
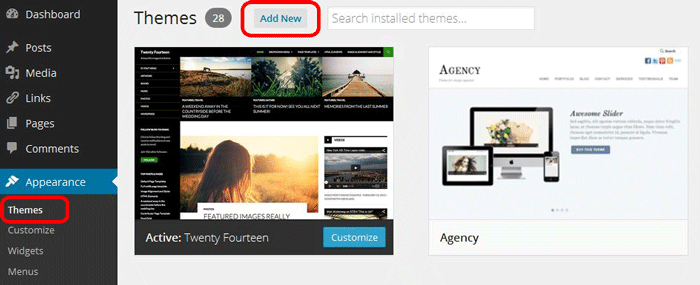
- Go to Appearance > Themes.
- Click on the "Add New" button, then click on the "Upload Theme" button
- Upload the theme.zip file (note: it is the theme.zip, not the theme-psd.zip that you just downloaded from the Member Area).
- Activate the theme
FYI: You can also install themes with FTP method. Read the Installing Themes tutorial for more info.
Demo Import
If you are starting a fresh site, importing the demo content will help you understand how the theme demo is built. The Demo Import feature will import the contents (posts, pages, comments, etc.), Themify panel settings, menus, and widgets setup from our demo to your site. You can erase the demo content afterward.
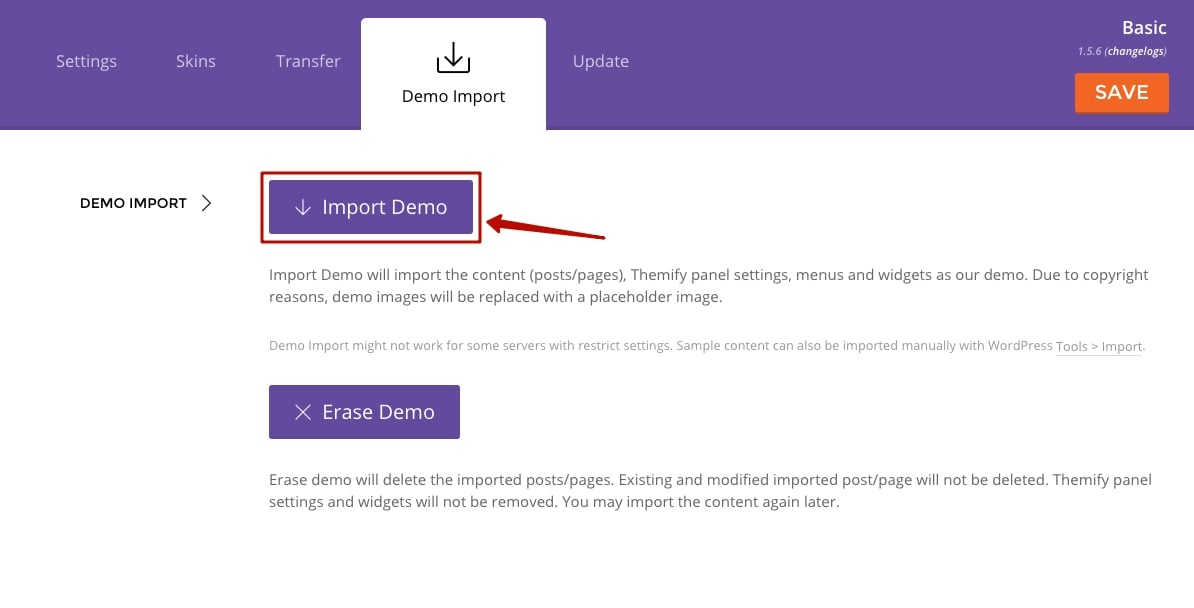
To import the demo setup:
- Go to WP Admin > Themify > Settings > Demo Import and click "Import Demo" button.
- Note that the featured images will be replaced with an image placeholder for copyright reasons.
To erase the demo setup:
- On the Demo Import tab, click on the "Erase Demo" button which will then remove the demo content.
FYI: If the Demo Import does not work on your site, you can use the WP Admin > Tools > Import tool to import the demo content manually.
Site Logo & Tagline
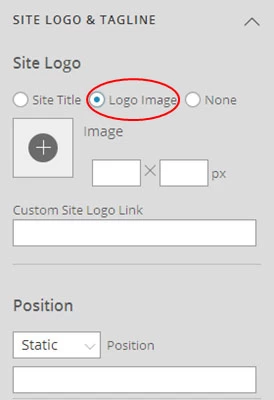
To display a logo image instead of the site name text:
- Go to WP Admin > Appearance > Customize > Site Logo and Tagline.
- Under "Site Logo", select "Logo Image" radio button.
- Upload a logo image.
- Specify the logo image width and height.
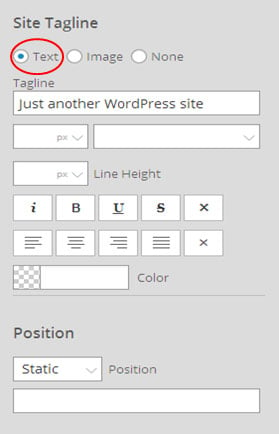
You can also change website Tagline from here:
- Go to WP Admin > Appearance > Customize > Site Logo and Tagline.
- Scroll down and under "Site Tagline" select "Text" radio button.
- Enter your site Tagline.
- Click "Save & Publish".
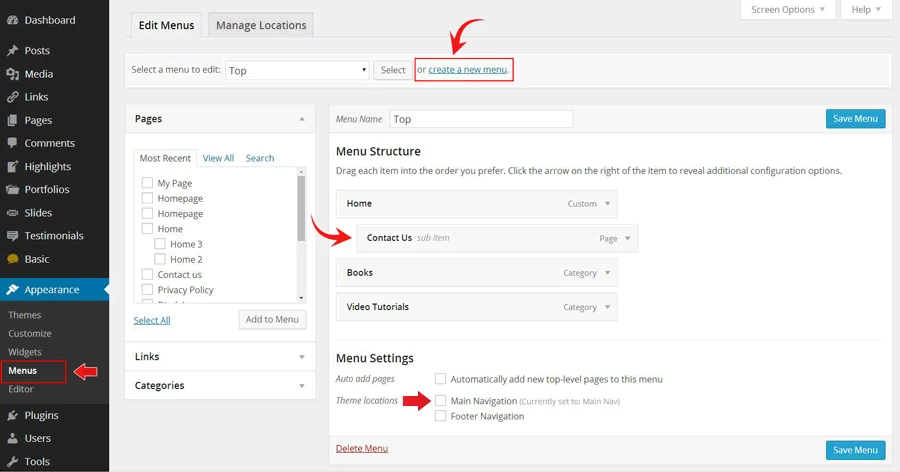
To create a custom navigation menu:
- Go to WP Admin > Appearance > Menus.
- Click on "create a new menu" to create a new menu (eg. Main Menu).
- Add the menu items from the left panels.
- To create a dropdown menu: drag the menu item towards the right (the item(s) will be indented).
- When you are done adding the menu items, click "Save Menu".
- To assign menu locations:
- Scroll down to the bottom where it says "Theme locations" and tick the menu location checkbox.
- Main Navigation = main menu on the header
- Footer Navigation = footer menu on the footer (Note: some themes might not have Footer Navigation).
TIPS: You can display menus on sidebar widgets, remove the main menu, create empty links, and lightbox links. Read Custom Menus for more detailed tutorial.
Setting Up the Social Links
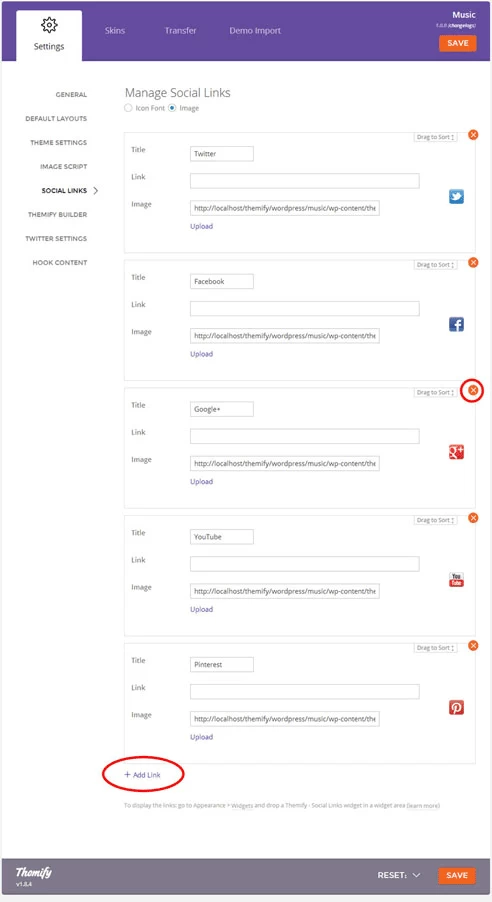
Step 1) To set up the social media links:
- Go to WP Admin > Themify > Settings > Social Links tab.
- The theme comes with some pre-filled social links. Simply enter your social profile URL in the Link input field. For example, enter 'https://twitter.com/themify' for the Twitter link.
- You can choose to display either "Icon Font" or "Image".
- If "Icon Font" is selected, click on "Insert Icon" to select an icon (over 320+ icons available).
- If "Image" is selected, you can upload your own graphic icon by clicking on the Upload button.
- To add more links, click on the Add Link button at the bottom.
- To remove a link, click on the delete icon.
- To arrange the display order, drag and drop the link container.
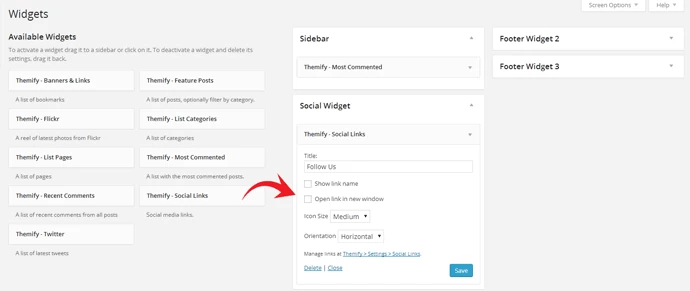
Step 2) Displaying the Social Links:
- Once you have the Social Links setup, go to WP Admin > Appearance > Widgets. Drag and drop the Themify - Social Links from the Available Widgets panel to the Social Widget panel.
- Optional: Customize Widget Title - such as "Follow Us". You can also "Show link name" and adjust icon size.
To hide the default RSS icon in the header:
- Go to WP Admin > Themify > Settings > Theme Settings.
- Under the "Exclude RSS Link", tick the checkbox that says "Check here to exclude RSS icon/button in the header".
To hide the default search form in the header:
- Go to WP Admin > Themify > Settings > Theme Settings.
- Under the "Exclude Search Form", tick the checkbox that says "Check here to exclude search form in the header".
Custom Homepage
Creating the homepage with Themify Builder
To create a custom Page as shown on our demo:
- Create a new Page (eg. Custom Homepage)
- View the page frontend
- On the top admin bar, select Themify Builder > Turn On Builder (view Builder documentation for more info)
- Expand the first row to full width column, then drop in a Builder - Highlight module, select the grid3 layout icon for the Highlight posts
- Then drop a Builder - Divider module below the Highlight module, set the divider color as you like
- On the next row, create 3-column grid (drag the column dividers left/right to merge or expand columns), then:
- In the first column: drop a Builder - Widget module, select Themify - Feature Post widget and the configure the widget options as you like
- In the second column: drop a Builder - Widget module, select Themify - Twitter and enter your Twitter ID in the options (note: you need to create a required access token from Twitter API in order to show the tweets)
- In the third column: drop a Builder - Text module and enter any text as you like. You can insert Heading tags (H1 - H6) and shortcodes as you like
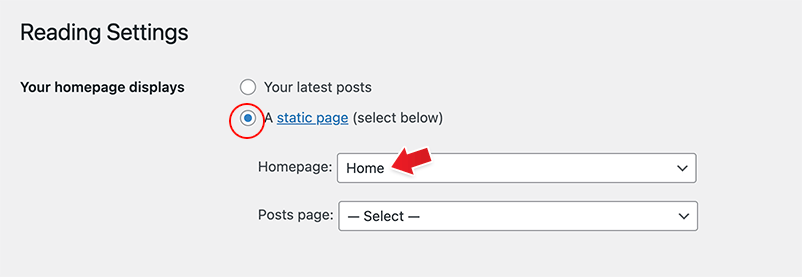
Set Custom Front Page
After you set the page as front page, the home slider and welcome message will appear. To set the front page:
- Go to wp-admin > Settings > Reading
- Select a static page under the "Front page displays"
- Then select "Custom Homepage" in the dropdown
Welcome Message
To display a welcome text, go to Themify > Theme Settings and enter the html content in the Welcome Text box. You may also enter shortcodes in the welcome text box. Below is a sample welcome text in HTML format with two button shortcodes:
<h2>Welcome <em>to</em> Themify</h2>
<p>Curabitur vel risus eros, sed eleifend arcu.</p>

[button link="https://themify.me"]Learn More[/button] [button link="https://themify.me/themes"]Sign Up[/button]
Slider Post Type
Use the slider to highlight features or services your site. To show the slider on the front page, you need to add the Slider posts first.
To add Slider posts:
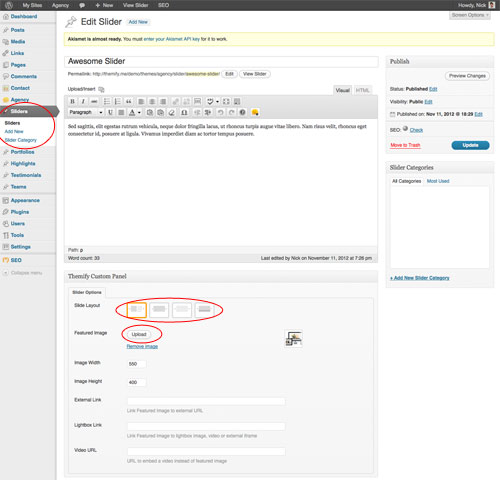
- Click on the "Add New" link under the Slider admin menu.
- Choose the layout option:
- default: display the feature image on left, title and content on the right
- image-only: display the feature image only (no title or content)
- content-only: display the content only (title and feature image will not be displayed)
- image-caption: display the title and content as overlay image caption

- Upload a featured image.
- If you want to display a video embed instead of a featured image, insert the Video URL in the custom panel.
- Image width and height is optional. If the field is empty, default image size will apply.
- Image link is optional.
Slider Options
To customize the slider transition effect, speed, etc., go to Themify > Theme Settings.
Portfolio Post Type
To add Portfolio posts:
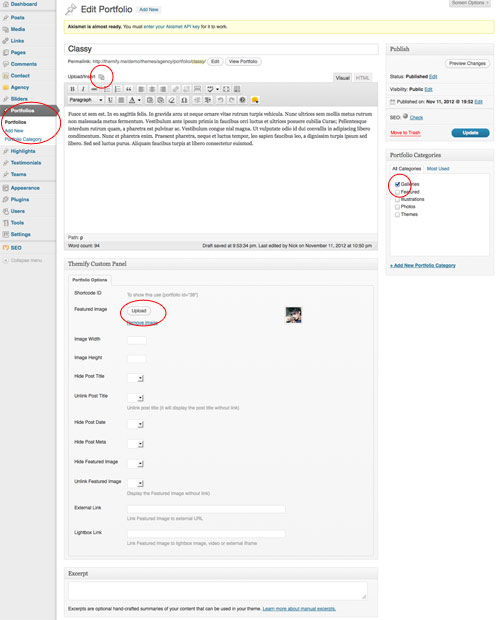
To display the Portfolio posts
To display the Portfolio posts simply enter the shortcode in the post content box. You can configure the result by adding the parameters.
- [portfolio]
- = display Portfolio posts with default setting
- [portfolio style="grid3" limit="3" post_date="yes" image_w="306" image_h="180"]
- = display latest 3 Portfolio posts in grid4 layout, set image dimension to along post date
- [portfolio category="13" style="grid2" limit="8" page_nav="yes" image_w="474" image_h="250"]
- = display latest (first) 8 Portfolio posts from Portfolio Category ID 13 in grid2 layout
- = if there are more than 8 posts, a page navigation will appear (note page_nav="yes")
- [portfolio category="web-design,illustration" page_nav="yes"]
- = display latest Portfolio posts from portfolio categories Web Design and Illustration, given that their text slugs are "web-design" and "illustration".
- = if there are more than 4 posts, a page navigation will appear (note page_nav="yes")
Available parameters:
- style= grid4, grid3, grid2, full
- you can also include additional CSS class(es) for your own custom styling (eg. style="classname")
- limit = number of post to query (eg. enter limit="4" will query 4 posts, enter -1 to query all posts)
- category = category ID number or text slug (default = all categories). To find category ID number or text slug: click on "Portfolio Category" link located under the Portfolio admin menu
- image = show featured image or not (yes, no, default = yes)
- image_w = post image width
- image_h = post image height
- title = show post title (yes, no, default = yes)
- display = display whether content, excerpt or none (content, excerpt, none, default = none)
- post_meta = display post category meta (yes, no, default = no)
- post_date = display post date (yes, no, default = no)
- more_link = display a custom more link after the posts
- more_text = text that will appear in more_link
- page_nav = display page navigation if there are more posts (yes, no, default = no)
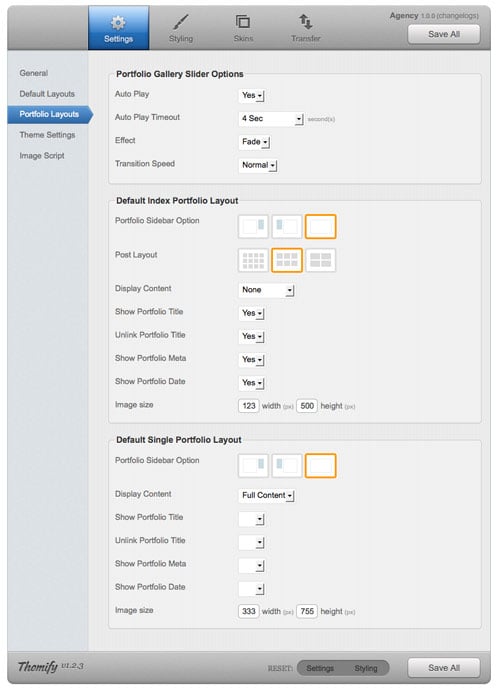
Portfolio Layout Options
To set the layouts of portfolio index and portfolio single page, go to Themify > Settings > Default Layouts.
- Portfolio Gallery Slider = applies to the Portfolio posts that have multiple images uploaded via Media panel (gallery)
- Default Index Portfolio Layout = applies to the Portfolio category pages
- Default Single Portfolio Layout = applies to the Portfolio single post page
Changing the portfolio permalink slug
By default, your portfolio single views will look like http://example.com/project/some-illustration/. If you want to change the "project" section, follow these steps that show how to change it into "work":
- create a file named custom-functions in Agency theme folder
- open it and paste:
<?php function themify_theme_portfolio_rewrite($slug){ return 'work'; } add_filter('themify_portfolio_rewrite', 'themify_theme_portfolio_rewrite'); ?>
- save the file and upload it to your server
- login to the WP Admin in your site
- go to Settings / Permalinks and click Save Changes
Your URLs for single portfolios will now look like http://example.com/work/some-illustration/.
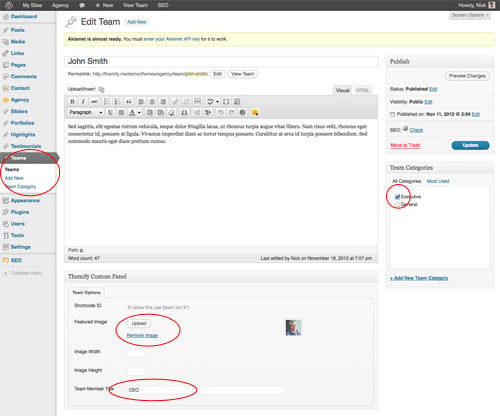
Team Post Type
To add Team posts:
- Click "Add New" under the Teams admin menu
- Enter the title and content
- Upload a Featured Image (team member picture)
- Enter the Team Member Title
- You can categorize the Team posts by adding new categories in the Team Categories panel (eg. you can categorize them as: Executive, General, HR, etc.)
Displaying Team Posts:
To display the Team posts simply enter the shortcode in the post/page content box. You can configure the result by adding various parameters, such as the following examples:
- [team]
- = display Team posts with default settings.
- [team style="grid3" limit="3" post_date="yes" image_w="100" image_h="100"]
- = display latest 3 Team posts in grid4 layout, set image dimension to along post date
- [team style="grid2" limit="8" image_w="140" image_h="140" unlink_title="yes" unlink_image="yes"]
- = display latest (first) 8 Team posts in grid2 layout
- = it will unlink post title and image
- [team category="14" style="grid2" limit="10" use_original_dimensions="yes" unlink_title="yes" unlink_image="yes"]
- = display the category 14 of Team entries up to a limit of 10 posts and using original dimensions for those entries that have width and height specified in Custom Panel.
- = it will unlink post title and image
Available parameters:
- style = grid4, grid3, grid2, grid2-thumb, list-post
- limit = number of post to query (eg. enter limit="4" will query 4 posts, enter -1 to query all posts)
- category = category ID number or text slug (default = all categories). To find category ID number or text slug: click on "Team Category" link located under the Team admin menu
- image = show featured image or not (yes, no, default = yes)
- image_w = post image width
- image_h = post image height
- title = show post title (yes, no, default = yes)
- display = display whether content, excerpt or none (content, excerpt, none, default = none)
- more_link = display a custom more link after the posts
- more_text = text that will appear in more_link
- use_original_dimensions = use image width & height specified in the Team entry Custom Panel
- unlink_image = remove the link on featured image (yes, no, default=no)
- unlink_title = remove the link on the post title (yes, no, default=no)
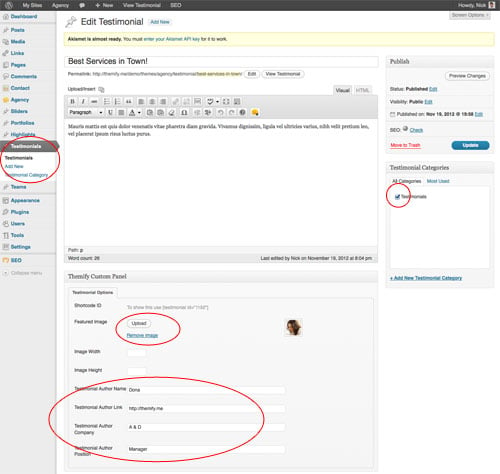
Testimonial Post Type
To add Testimonial posts:
- Click "Add New" under the Testimonial admin menu
- Enter the title and content
- Upload a Featured Image (the testimonial author picture)
- Enter:
- Testimonial Author Name
- Testimonial Author Link (will link to Testimonial Author Company)
- Testimonial Author Company
- Testimonial Author Position
- You can categorize the Testimonial posts by adding new categories in the Testimonial Categories panel (eg. you can categorize them as: Testimonial A, Testimonial B, etc.)
To display the Testimonial posts
To display the Testimonial posts simply enter the shortcode in the post content box. You can configure the result by adding the parameters.
- [testimonial]
- = display Testimonial posts with default setting
- [testimonial style="grid3" limit="3" image_w="80" image_h="80"]
- = display latest 3 Testimonial posts in grid3 layout and set image dimension to 80 x 80px
- [testimonial category="13" style="grid2" limit="8" page_nav="yes" image_w="80" image_h="80"]
- = display latest 8 Testimonial posts from Testimonial Category ID 13 in grid2 layout
- [testimonial category="client" style="grid2" limit="4"]
- = display latest Testimonial posts from 'client' (slug) category
Available parameters:
- style= grid4, grid3, grid2, full
- you can also include additional CSS class(es) for your own custom styling (eg. style="classname")
- limit = number of post to query (eg. enter limit="4" will query 4 posts, enter -1 to query all posts)
- category = category ID number or text slug (default = all categories). To find category ID number or text slug: click on "Testimonial Category" link located under the Testimonial admin menu
- image = show featured image or not (yes, no, default = yes)
- image_w = post image width
- image_h = post image height
- title = show post title (yes, no)
- display = display whether content, excerpt or none
- more_link = display a custom more link after the posts
- more_text = text that will appear in more_link
Highlight Post Type
Highlight post type consists a short paragraph of text with an image icon and heading. It can be used to display a list of services, product feature list, etc.
To add Highlight posts:
- Click "Add New" under the Highlight admin menu
- Enter the title and content
- Upload a Featured Image (the testimonial author picture)
- Enter:
- Highlight Author Name
- Highlight Author Link (will link to Highlight Author Company)
- Highlight Author Company
- Highlight Author Position
- You can categorize the Highlight posts by adding new categories in the Highlight Categories panel (eg. you can categorize them as: Highlight A, Highlight B, etc.)

To display the Highlight posts
To display the Highlight posts simply enter the shortcode in the post content box. You can configure the result by adding the parameters.
- [highlight]
- = display Highlight posts with default setting
- [highlight style="grid3" limit="3" image_w="80" image_h="80"]
- = display latest 3 Highlight posts in grid3 layout and set image dimension to 80 x 80px
- [highlight category="13" style="grid2" limit="8" page_nav="yes" image_w="80" image_h="80"]
- = display latest 8 Highlight posts from Highlight Category ID 13 in grid2 layout
- [highlight category="features" style="grid2" limit="4"]
- = display latest Highlight posts from 'features' (slug) category
Available parameters:
- style= grid4, grid3, grid2, full
- you can also include additional CSS class(es) for your own custom styling (eg. style="classname")
- limit = number of post to query (eg. enter limit="4" will query 4 posts, enter -1 to query all posts)
- category = category ID number or text slug (default = all categories). To find category ID number or text slug: click on "Highlight Category" link located under the Highlight admin menu
- image = show featured image or not (yes, no, default = yes)
- image_w = post image width
- image_h = post image height
- title = show post title (yes, no)
- display = display whether content, excerpt or none
- more_link = display a custom more link after the posts
- more_text = text that will appear in more_link
Displaying Blog Posts
To display regular blog posts, use the existing list_posts shortcode: [list_posts image="yes" style="grid4"]. For more details on list_posts, please refer to the documentation here.
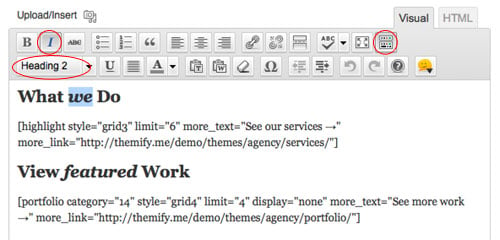
Sub-heading Styling
Our theme comes a fancy pre-designed H2 sub-heading. To display a fancy sub heading: select Heading 2 format. To set italic font style, select the text and then click on the 'italic' icon. If you don't see the Heading dropdown menu on your editor, click on the "Show/Hide Kitchen Sink" icon.
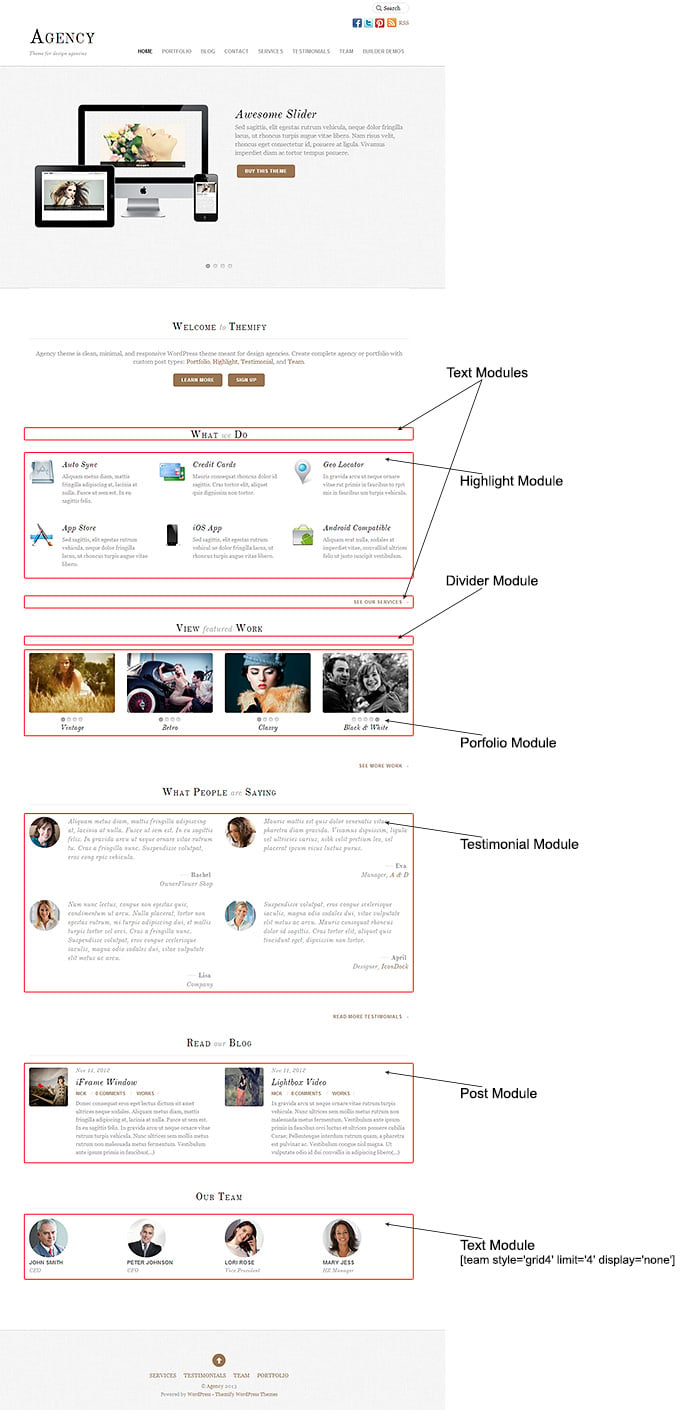
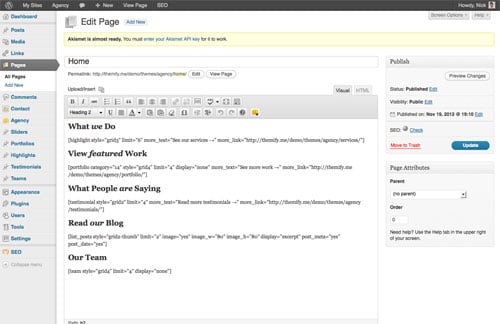
Creating a Custom Front Page
Having the ability to display the custom post types with shortcodes gives you a full control what to appear on the page. For example, you can create a page with whatever post types you want to appear and set it as front page (home page). To do so:
- create a new Page (eg. Home)
- in the Page Custom Panel, select Yes => Hide Page Title
- enter the shortcodes like below
- then go to WP Admin > Settings > Reading and select 'Home' as your Front page.
<h2>What we Do</h2>

[highlight style="grid3" limit="6" more_text="See our services →" more_link="https://themify.org/agency/services/"]

<h2>View featured Work</h2>

[portfolio style="grid4" limit="4" display="none" more_text="See more work →" more_link="https://themify.org/agency/portfolio/"]

<h2>What People are Saying</h2>

[testimonial style="grid2" limit="4" more_text="Read more testimonials →" more_link="https://themify.org/agency/testimonials/"]

<h2>Read our Blog</h2>

[list_posts style="grid2-thumb" limit="2" image="yes" image_w="80" image_h="80" display="excerpt" post_meta="yes" post_date="yes"]

<h2>Our Team</h2>

[team style="grid4" limit="4" display="none"]
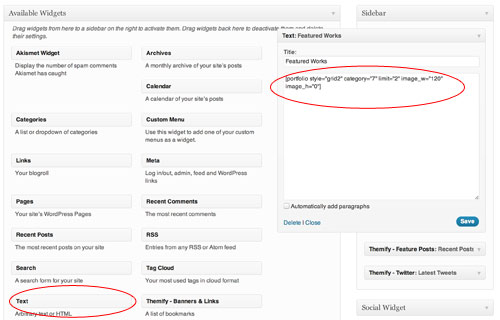
All shortcodes can also be inserted into sidebars using the Text widget. To run a shortcode in the widget:
- go to Appearance > Widgets
- drag and drop a Text widget to a sidebar
- then enter the shortcode
[portfolio style="grid2" limit="2" image_w="120" image_h="0"]
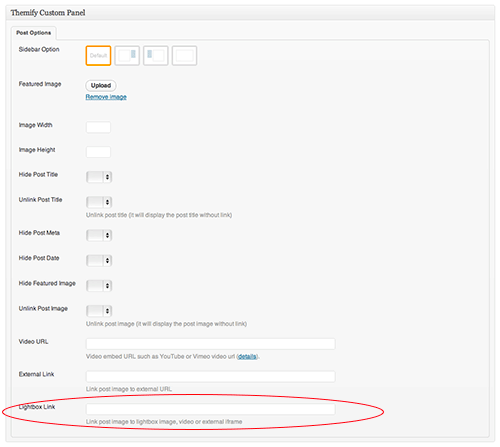
To link the featured image with a lightbox popup such as image zoom, video or an iframe window, enter the URL in the Lightbox Link field under the Themify Custom Panel. The Themify Custom Panel can be found in the post edit page.
- Sample image: https://themify.org/pinboard/files/2012/06/133618178.jpg
- Sample video: http://youtu.be/Abjx1JJO1i8
- Sample iframe: https://themify.me?iframe=true&width=100%&height=100% (you need to add
?iframe=true at the end of the URL)
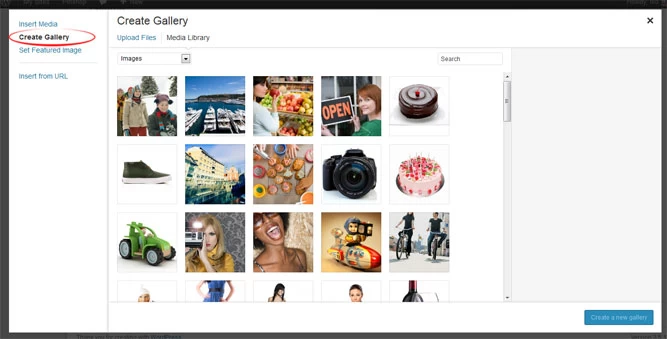
Inserting Gallery to Posts or Pages
The gallery can be inserted in any post or page. To insert a gallery, click on "Add Media" button
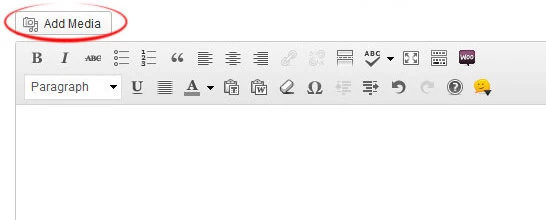
It will open a lightbox for you to create and insert gallery. Read this tutorial for more details on how to use WordPress Gallery.
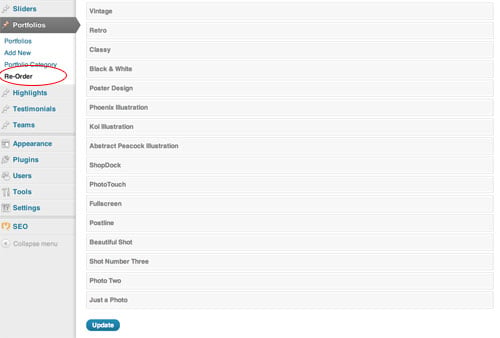
Recommended Plugin: Post Types Order Plugin
By default, the posts are sorted by publish date. Post Types Order plugin allows you to sort the post order with drag and drop. After you activate the plugin, you will see a "Re-Order" menu link under each post type. This plugin is great for ordering your portfolio or highlight posts.
Setting Default Post and Page Layouts
Generally, the theme works out of the box. All the sidebar options and image dimensions are pre-defined in the theme. If you need to change the default sidebar options, featured image dimensions, content/except display, post meta, etc., it can be done in the WP Admin > Themify > Settings > Default Layouts.
There are three default layout options under Themify > Settings > Default Layouts:
- Archive Sidebar Option: refers to the default home page, category, search, archive, tag pages, etc.
- Default Post Layout: is the post page direct URL (also known as "Single Post").
- Note: Some themes may only have 4 layouts.
- Default Static Page Layout: is the static page.
FYI: Read Default Layouts documentation for more info.
Creating a Blog Page
To create a blog page:
- First, create a new Page (go to WP Admin > Pages > Add New), name it "Blog" or any page title as you want.
- View the page on the frontend, click "Turn On Builder".
- Drop in a Post module and configure the options as you like.
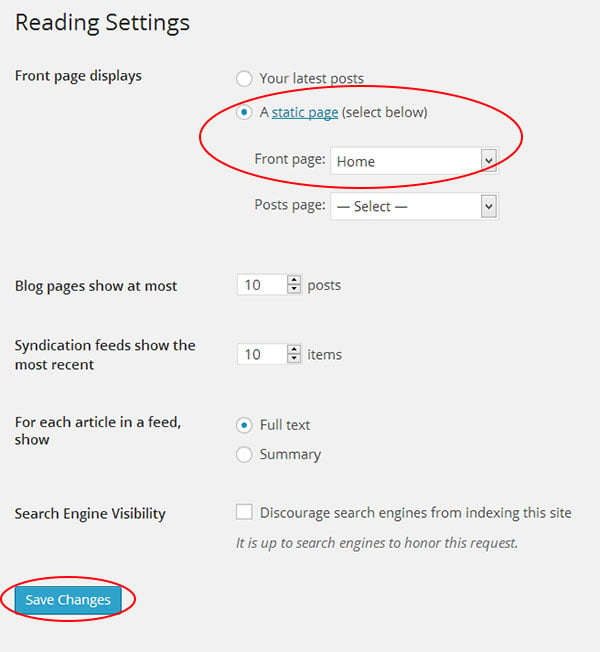
Setting a Custom Front Page
You can set any page as the front (home) page. This means you can use the Builder to design the page and assign it as the front page. To set the Front Page:
- Go to WP Admin > Settings > Reading.
- On the Front page displays, select the "A static page (select below)" option and then select a "Front page".
- Leave the "Posts page" default. If you want to create a custom Blog page, read this tutorial instead of setting the "Posts page".
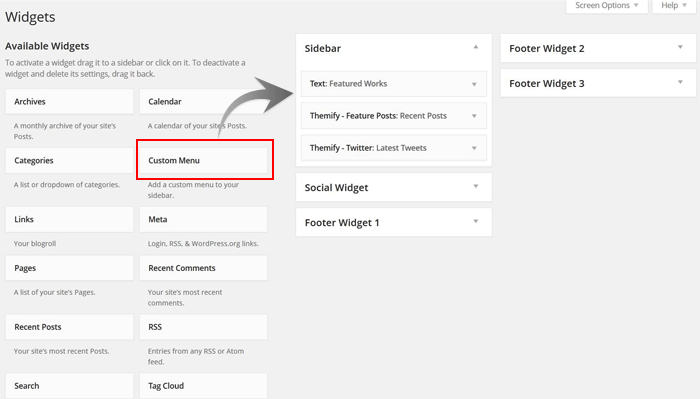
To add widgets to widgetized areas (eg. sidebar and footer widgets):
- Go to WP Admin > Appearance > Widgets.
- The big panel on the left side shows all available widgets. The small panels on the right are the widgetized areas.
- To add a widget: drag and drop the widget from the left panel to the right panel.
- To remove the widget: drag the widget back to the left panel (Available Widgets panel). If you want to keep the widget setting for future use, drag it to the Inactive Widgets instead of the Available Widgets panel. It will save your widget settings. To retrieve the widget, drag the widget from Inactive Widgets panel instead of the Available Widgets panel.
TIPS: You can also add widgets in Appearance > Customize panel.
Theme Skins
To apply pre-designed color skins:
- Go to WP Admin > Themify > Skins, select a skin by clicking on the thumbnail and click Save.
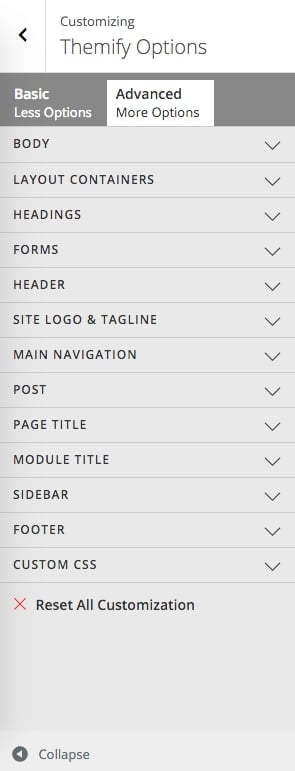
Styling The Theme
To style the theme frontend appearance:
- Go to WP Admin > Appearance > Customize.
- It will take you to the Customize panel with live preview where you can style the appearance of the theme design (ie. color, background, font, spacing, border, etc.).
FYI: Refer to Customize documentation for more info.
- To set the Footer Widget column layout, go to WP Admin > Themify > Settings > Theme Settings.

- To drop the widgets in the Footer Widgets, go to WP Admin > Appearance > Widgets.
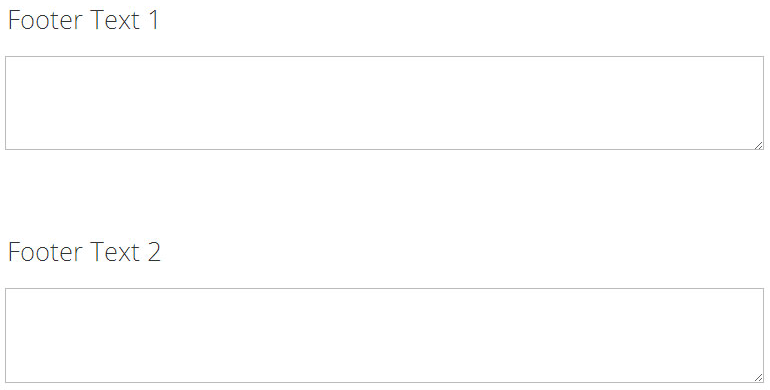
To replace the footer credit links:
- Go to WP Admin > Themify > Settings > Theme Settings and enter the footer text.
- HTML tags are allowed in the Footer Text.
- To have empty footer text, tick the hide footer text checkbox.
Read More
07
Nov
2012
/
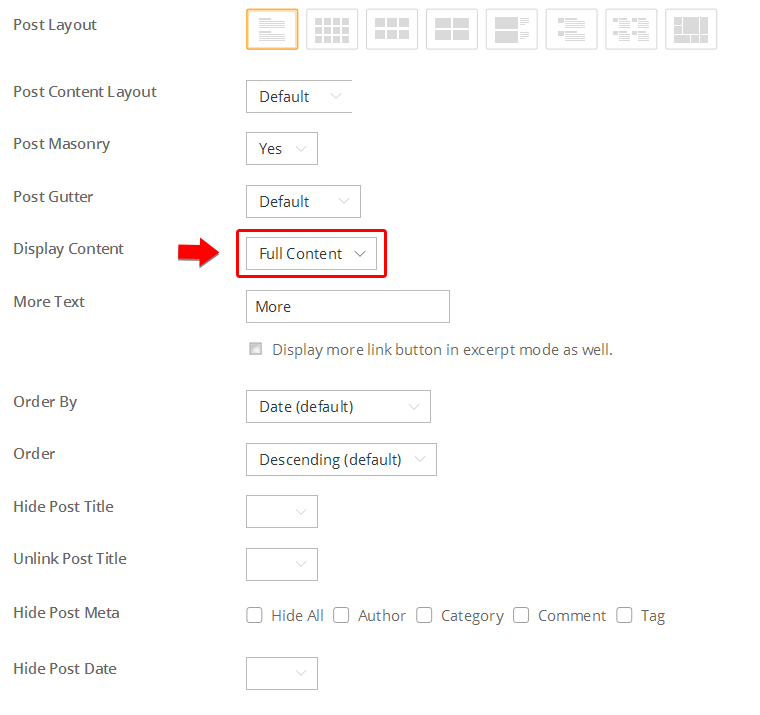
Content
Content refers to the post content. With content mode, WordPress will display everything from the post content unless you specify the more tag. If the more tag is added in the post content, WordPress will cut the post content where you specified the more tag and display a more link on the archive pages. Readers can click on the more link to jump to the single post page.
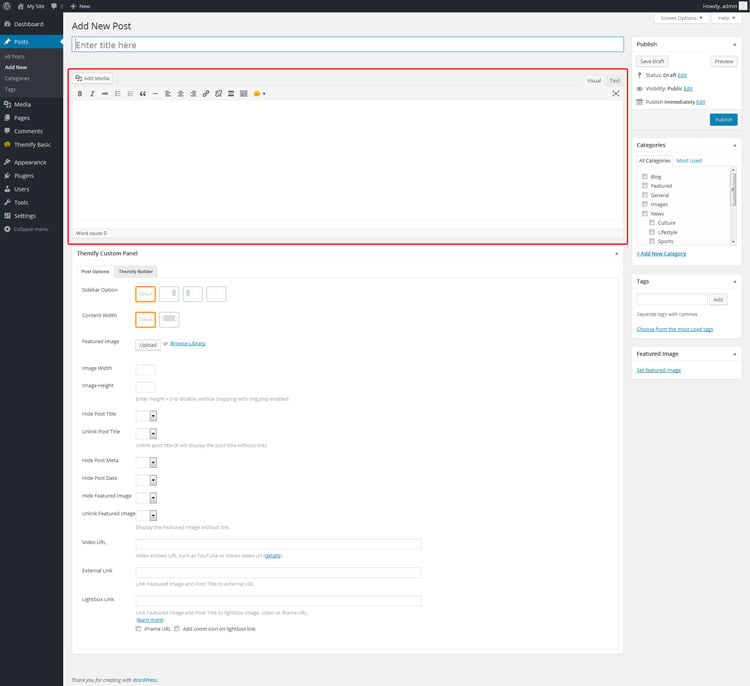
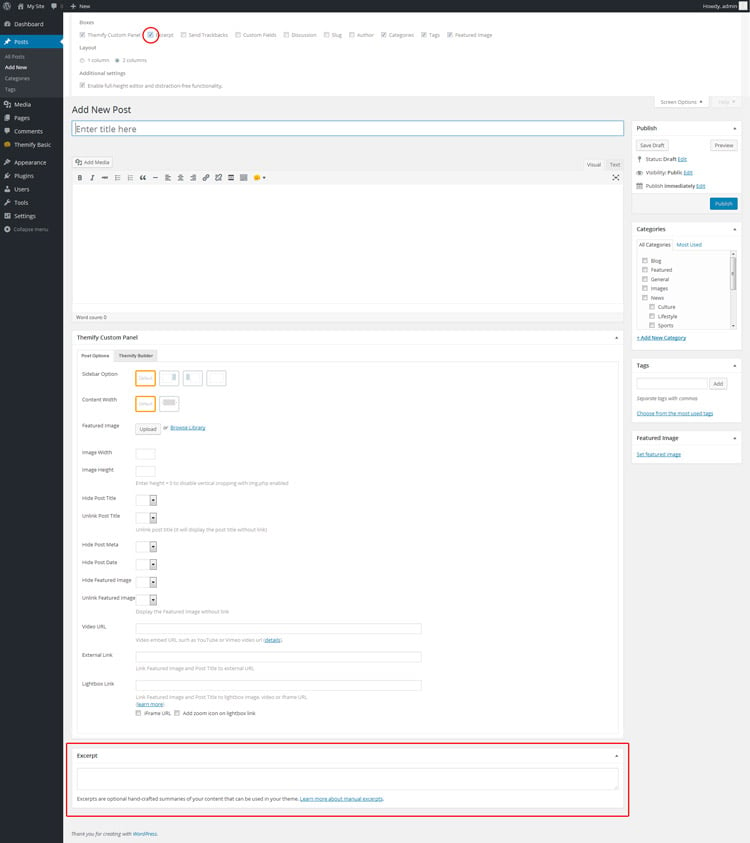
Excerpt
Excerpt refers to the text in the Excerpt panel. By default, Excerpt panel is hidden. You can turn it on by clicking on the "Screen Options" located top right corner and then checking the "Excerpt" checkbox. The Excerpt panel will appear at the bottom.
If the post Excerpt is empty, WordPress automatically displays the first 55 words from the post content and add [...] at the end. Note that more link and HTML tags such as <img>, headings (h1, h2, h3..), link, etc. are stripped in the excerpt output. If you want to customize the excerpt word counts, read this Custom Excerpt Length tutorial.
Setting Content Display
You can set the content display at Themify > Settings > Default Layouts => Default Index Layout.
Read More
19
Oct
2012
General /
Responsive WordPress themes and responsive design in general has emerged as a hot topic in the digital world. At Themify, we made the decision to create responsive WordPress themes rather early on, and it has become one of our strongest features and selling points. Because of our extensive knowledge in this domain, we wanted to clear up exactly what you get with a “responsive WordPress theme” and what it means when you buy an awesome WordPress theme from Themify.
What is a “responsive WordPress theme”?
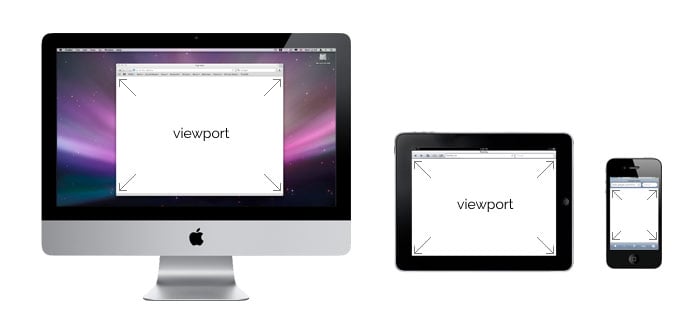
When answering this question, we can also answer the question “What is a responsive design?” A responsive design and responsive WordPress theme utilize CSS and JavaScript to adapt a website’s layout to the user’s “viewport.” For those who don’t know, a “viewport” is essentially the visible portion of the canvas inside a web browser.
We use responsive design to create a consistent user experience for browsers of all shapes and sizes because the digital world doesn’t run on just 4:3 resolutions anymore. We adapt content to viewports of different sizes, including everything from mobile phone browsers all the way up to large television screens.
Many people confuse “responsive design” with “mobile design,” but mobile design targets mobile devices specifically, whereas responsive design includes support for mobile devices and many more.
What does “responsive design” look like?
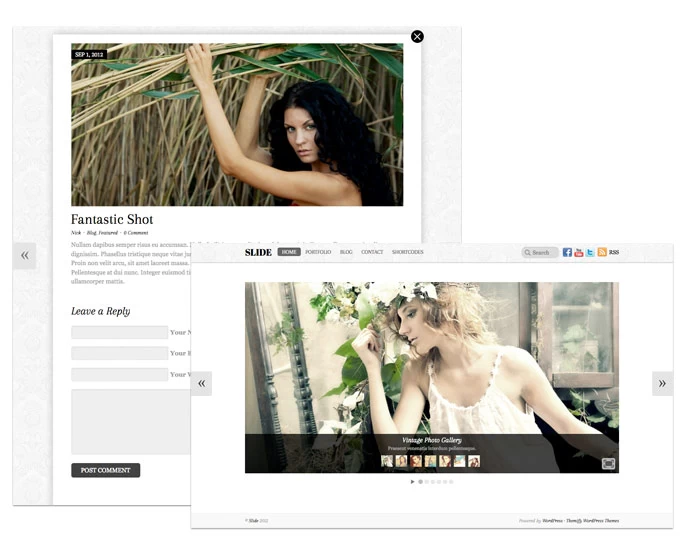
To get an idea of what responsive design, especially in WordPress, can achieve, take a look at our Elemin theme.
Elemin displays nicely on your standard browser size, but you can change the size of your browser to get an idea of how the layout changes and adapts along with the width of your browser window. The layout never breaks, and the content simply flows to fit with the browser’s viewport.
A viewer can enjoy a website using the Elemin theme on their desktop, their laptop, their notebook, their tablet, their mobile device, and even their television. The layout and experience of the website remains consistent throughout.
Here are some more hand picked responsive WordPress themes from Themify
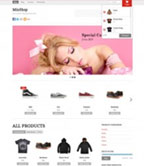
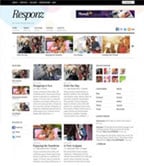
As shown in the examples below, responsive design is not limited to just blog theme. It can be complex grid layout like Pinboard, Ajax shop theme Minshop, 3-column Responz, and corporate theme with responsive slider like Suco. Check our responsive themes collection for more.
Read More